首页
国产厂商
韩国御姐
XXX-AV
无码流出
水果派解说
巨乳美乳
强奸乱伦
自拍偷拍
91探花
欧美精品
SM调教
探花嫖娼
欧美性爱
性感人妻
瑜伽裤
男同系列
国产传媒
兽耳系列
heyzo
网曝门
台湾辣妹
FC2
过膝袜
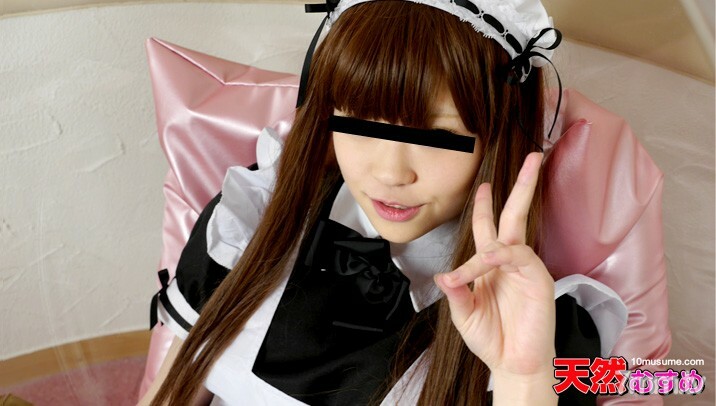
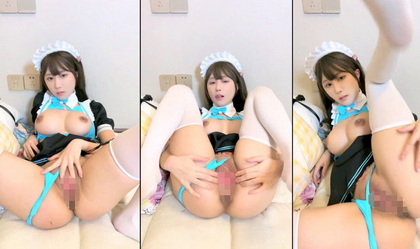
Cosplay
Gachinco
天美传媒
东京热
黑料事件
女同系列
中字无码
女同性恋
主播视讯
野外露出
传媒出品
素人自拍
日本片商
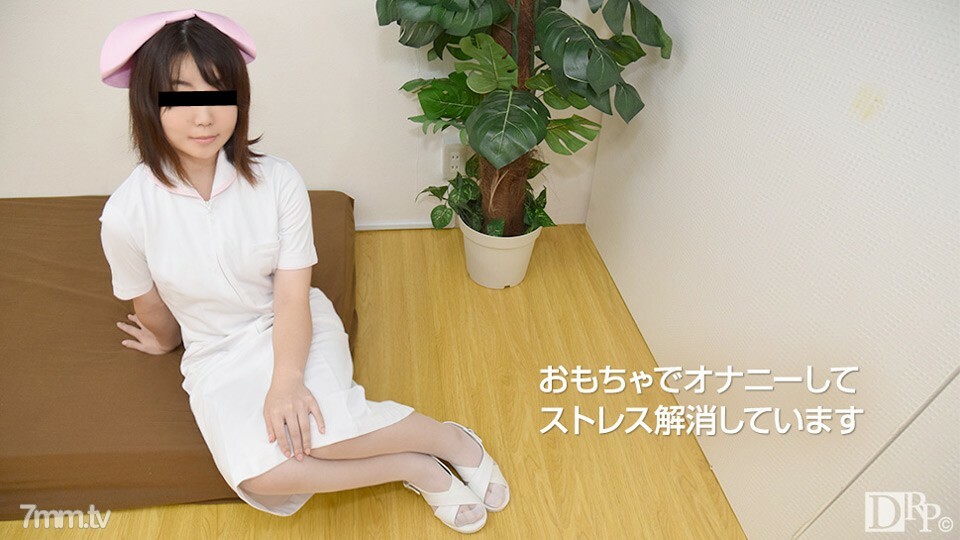
闷骚护士
恋腿狂魔
剧情介绍
美女写真
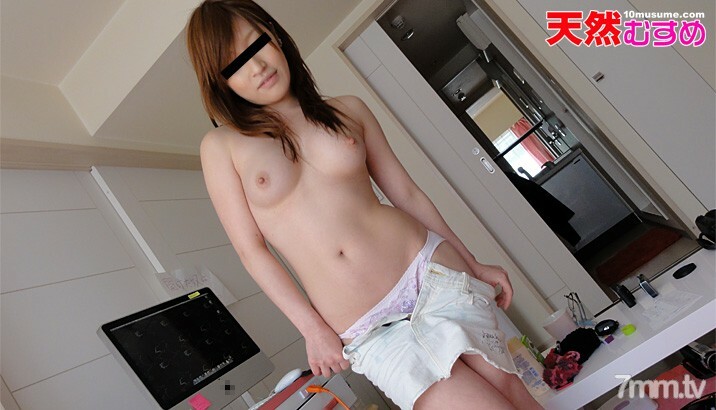
10musume
同性恋
精东影业
国产乱伦
主播直播
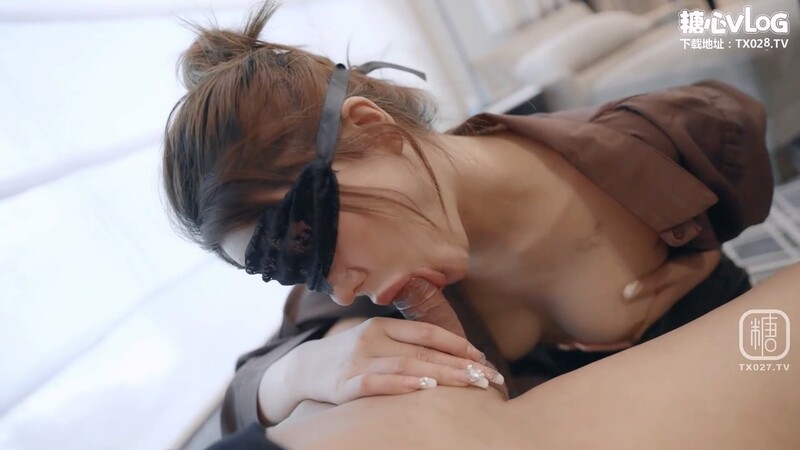
糖心Vlog
国产色情
日本有码
人妻熟女
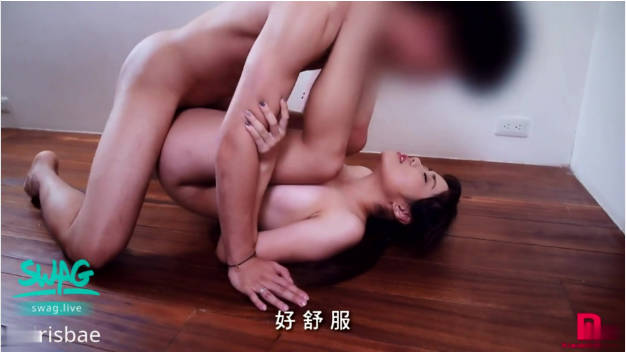
台湾swag
日本素人
中文字幕
日本精品
蜜桃影像传媒
国产SM
精品推荐
童颜巨乳
唯美港姐
网红流出
亚洲有码
一本道
星空无限传媒
多人多P
日本无码
可爱学生
Caribbeancompr
国产专区
主播秀色
明星换脸
网曝系列
丝袜OL
卡通动漫
国产精品
三级伦理
Caribbeancom
人妻斩
葫芦影业
其他传媒
亚洲无码
伦理三级
欧美情色
制服丝袜
风情旗袍
萝莉少女
国产丝袜
韩国直播
成人动漫
中字有码
女优系列
欺辱凌辱
男同性恋
国产人妻
东南亚AV
麻豆传媒
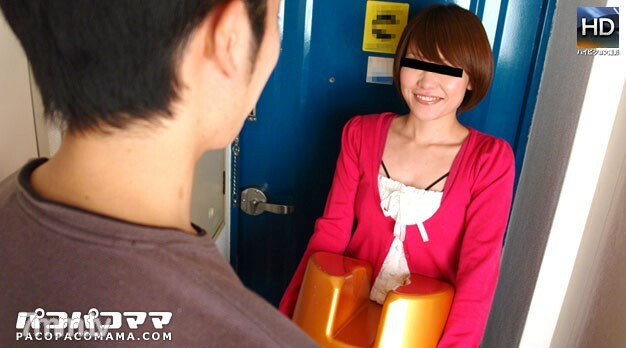
pacopacomama
顽皮
口交颜射
91制片厂
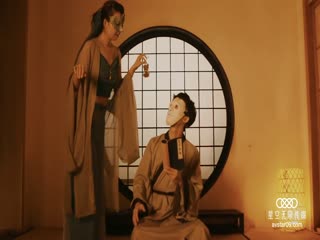
古装扮演
中国直播
国产厂商

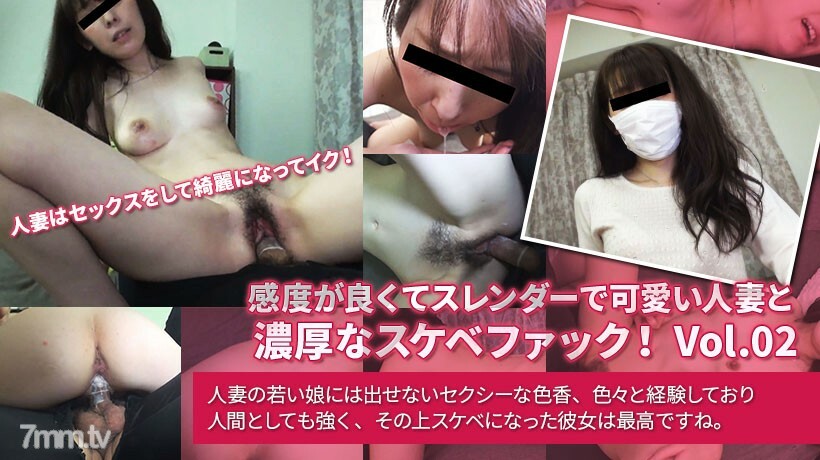
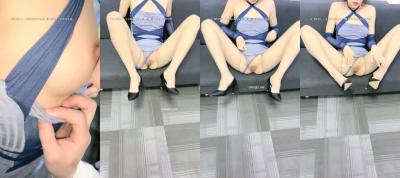
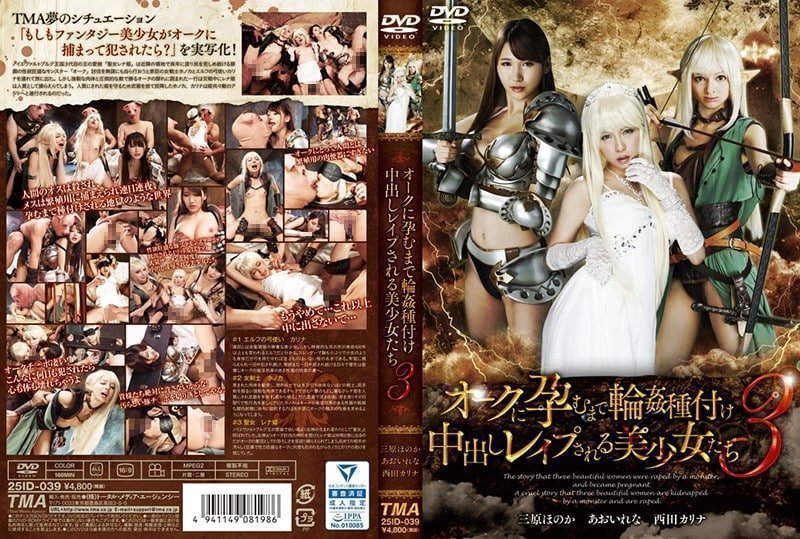
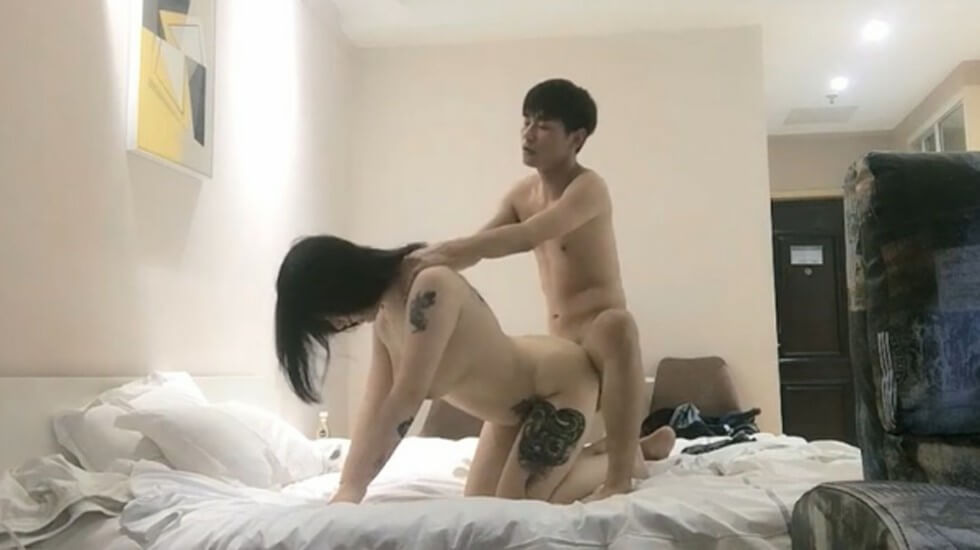
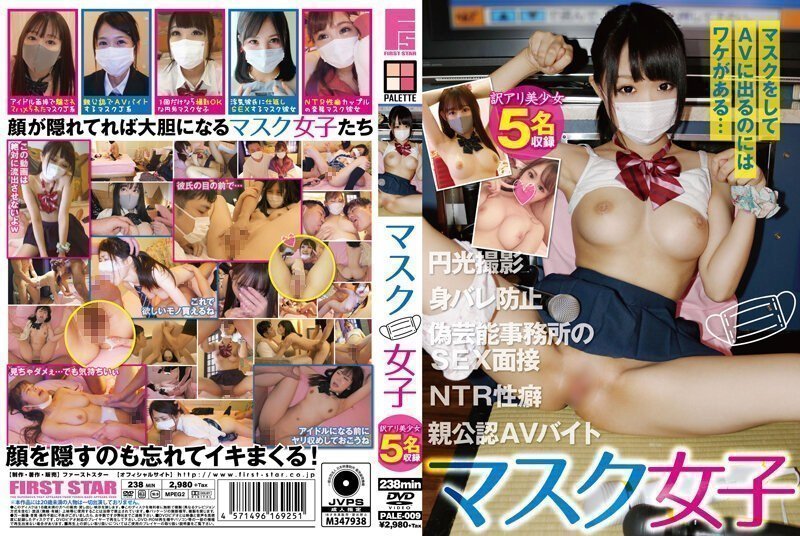
反差骚学妹清纯活力少女〖ssrpeach〗清纯靓丽床上风骚 操到腿软 高潮颤挛抽搐呻吟勾魂 小穴都要被干肿了
短裙少妇TP啪啪,调情一番再开干上位骑坐抽插喊很紧
韩国御姐
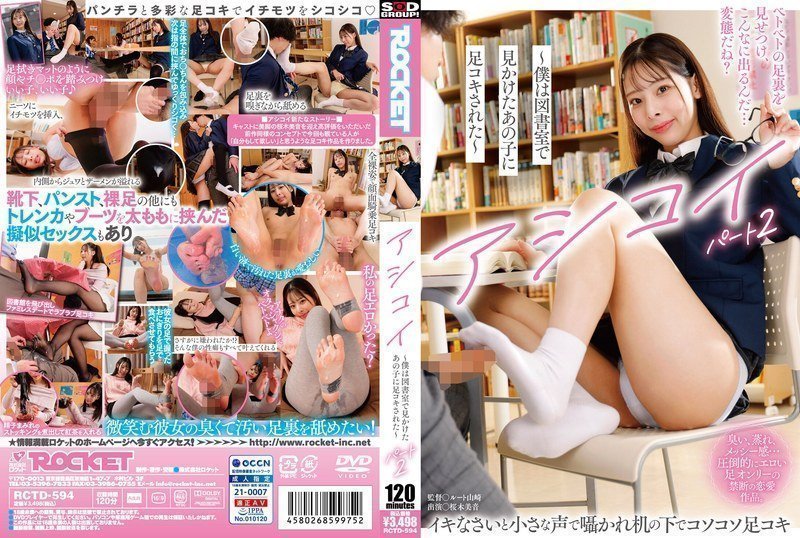
RCTD594アシコイ~僕は図書室で見かけたあの子に足コキされた~パート2

お前らチ○ポ洗って待っとけよ! M男クンの自宅にいきなり家凸! W小悪魔SEXデリバリー!!
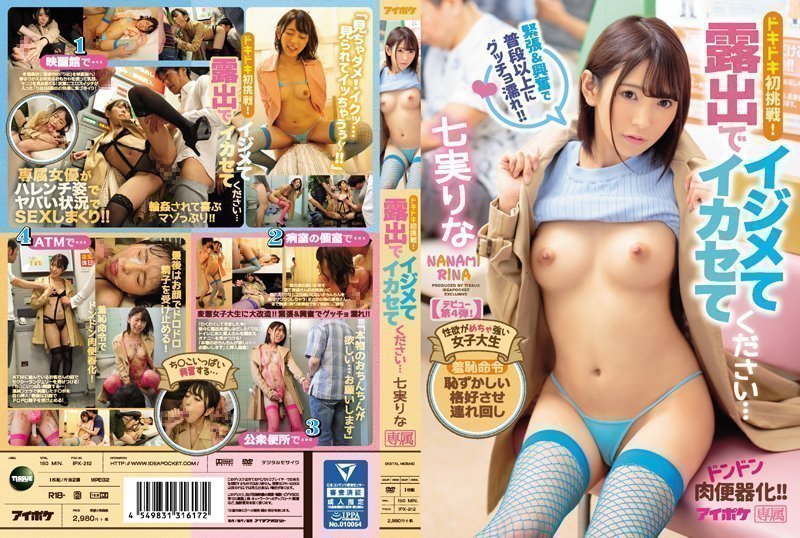
心跳初体验!露出让人玩弄到高潮 七实里菜 IPX-212.
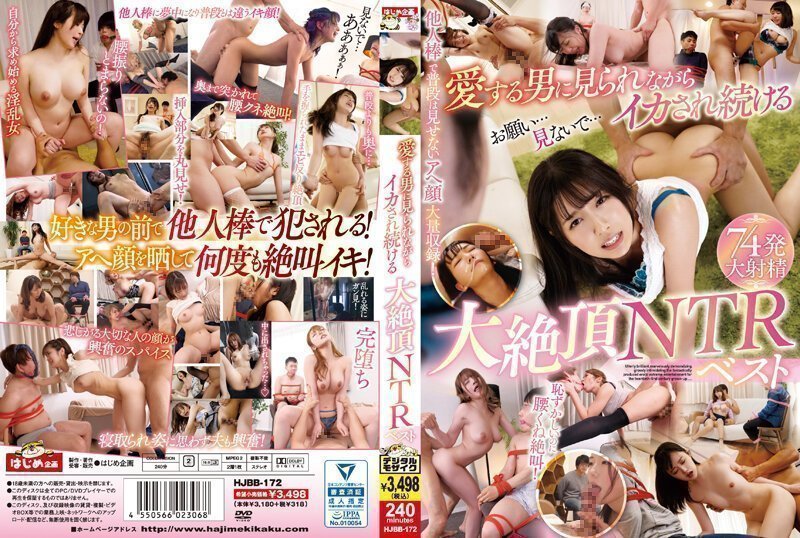
愛する男に見られながらイカされ続ける大絶頂NTRベスト的!
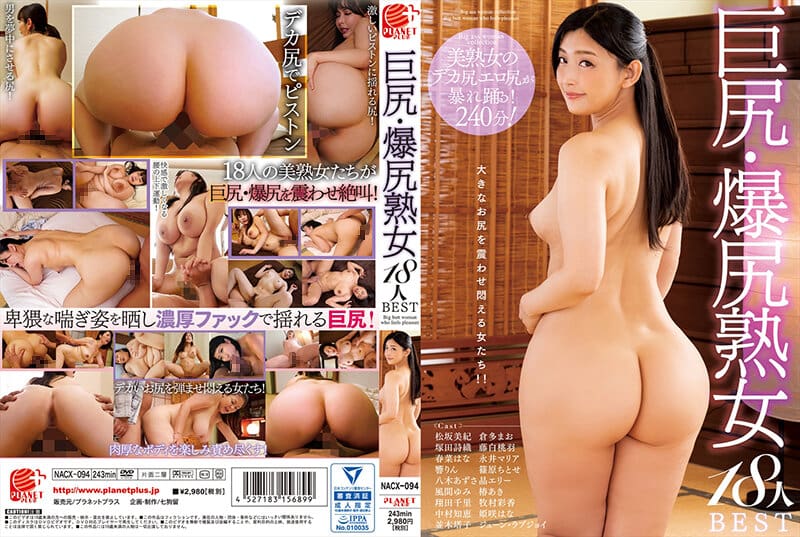
巨尻・爆尻熟女18人BEST

今話題の稅○署勤務の美腳美女
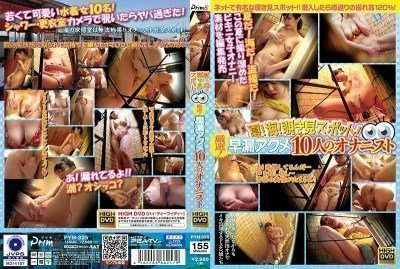
PYM--325 夏!海!覗き見スポット! 厳選!早漏アクメ10人のオナニスト

JD053 人類高質量女性相親記
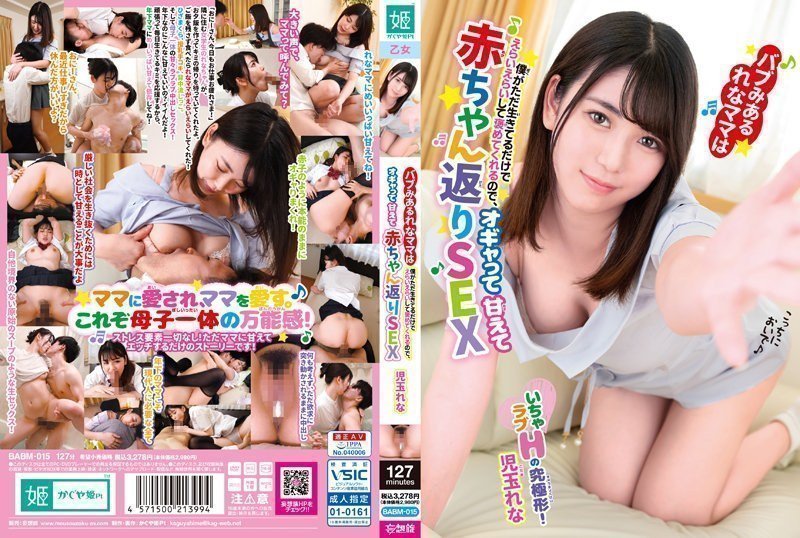
只是活着就让妈妈感恩戴德 小婴儿一般的撒娇SEX 儿玉怜奈儿玉玲奈。
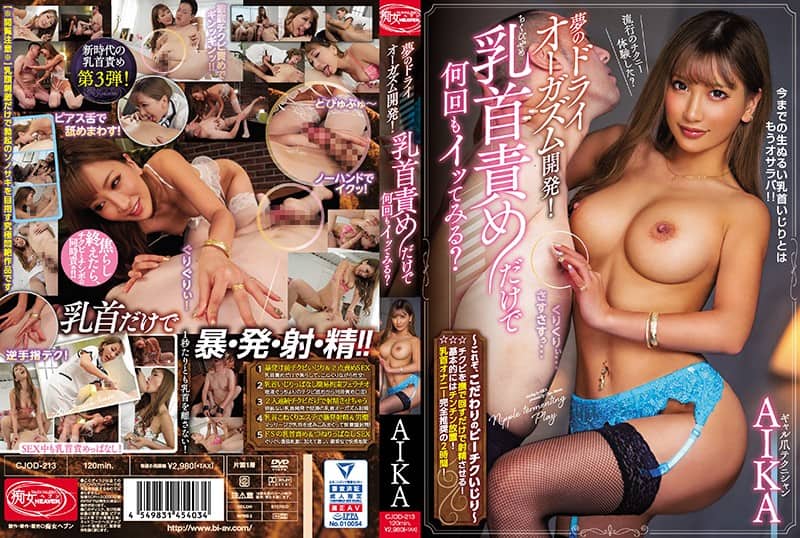
夢のドライオーガズム開発!
※どシコリ注意主観アングル※【センズリ特化】アヘアヘお下品ドスケベSEXしか勝たん!!!!ゾク

韩国御姐 韓國淫蕩女友無毛嫩穴被狠狠猛插 動聽騷叫一聽即射
XXX-AV
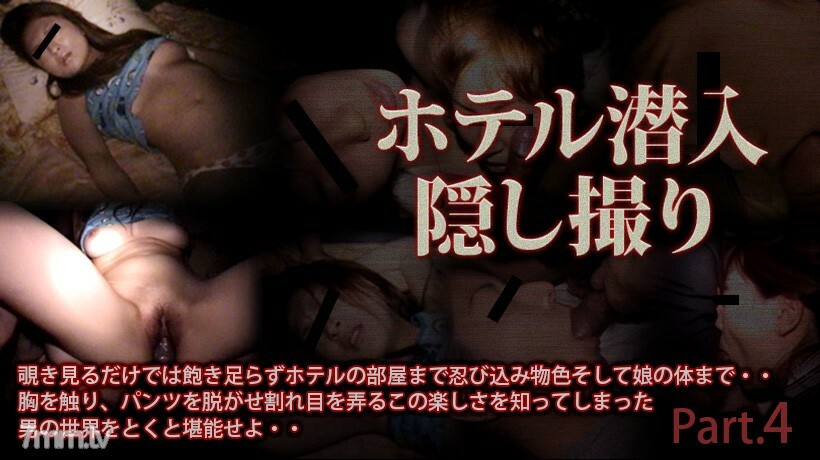
XXX-AV-24286 酒店渗透隐藏拍摄 part4

XXX-AV-24258 业馀女儿私人手淫 part06

XXX-AV-24178 一个不奇怪的美丽成熟女人。你认识一位前AV女优吗?美丽的妻子的阴道射精真的是最好的......“成熟的女人俱乐部提供了工作”

XXX-AV-24289 Sky Angel Blue Vol.143 Ai Suzuki Part1

XXX-AV-20847 Kanako Iioka Chise Aoba 最接近天堂的性救济设施 Full HD PART3

XXX-AV-24288 酒店渗透隐藏拍摄 part6
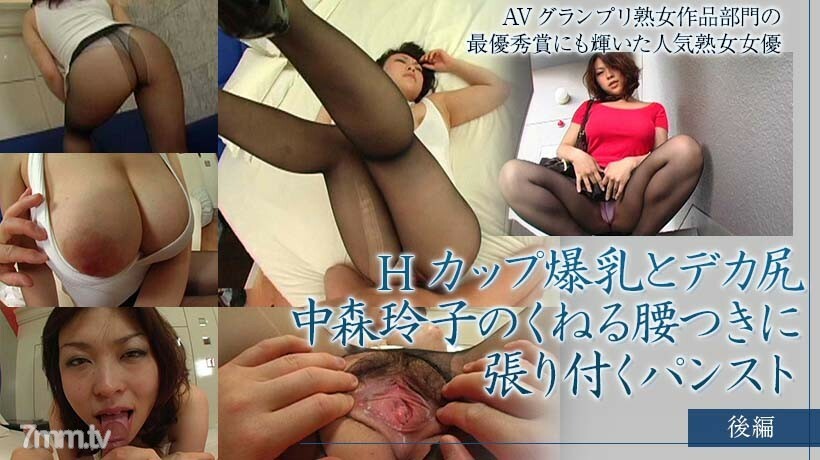
XXX-AV-23080 H 杯巨大的乳房和大屁股,连裤袜粘在 Reiko Nakamori 的扭腰第 2 部分
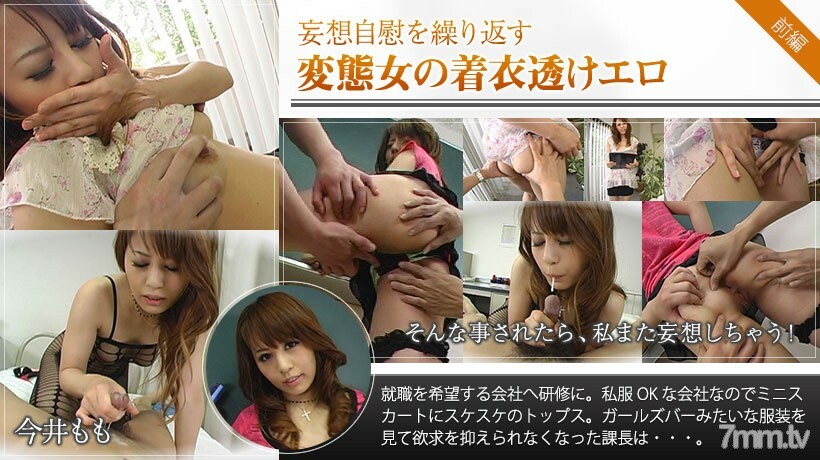
XXX-AV-24095 Momo Imai 衣服纯粹色情的一个重复妄想自慰的变态女人第 1 部分

XXX-AV-20443 与国民枕业偶像vol.3大狂欢
XXX-AV-23952 敏感、苗条、可爱的已婚女人和有钱的淫荡操! 02卷

XXX-AV-24290 Sky Angel Blue Vol.143 Ai Suzuki Part2

XXX-AV-21076 Ubukko School Girls No Pan High School 2 全高清第 2 部分
无码流出
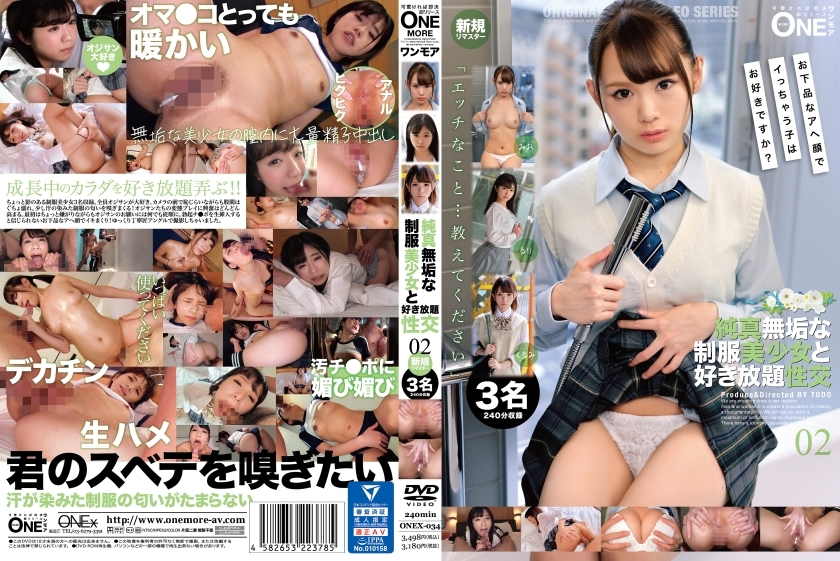
ONEX-034 与清纯漂亮的制服女孩尽情做爱 02
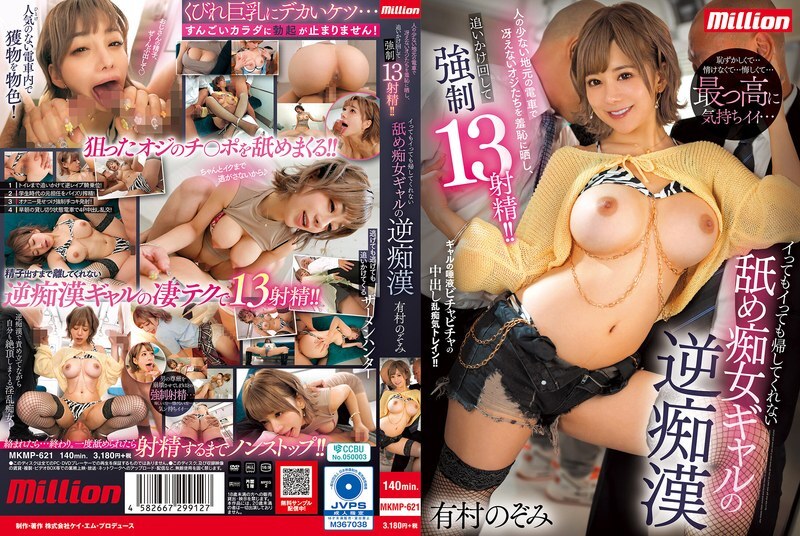
MKMP-621 在一辆废弃的当地火车上,他羞辱了几个愚钝的老男人,追著他们跑,并强迫他们射精 13 次! !有村希美,一个舔荡妇女孩,即使你来了也不会让你回家
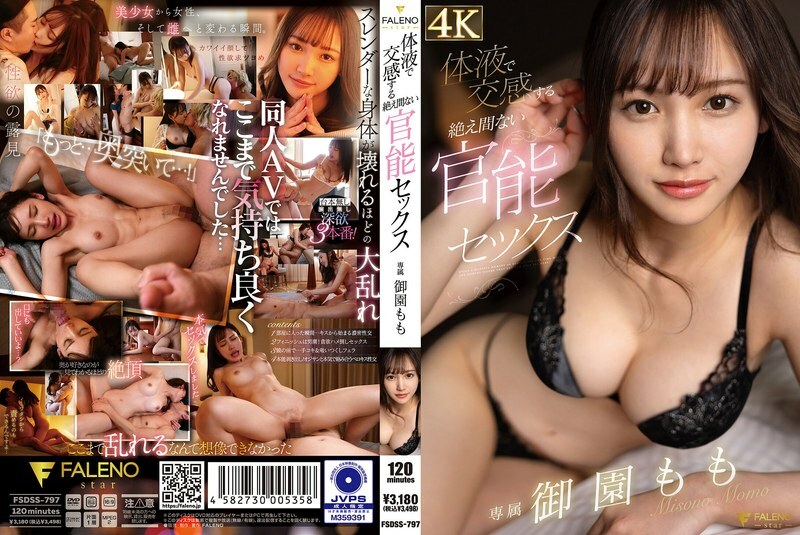
FSDSS-797 用体液持续性交 Momo Misono - 御园もも

SIRO-5008 [我申请是因为我想做♪] 50多个有经验的人?一个对自己的性欲诚实的海滨别墅女孩,她肆无忌惮的性欲和晒伤的疤痕将用她色情的 G 罩杯乳房耗尽她的精子......!网上AV应用→AV体验拍摄1937
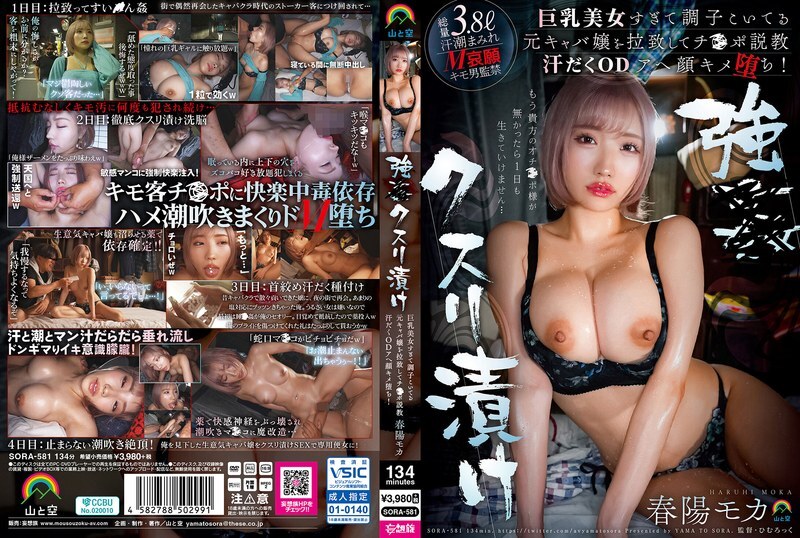
SORA-581 强药腌制心情好的巨乳美女绑架了前女主人,给他上了一堂鸡巴课。 春世摩卡 - 春阳モカ
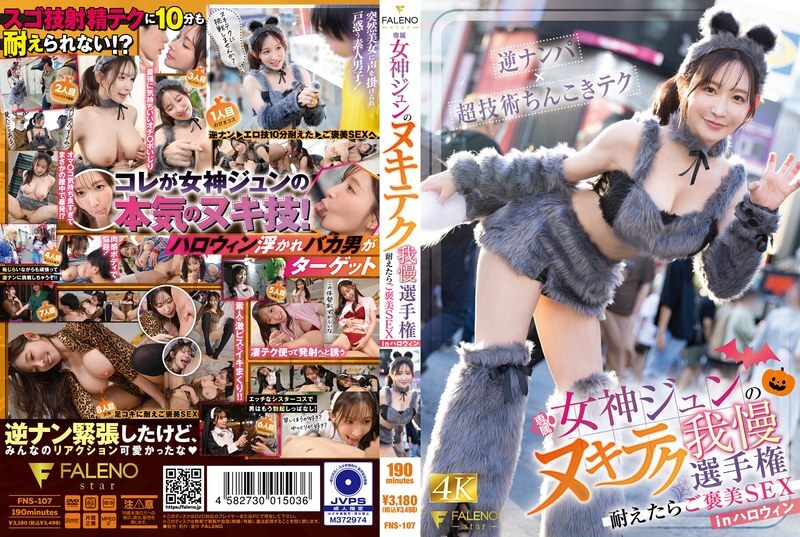
FNS-107 女神君的耐力锦标赛:坚持下去的话,万圣节性爱有奖励 - 女神ジュン

HNHU-0088 个人拍摄接机#三温暖女孩#squirting #长舌吻#脆乳头#raw Creampie 250 1
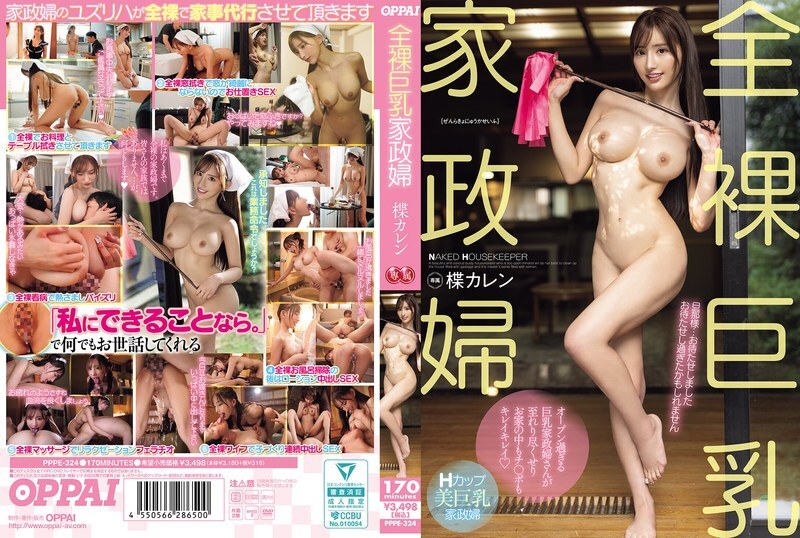
PPPE-324 裸体丰满管家 Karen Yuzuriha - 楪可怜
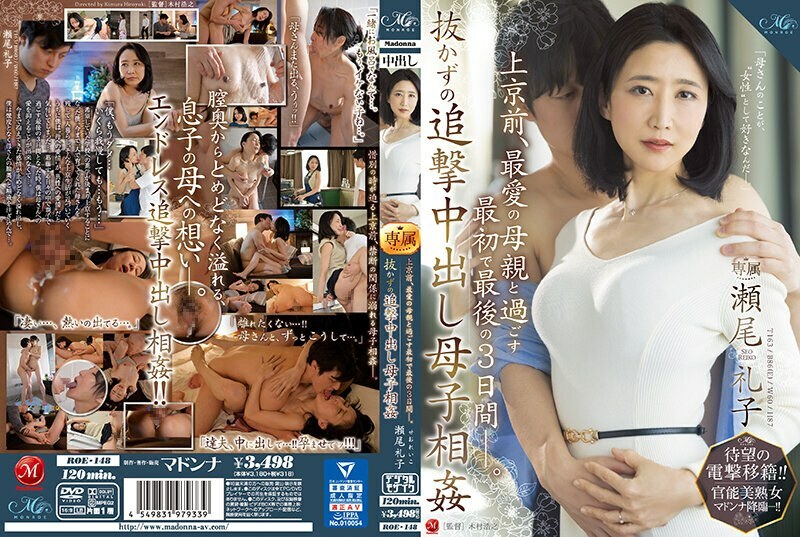
ROE-148 期待已久的电击转移! !感性美丽成熟的女人麦当娜降临! !搬到东京之前,前三天和最后三天都是和深爱的母亲一起度过的。母婴乱伦 Reiko Seo - 瀬尾礼子
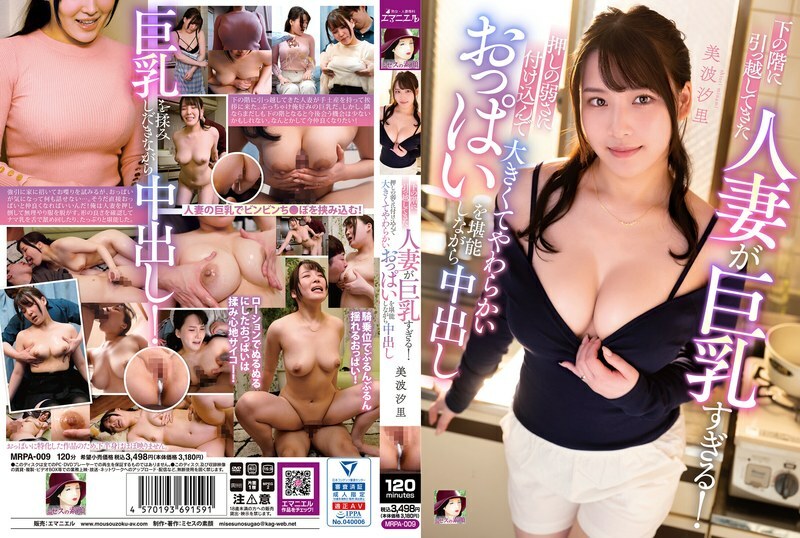
MRPA-009 搬下楼的已婚女人胸太大了!南诗织利用她微弱的压力射精,同时享受她又大又软的胸部。 - 美波汐里
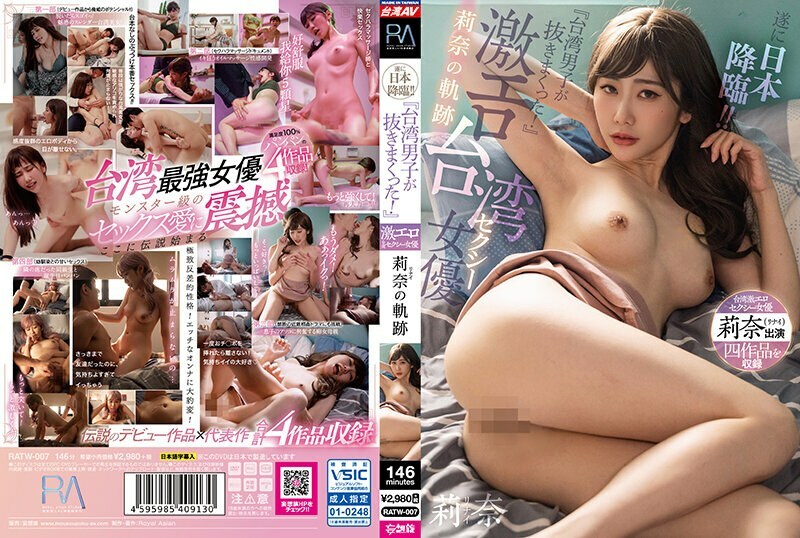
RATW-007 终于来日本了! ! “台湾小伙子超越了我们! 》超情色台湾性感女星Rina Rina的轨迹 - リナイ
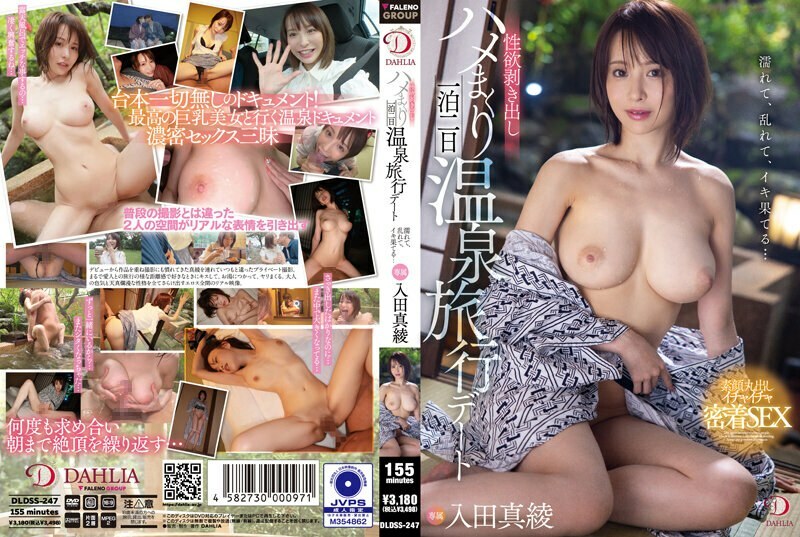
DLDSS-247 湿润、凌乱、高潮…一晚两天温泉旅行约会性欲暴露真绫入田 - 入田真绫
水果派解说
π018 真男人就该征服男人!~冲向克蕾儿搜查官

π089 结构最好的av片

π040水果派战斗民族-成片
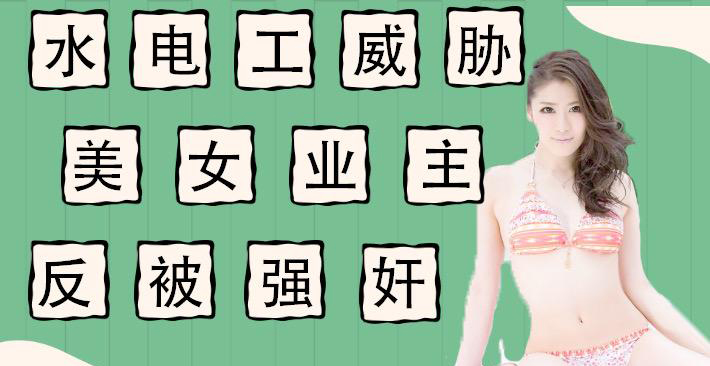
π011水电工威胁强上美女业主反被当免费鸭子
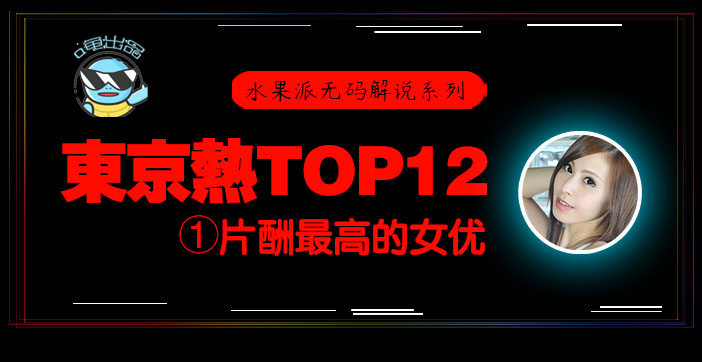
π076 东京热片酬最高的女优!【东热12钗系列】
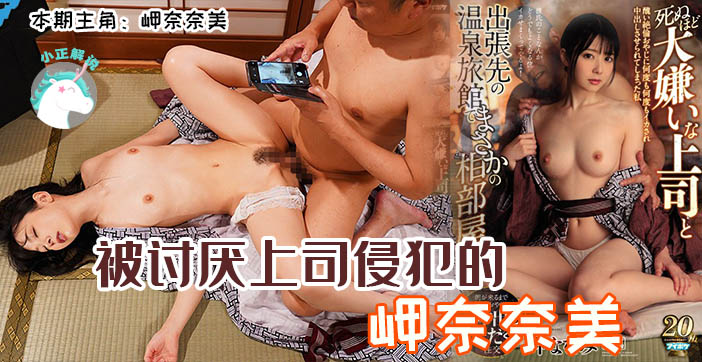
π050出差时被最讨厌上司侵犯的岬奈奈美
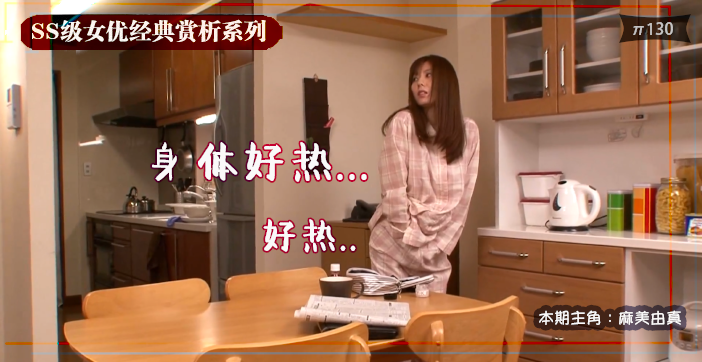
π130 保守人妻被春药控制 从此欲海沉浮、回头无岸

π053 美腿丨丝袜丨足交丨高跟鞋!你想要的,桥本老师都给你!

π133 三上悠亚的部长是处男…只好每周五加班帮他进化成大人!
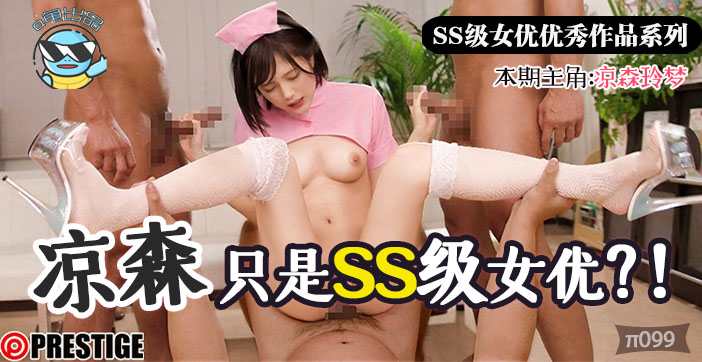
π099 哭了!地表最美现役女优-被猛男们狠狠地射在里面了!

π172 明朗少女归乡记
π063 加速抽插!就是要在她老公面前这样才过瘾嘛!
巨乳美乳
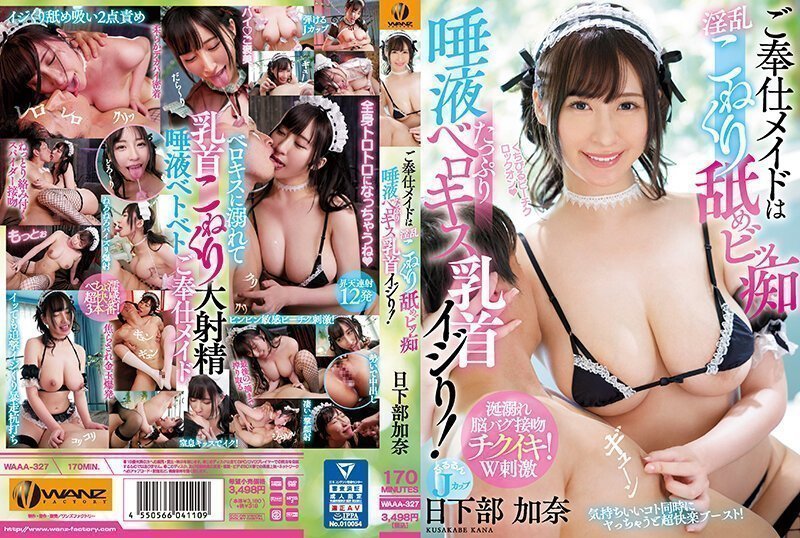
ご奉仕メイドは淫乱こねくり舐めビッ痴 唾液たっぷりベロキス乳首イジり!。
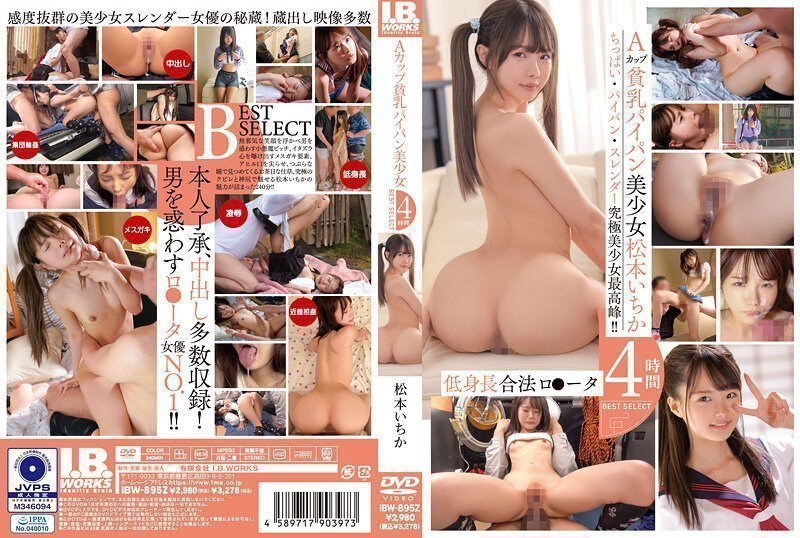
A罩杯贫乳少女松本一课4小时-松本一香。
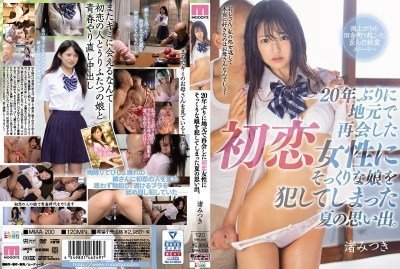
MIA-A-200 20年ぶりに地元で再会した初恋女性にそっくりな娘を犯してしまった夏の思い出。 渚みつき
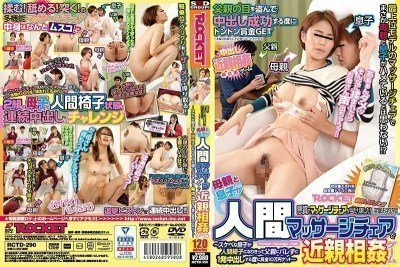
RCTD-290 母親と息子が人間マッサージチェアで近親相姦ゲーム
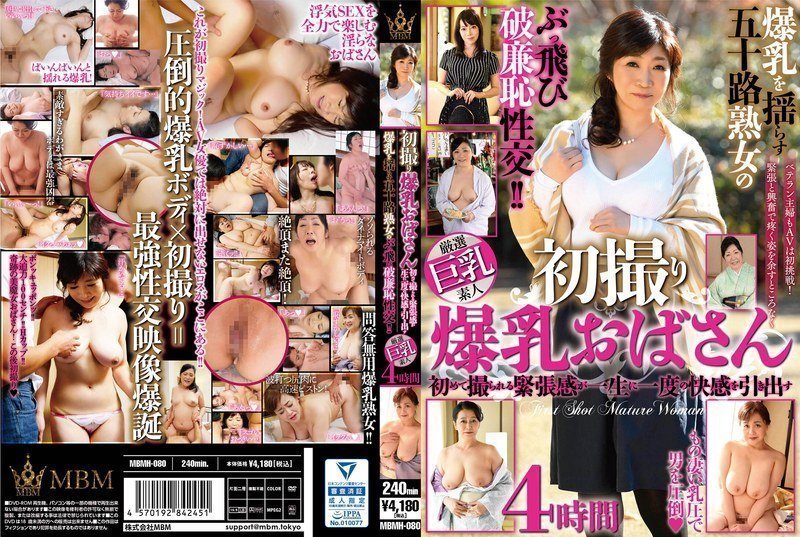
MBMH080初撮り爆乳おばさん初めて撮られる緊張感が一生に一度の快感を引き出す爆乳を揺らす五十路熟女の.
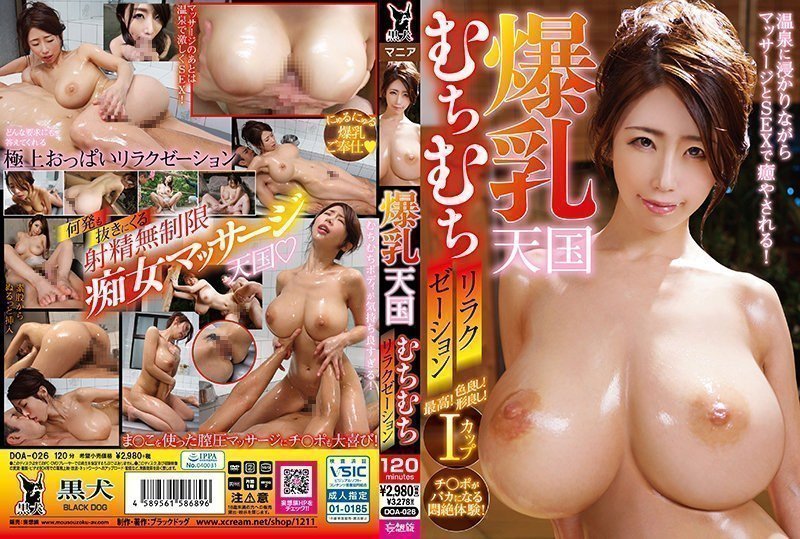
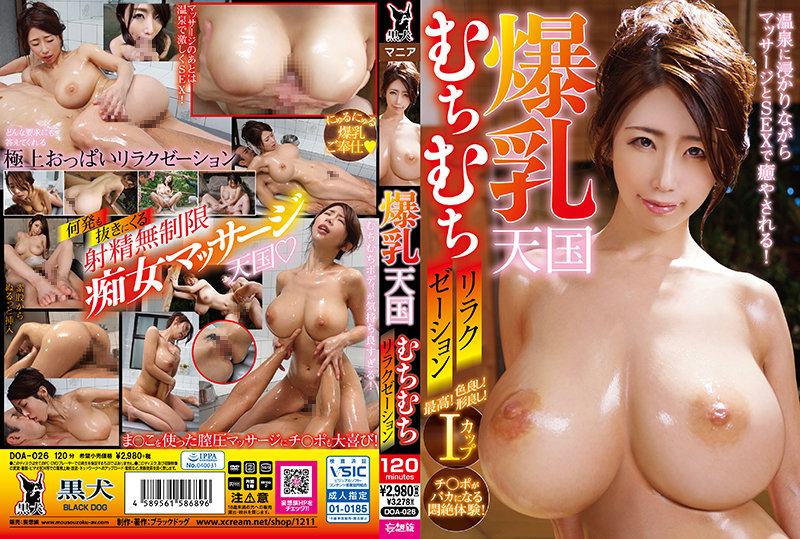
爆乳天国むちむちリラクゼーション筱田步美。

在所有体位都玩弄乳房!H罩杯的乳房,不让乳房离开,持续玩弄的极致汗流浃背中出性爱 九井スナオ TPPN-264
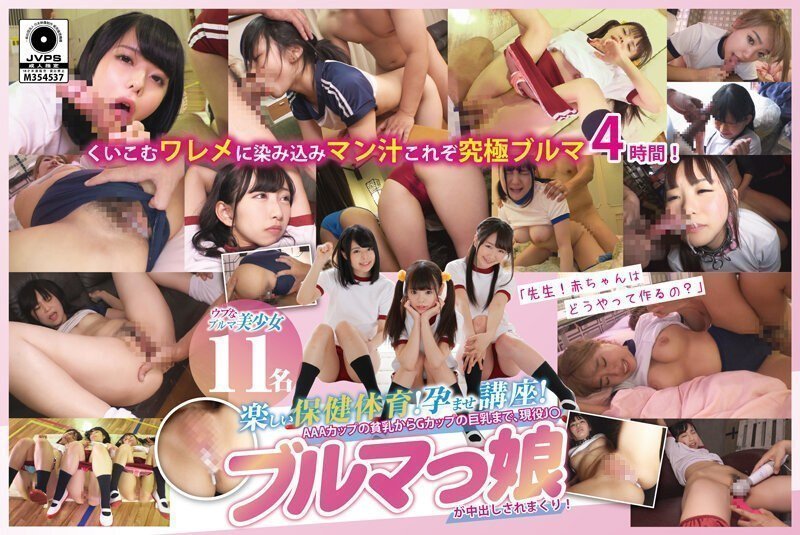
楽しい保健体育!孕ませ講座!AAAカップの貧乳からGカップの巨乳まで、現役J○ブルマっ娘が中出的!
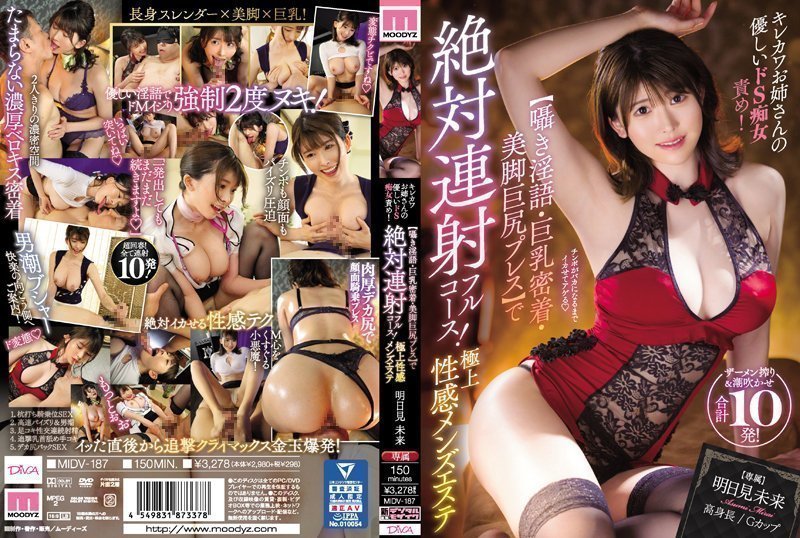
S系性爱攻击!淫语、巨乳、美腿大屁股的!
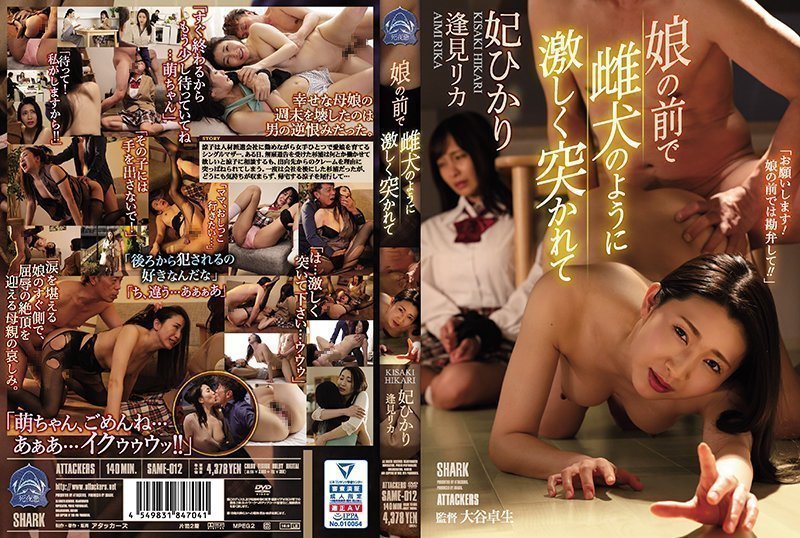
SAME-012 在女兒面前如母狗般的被激烈抽插 逢見梨花 妃光莉
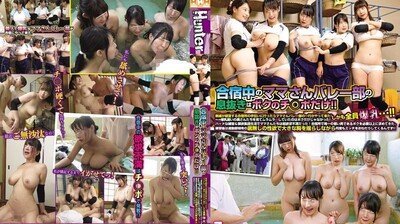
HUNTA416在合宿中的阿姨排球社团里只有我一个男的!!去亲戚的合宿场地帮忙时阿姨排球社团一行人来了!而且全是爆乳!我看着这些爆乳人妻心中躁动……而且躁动的不止是我,她们也在紧张的练习和禁慾的集.
顾客满足度NO.1 预约超困难的爆乳榨精男性沙龙 夕季千岁!
强奸乱伦
真正的变态性交:50多岁的母子第九卷:我儿子的玛拉,加山夏子,满足我孤独的身体 加山なつこ NEWM_087
丰满美体人母 推川百合 推川悠里 BBTU-053-C
SDMM-095 魔鏡巨乳嬰兒車媽媽限定!無情揉捏產後敏感三倍的乳房,這才叫奶杉檢查!如果你在你媽媽朋友面前感覺到它,最後你會用你丈夫以外的臉頰抽搐
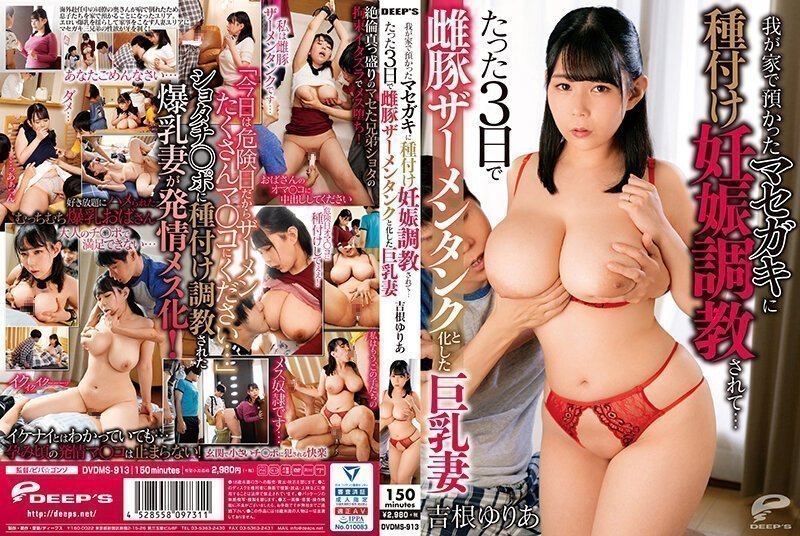
被暂放在我家的小鬼播种怀孕调教…只有3天就变成母猪精液槽化的巨乳妻!
VK-053 喉マ○コ直射イラマ窒息寸前【精子飲まされまくる】マニア旦那に公衆便女調教される美人妻ドキュメント【むっちり巨尻挿入アクメ連続騎乗位】【連続ザーメン10発マンズリ潮吹き】【ハメられっぱなし意識混濁ケイレン号泣】他人チ●ポに凌●され続ける7P大輪カンSEX
RCTD-484 母親のドスケベフェラで射精我慢できたら賞金100万円 暴発したら近親相姦罰ゲーム
MEYD-493老公对不起,我是个坏女人
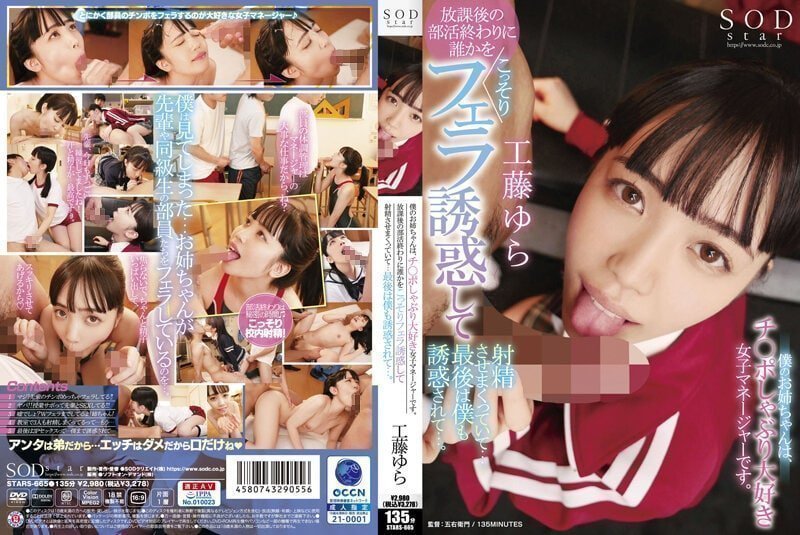
我的姐姐是一个爱吮吸阴茎的女经理
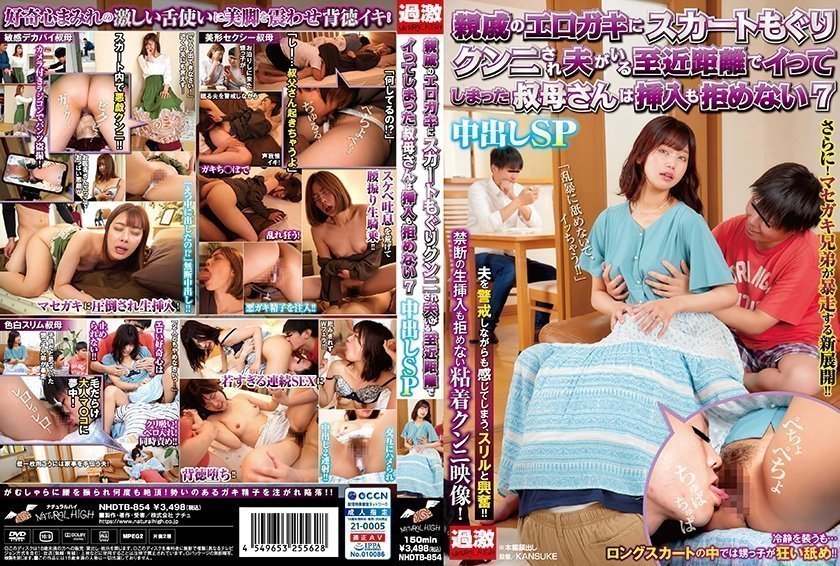
4 親戚のエロガキにスカートもぐりクンニされ夫がいる至近距離でイってしまった叔母さんは挿入も拒め的
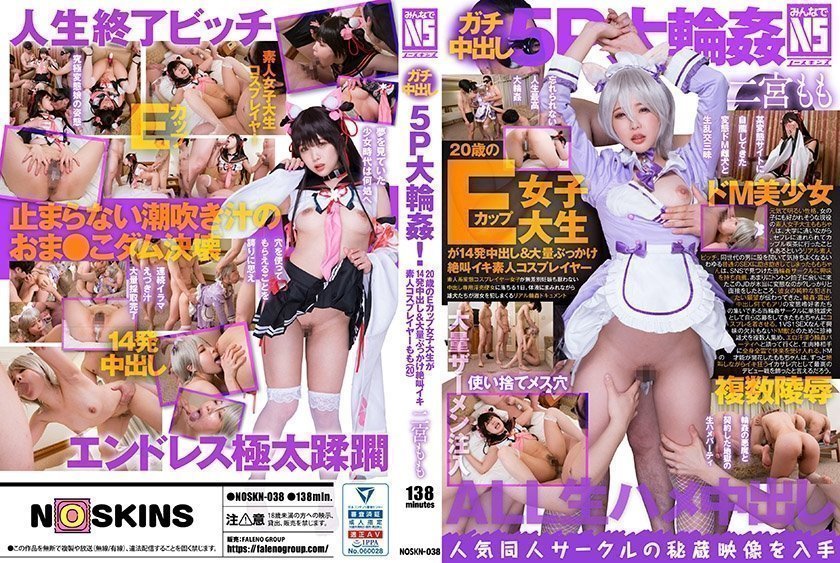
ガチ中出し5P大輪姦!20歳のEカップ女子大生が14発中出し&大量ぶっかけ絶叫イキ 素。。
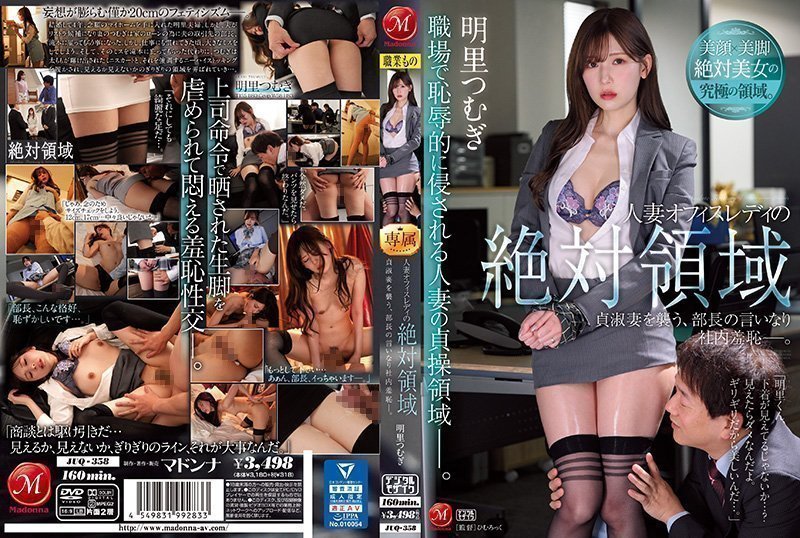
JUQ358C人妻オフィスレディの絶対領域貞淑妻を襲う、部長の言いなり社内羞う恥―.
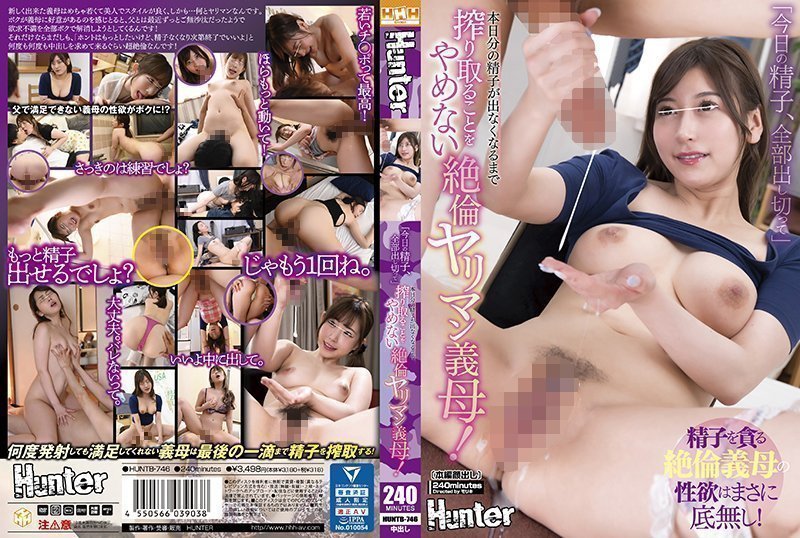
6 「今日の精子、全部出し切って」本日分の精子が出なくなるまで搾り取ることをやめない絶倫ヤリマン義母!的!
自拍偷拍

素颜学妹大二学霸学妹小洁清纯素颜淫荡反差被富二代男票骗色酒店献身

SWAG ladyyuan 洗车工小妹不小心把车漆刮了为了拟补损失只好用身体赔偿
新来技师小樵直接招待.

乖巧甜美外围小姐姐扒掉内裤埋头舔逼
国产表哥轻点力小妹妹会痛的啊

真香警告-尤物御姐超高颜值极品御姐美美的脸纤细的腰

网聊认识气质人妻英语老师很有韵味聊一半强制推到舔逼干炮

邱淑贞早期精彩三级片段混剪

贝贝贝贝塔健身女神自慰失禁连珠插屁眼大黑牛_
挑战一下在天桥上面露出自慰。

情侣私拍大连外国语大学王xx极品身材学妹不雅视频流出

戴眼镜的学妹干起来别有一番风味的啊
91探花

极品女神找炮友来止痒!
梦境之恋-初遇

91CM-197 离婚前的性爱谈判

才艺美少女!完美身材!细腰美乳顶级,一线天无敌馒头逼.

19岁清纯校园女神下海,肤白貌美一个字嫩,激情舌吻陶醉性爱

C罩杯面罩小姐姐,这奶子针不错,可惜小逼已黑

形体老师

高跟丝袜肥臀大奶骚货口交伺候狼友上位坐骑操

三十六路各种抽插爆操

娘家妇女厨房打扫发骚学生服道具紫微秀_
饭局夫人2优美夫人高清无水印完整版

【姐妹榨汁机】两个少妇双飞战大叔,花样百出,极致享受。
欧美精品

喜爱肛交的cos美女

JacquieEtMichelTV.20.10.26

Skinny bitch

MYLF-被男性脱衣舞娘性交的热熟女【MYLF】

足交骑乘巨乳人妖

和岳母偷情,被女友发现

非常像钟丽缇的美女被大屌无套狠操 干的叫声很大

我的第一个射液汇编2019! 射液-咪咪繁荣 Mimi Boom

欧美激情大片397

打破规则的乐趣

FamilyStrokes-令人毛骨悚然的继子偷偷溜进熟女的房间做爱【FamilyStrokes】

Fiona Moore Cum On His Face
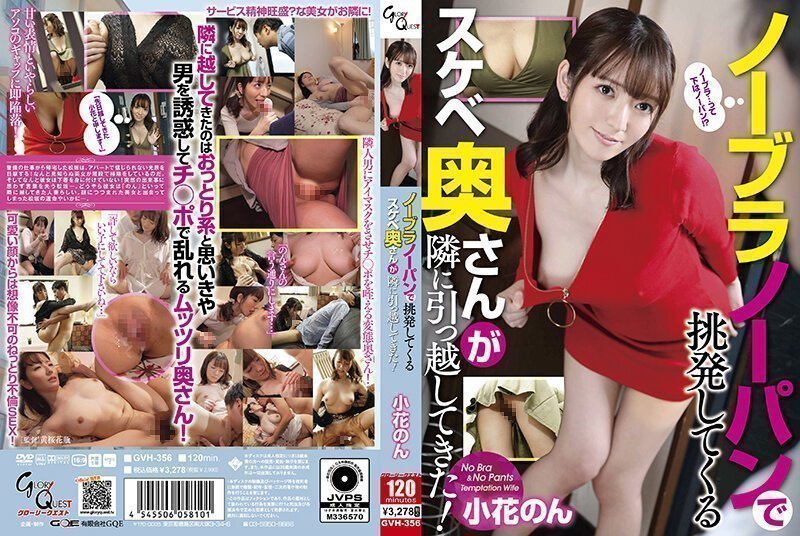
SM调教
推特优质超强调教大佬【奴隶物语】最新流出3部作品,马不停蹄,睡眠剥夺,少女劳改
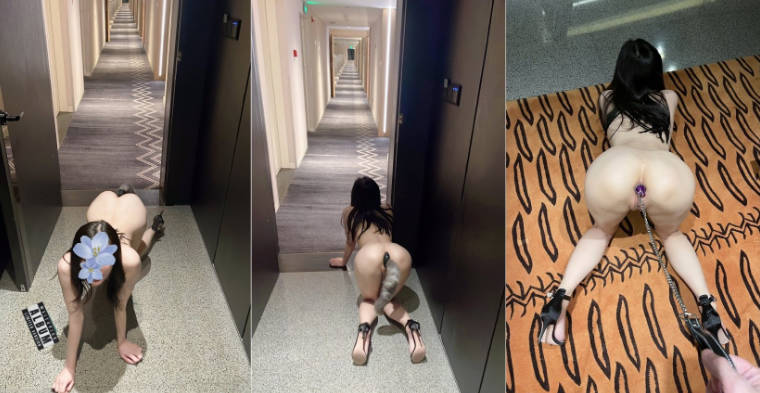
推特调教大神『潇洒(匹夫隐世)』VIP付费福利,户外调教露出 高冷女神私下其实个骚婊母狗

近距离拍摄S女王调教同性女奴,口水唾液分泌拉丝让女奴吞食得一滴不剩
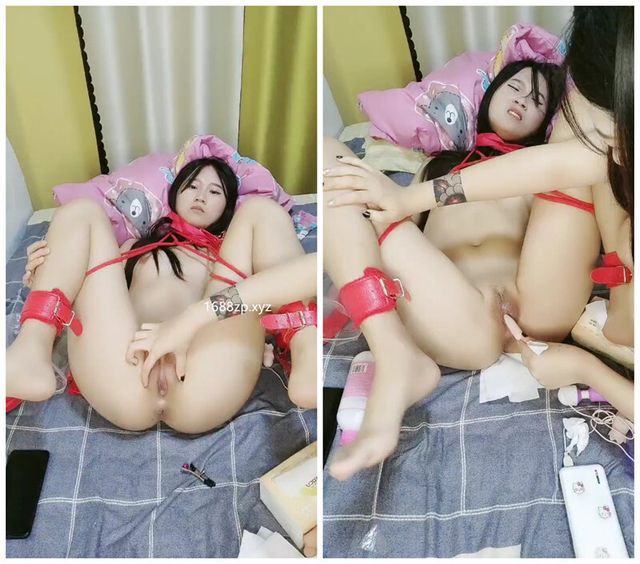
新人下海两个嫩妹妹!SM捆绑挺会玩!手铐口塞,绑着腿张开,跳蛋震动阴蒂,闭眼享受很爽

橙橙小萝莉学生制服啪啪SM诱惑,口交足交翘大屁股乳夹黑绳捆绑

秀人网极品模特『王馨瑶』被带SM眼罩模拟性虐待爽到高潮 伸舌头出来超骚求操
超极品身材反差尤物 被大鸡巴爸爸当成鸡巴套子 母狗就是给大鸡吧随便使用的肉便器 唯美刺激
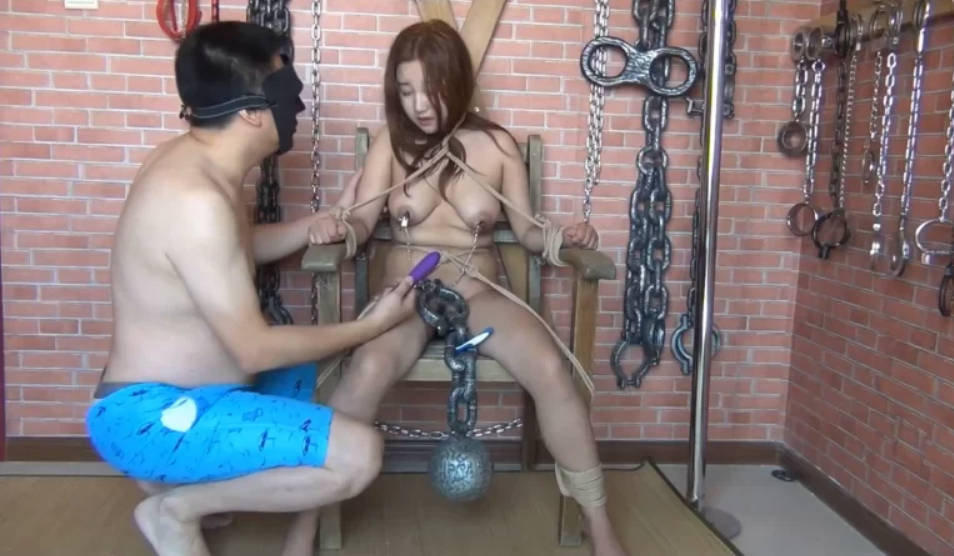
国产SM工作室【路由超级玛丽】内涵版剧情作品,巨乳女间谍入室窃秘被抓,脱光老虎凳上各种折磨
凋零 束缚PUA调教06年小母狗 窒息深喉凌辱 反差肉奴开发三穴 沦陷肉欲爆艹内射肉便器
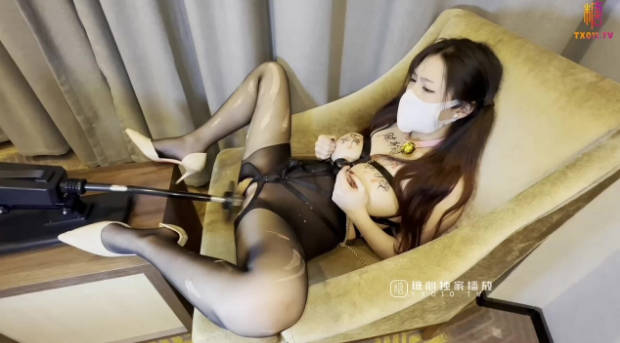
91情深叉喔 沉浸式SM调教 乳夹滴蜡炮机驯服小母狗 失禁狂喷淫物 口爆巨乳女宠
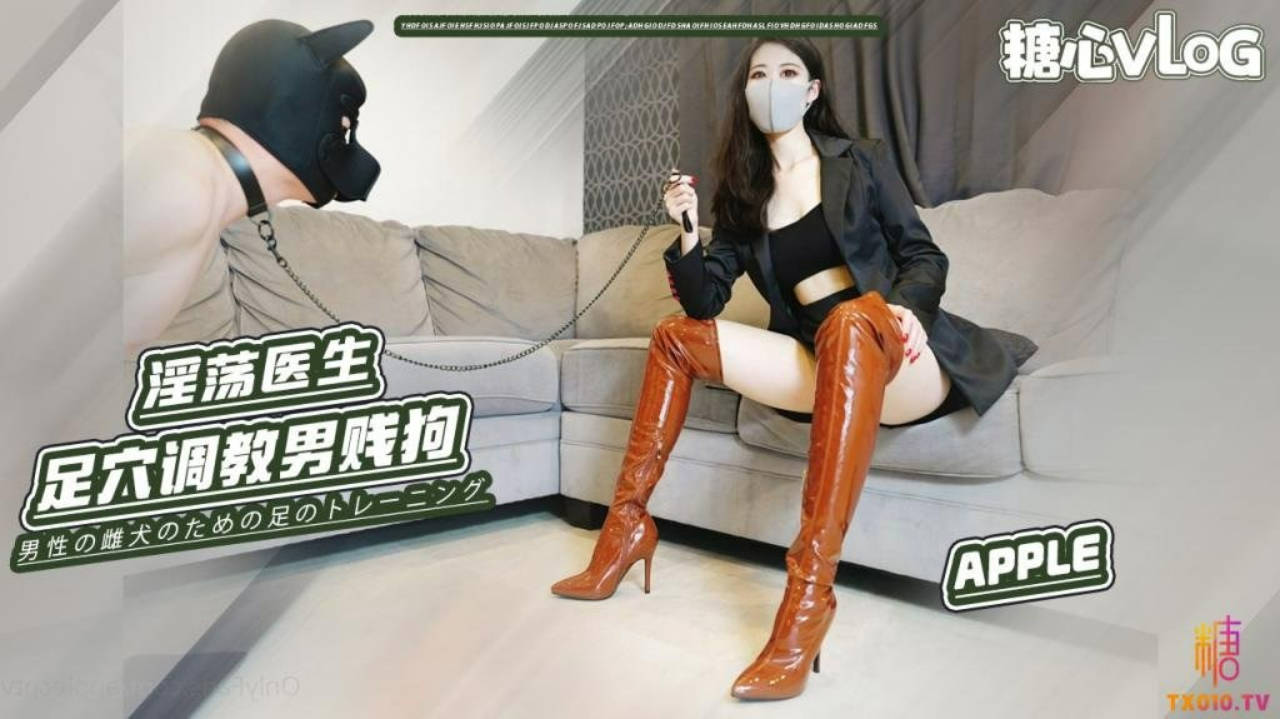
Apple苹果 女王医生足穴调教男贱狗 淫欲挑逗 超湿多汁蜜鲍 淫穴取精榨干最后一滴汁液

涵涵极限SM调教特辑二, 黑丝分腿缚,强制内置遥控高频震动蛋,蜘蛛系列延长杆YJ欲仙欲死
探花嫖娼

偷情泄密猥琐大叔出租房与工友的良家小媳妇偸情肉肉的身体屁股肥大干起来肯定爽冲刺的时候

私拍泄密顶级傲人身材红发小淫女年纪不大逼却像只老母狗与男友激情无套啪啪视频流出

泄密流出被干的乐开花杭州西湖区白领少妇周文婷和同事偷情事件

按摩技师的性爱服务...

传销总监平台第一大屌哥91沈先生网约学生

自拍流出师大素雅文静小学妹与热恋男友爱爱视频流出
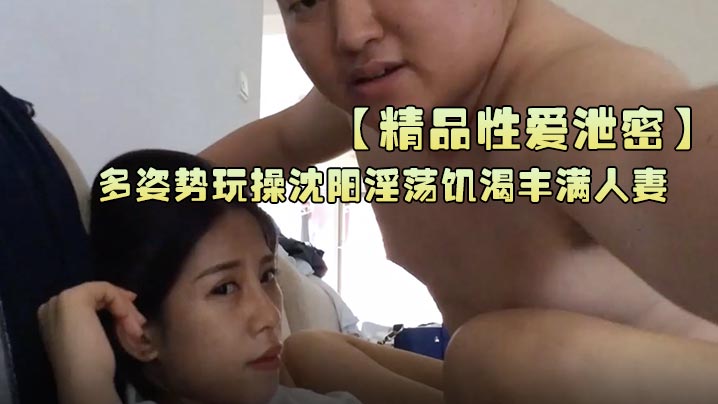
精品性爱泄密多姿势玩操沈阳淫荡饥渴丰满人妻和东北饥渴虎狼少妇做爱畅快淋漓很爽.

歌厅探花商K包间灯红酒绿双飞佳人

极品御姐李月如fannylyofFannyLy潮吹直播自慰OFZYCB131
午夜20.08AI高清画质2K修复2020.8.9午夜第二场高颜值白衣妹子脱光光坐在身上摸奶扣逼调情侧入猛操.

身材火爆的美女模特被富二代男友用跳蛋玩嫩逼啪啪完美露脸
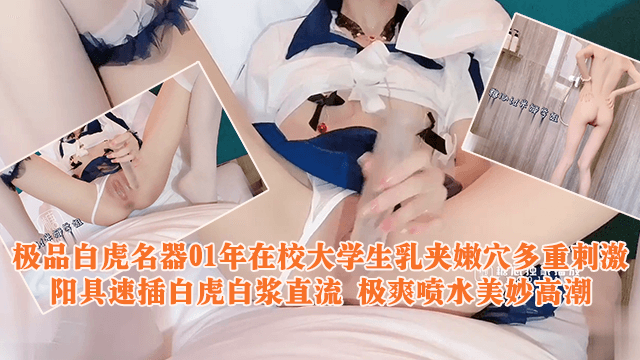
极品白虎名器01年在校大学生乳夹嫩穴多重刺激阳具速插白虎白浆直流极爽喷水美妙高潮
欧美性爱

超强BBC媚黑荡妇,绿帽骚妻【asianprincess】被野兽附体的黑鬼爆肛见红,边操菊花阴道边喷水
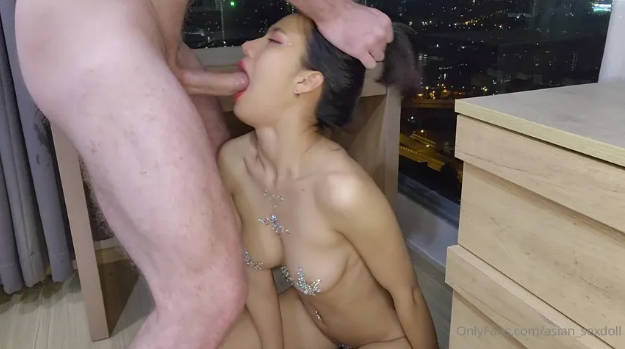
亚裔高颜小只马白人的性玩具「Asian_sexdoll」OF露脸大尺度私拍 火辣身材白虎少女极品炮架子【第七弹】

带美女到餐厅厕所操逼,撩起裙子白丝美穴,踩在马桶上扒开内裤后入,忍不住呻吟娇喘,第一时间抽插美臀

韵味熟女人妻吃鸡啪啪 皮肤超白 被黑祖宗大肉棒无套输出 呻吟不停 潮喷抽搐不停 内射满满一鲍鱼 黑白配

欧美高颜值小姐姐丰满身材眼睛好漂亮,高跟大长腿又圆又翘大屁股坐在腿上扭动销魂感受太爽了啪啪扶着纤腰冲刺操

超强BBC媚黑荡妇,绿帽骚妻【asianprincess】生猛激烈的4P乱交,2根黑驴屌阴道屁眼换着插

欧美豹纹尤物,露脸和男友直播,打飞机撸硬,舌头挑逗龟头极致口活撅起屁股后入
极品高颜值爆炸身材阿黑颜口交皇后「Ruthy」OF露脸私拍 颜值即正义!素颜即巅峰!【第六弹】

有青春嫩嫩两个妹妹好性福啊 在身边瑜伽锻炼肉体露出扭动
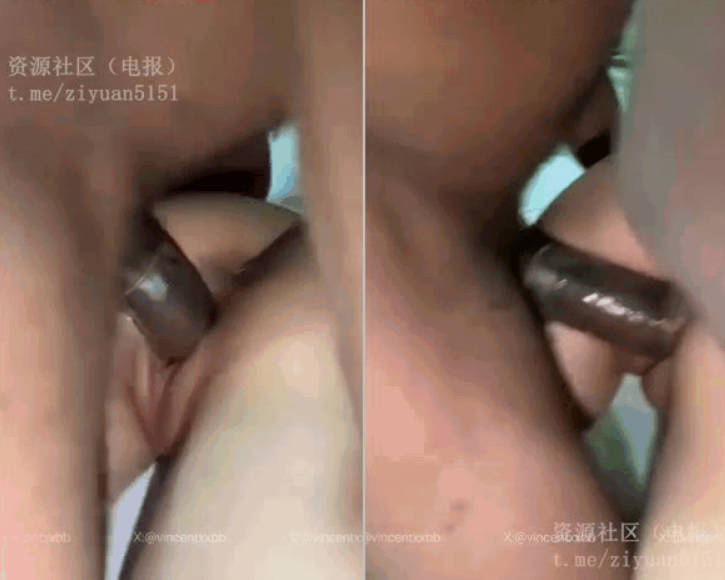
媚黑反差淫妻「Vincentxxbb」《新女主:03的白虎小m》第一次被大黑屌操,由于太紧只能涂润滑油

P站蜜桃臀高颜值淫娃【ArinaFox】我舔了一位打瞌睡的女同事,结果她竟然给我做足交,忍不住内射了

P站极品巨乳肥臀,高颜值女神【Comatozze】最新露脸第16部,中出内射
性感人妻

捕获性感小白兔~无毛蜜穴温柔操弄
素人ハメ動画 優香25歳③
露!老年人举办的会员制狂欢派对的现实!!一段闭门视频被某参与者泄露!-未知演员。

可爱妹子爱吹屌~吹完赶快放进去温存

曾经的女神扮演的听话女友,真的好看

最讨厌的上司强迫我不伦关系

PJAB011始めは」いいね!」が欲しいだけだったのに…承認欲求に取りつかれ過激な中出しセックスまで配信

学生妹子的第一次插着就是爽

361SEKAO-105 デイジー・ダンケン

ちんぐり返しアナルいじりフェラ抜き スペシャル15

芸能人になりたい地方在住の色白ムチムチFカップ未成年女子大生
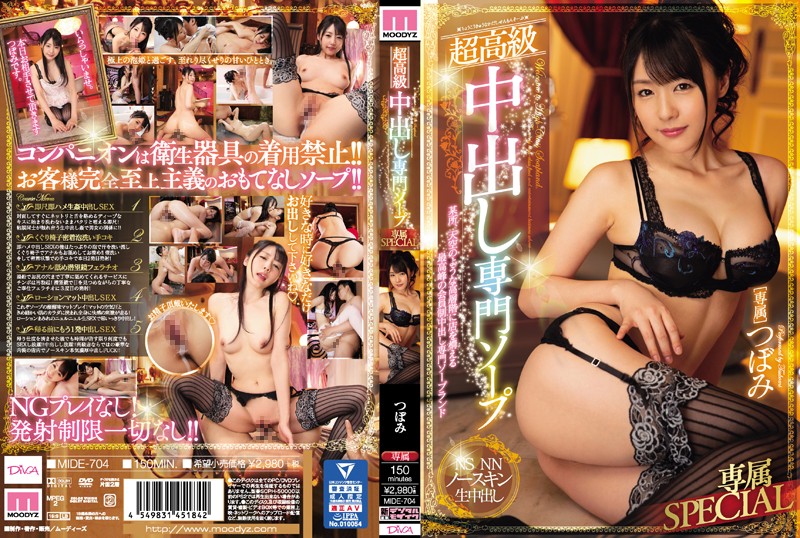
MIDE-704 超高級中出し専門ソープ 専属SPECIAL つぼみ
瑜伽裤

极品短发大美妞情趣内裤激情大战,喜欢先用振动棒玩一会,舔屌深喉口活一流,骑在身上猛操,打桩机妹子很享受 (1)

瑜伽裤TMY0009 女大學生下海記[2]

激情3P骚熟女,洗完澡两根JB轮着舔一个侧入一个插嘴,扛起双腿进出撞击猛操!
身材超赞的粉嫩干女儿,第一次玩菊花记录.

猫可可

高颜值国模小莲宾馆与摄影师激情互动私拍流出 这一笑我爱上了她 狂野纹身 漂亮美乳 高清1080P原版无水印的!

#月月_苗条身材,可爱萝莉主播小妹洗澡&啪啪大秀直播,口交大鸡巴,骑乘,正入猛操呻吟

#糖糖 极品骚货舞蹈女神 1

微信到的附近大学圆脸妹子,一顿饭钱就拿下了,简直太简单
纯欲系JK少女 油光丝袜 大长腿 无套骑乘.

嫩奶御姐狂插白虎一线天.

风骚技师全套大保健服务的!
男同系列

下药迷晕黝黑直男玩大屌
国产传媒

XSJKY001 音乐系学生叫床很好听

MDHT0021 禁欲穷游后的湿身勾引 / 全新开张 欢淫欲约

MD0337 未亡人在灵堂偷情 遗照前被猛干骚逼

MKYBA005 被跳蛋控制的直播主 天马行空咸湿幻想

PMC314 快递员猛操强欲少妇 无处安放的荡妇欲火

MD0014-3 快递篇-连续被上的ol-c

MKYHS008 催情民宿 究竟谁先干到我

CUS-2238 大象传媒 捆绑情人 m属性的性爱信徒

PMX031 微醺女子酒瓶满塞 / 酒瓶塞满淫穴的高潮快感

CUS-1097 男优练习生ep1 性爱篇 / 屌丝面前的性爱处刑
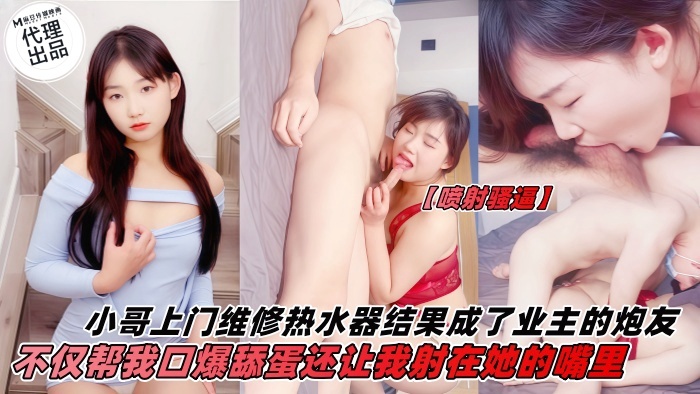
SZL029 小哥上门维修热水器结果成了业主的炮友

PMC406 准新娘被前任操得高潮不止 熟悉的肉棒才能满足淫荡小穴
兽耳系列

TM0142欲求不滿大兒媳

极品巨乳美女妖媚挑逗自慰_#巨乳_#眼镜娘_#自慰

知名台湾网红吴梦梦家教学生无套内射

兽耳系列 300MAAN780 可愛正妹魅力無法抵擋 腳交口交小穴全身性器榨精
楼梯间自慰被扔垃圾的邻居看到了
酒店约操俄罗斯外围女

COSPLAY三女互舔互插,香艳至极

真实勾搭调教良家少妇各种玩弄

甜美型肉感小少妇自慰诱惑的!

无毛馒头穴女友做你的貓

我喜欢粉色大鸡吧.

女教练泄密魔鬼身材健身教練可可和学员在情趣酒店偷情视频曝光
heyzo

SAKURA-SAKURAI 拿著指挥官的业馀女孩

HEYZO-2472 把 Nashiki Moe 归咎于玩具!

HEYZO-0334 在新婚前夕的孵化派对上为苗条的美女装上马鞍!

HEYZO-1463 把希望桃树归咎于玩具!

HEYZO-1132 村上凉子泄露了!

HEYZO-2514 一个为智能手机游戏收费过高的女人

HEYZO-2116 享受色情按摩! ~在佐伯真子的情况下~
HEYZO-3423 我无法接受!美丽的吸屁块茎! ③~美容集第37卷~

HEYZO-1426 HAMEZO ~ 奇闻趣事系列 ~ vol.38

HEYZO-1731 6 后~润湿 OL 具有出色的灵敏度~

HEYZO-3030 折原穗乃果的屁股好帅啊! - 折原穗香
HEYZO-2814 Mio Futaba [Mio Futaba] 当你想长矛时,长矛!鞍最好的情妇! !!
网曝门
最新流出FC2_PPV系列匪帽哥重金约炮肤白大奶肥臀优雅混血美人蝴蝶B小洞中出内射2V2

备胎超人趁王子不在 和公主一起偷情!成功上位成为甜心超人~

91CM-111 考研的姐姐-張晴

-guochan-【国产】嫖妓实拍 城中村22岁喜欢唱歌的靓妹 一百五一次 支付宝收款

大一校花妹妹,莫妮卡,直播抠逼还网贷,通体粉嫩

C仔最新大片-身材性感的高颜值超级嫩模松井遥吃鸡巴时嘴被大鸡巴塞满了,女上位时说:你太大了,坐不下去的真漂亮的的!

妹子带猫奔现被强上强插.

长相甜美可人颜值高长发妹子揉奶诱惑掰开逼逼揉阴蒂手指抠逼迷你黑震动棒震动阴蒂非常精彩的啊

免费男大肌肉体育生宿舍打飞机

大一学妹 与跑友宾馆啪啪的!

色欲韩妍熙 1

大哥约会小情人骚货被操的极度满足
台湾辣妹

【国产自拍直播】大屌粉丝不懂怜香惜玉各种姿势爆插女神思瑞

跪在主人面前.

minicat_私人精油按摩師_按到哪裡去了下面都濕漉漉的

台湾上过综艺的大奶子少妇和其他男人偷拍被曝光

萝莉女友粉色情人制服诱惑有事没事干秘书女上位榨汁遭不住呀每次都顶到子宫口.

HongKongDoll 玩偶姐姐 Vlog长片系列「一日女友的漂亮姐姐」 第2集 – 她是谁.

-guochan-【国产】打完炮 满足不了这风骚 少妇 还好带了2根振动棒

玩奶推荐极品爆乳小姐姐佳佳上门按摩全套服务的。

小姐姐十九岁极品美女

台湾辣妹『阿曼达』_叫你如何穿比基尼_小麦肌肤_诱人身材_野外小树林啪啪啪

好不容易高价约到超性感女神,当然要操到爽为止~的啊

【国产自拍直播】大奶骚浪主播露脸道具抽插爆菊
FC2

FC2-PPV-2994642 【FC2拍摄】出场!业馀女大学生 [限定] Rena-chan, 20 岁 用配套的应用程序来挑选喜欢去健身房的女大学生!在从健身房回家的路上约会并在酒店进行肌肉训练时的肉压性交! !!
FC2-PPV-2807182 [哈林3P 2名女性] 春菜&露娜★2位H罩杯巨乳色情少女举办“哈林3P会”! W漂亮的屁股和屁股工作W腿和腿工作W Jubofera“顶级姿势的女人”和臀部摆动等......充满色情[特殊FC2-PPV-2807182

FC2-PPV-4219037 **pp*钟秀
FC2-PPV-3299415 【3p/体射】双重强迫性阴道射精喂养单身已婚妇女哈雷戴维森著名摩托车杂志模特。酷似裸体体验,肯定心动

FC2-PPV-4473531 19岁,绝对漂亮!回矿洞根本就是浪费时间! 3.中出19岁美女友人“贴身拍摄”433人单独鼓掌
FC2-PPV-4757015 #YoungWife“掉进洞里”老男人的疯狂鸡巴让她全身痉挛,疯狂射精
FC2-PPV-4605250 990pt直到2/2 ♡第一次拍摄*大规模潮水泛滥! ?
FC2-PPV-2421403 [美巨乳人妻] 菜菜子“Part 1”★ 怎么会遇到这么美人妻超美巨乳!用手指责备大量女性射精。在喉咙后部吹气♪一边揉著皮肤白皙的超美丽巨乳,一边用枪刺和他妈的卷起来! 【附赠特别礼物】

FC2-PPV-4470472 新宿很温柔。 *未解决的审查/阴路径测试。

FC2-PPV-1604601 980日元!我在哪里找到了这个限时限次数参加顽皮写真的素人(第一人称)♪ 是个干净利落的类型,但她太敏感了,会发出“哦!哇!”的声音♪神户女孩,20 岁JD2 Yume- chan 第1 章
FC2-PPV-4635962 Mugi(18岁),155cm,46kg,可爱,胸部小。这是一段从不同角度展示她被手指插入、脸部被舔、被吮吸的整个过程的视频,让她气得浑身颤抖。
FC2-PPV-3741510 【个人节拍/斗篷制作曲】意外、失落、当下的日常生活与思绪,幸福成熟妻儿完整版
过膝袜

外围女神猎杀者『91斯文禽兽』 真实约炮长腿御姐 爆裂黑丝 老公不要停

丝袜美腿打飞机专用

过膝袜FC2PPV2770957 白晢巨乳妹子表情很迷離 被中出內射[Part1]

过膝袜「挑戰百人斬jimmybiiig」狂操童顏巨乳小女僕 還帶她出露台啪啪格外刺激

过膝袜FC2PPV2972348 可愛正妹藝能人兼職被小哥內射白虎穴 可愛呻吟害羞迷樣很迷人

过膝袜可愛狐狸巫女菊花小穴開發

过膝袜FSOG013 神樂七奈的愉悅性愛

过膝袜嫩嫩妹子粉色情人女上體位抽插 鲜嫩白虎蜜穴夾擊肉棒

女友又发骚了,露脸性感的奶子和逼逼,真假鸡巴轮着玩呢,表情好骚房间各处多体位玩弄,浪叫呻吟不止精彩.

过膝袜FSOG026 cola醬的性福生活

TMW044 用小穴帮哥哥加油 操完我一定用功读书 #中国AV #中国 #剧情 #学生 #过膝袜 #天美传媒 #夜夜

网红美少女柚子猫魅惑新作-黑丝
Cosplay

吸精少女京鱼儿1

极品纹身妹子主播掰开粉嫩bb自拍诱惑~

露脸洗澡时的吮吸颜射完整版.

巨乳少女抠嫩逼太舒服直接喷潮!把床单都弄湿了~
好身材人妻给老公戴绿帽,与小哥哥无套暴力抽插浪穴绝顶高潮!的啊

角色扮演「極品COSPLAY水果貓」麻衣學姐的表白

#直播 蜜桃臀腰细胸大新人妹子情侣居家啪啪

性感的人妻 诱人情趣内衣 骑乘做爱-Yuri

闺蜜实施勾引计划-旗袍下的诱惑的。
SWAG弥豆子-与炭治郎私夜生活-鬼灭之刃

性感晴妹妹

粉色头发卡哇伊眼镜萌妹子啪啪
Gachinco

GACHIG241 Sae-Separate issue Mankore 129-

GACHI1108 娜美顽皮的日常 117-

GACHIP352 未来单独发行 Magiona 129-

GACHI1071 Ria-M 女志愿者 13-

GACHIP342 早苗-单独发行 Magiona 122-

GACHI1107 佳能-业馀生活拍摄档案185-

GACHI736 南业馀生活拍摄文件 109-

GACHI989 葵-业馀生活拍摄档案156-

GACHI1070 洋子实录 Gachi 采访 122-
GACHI1119 Ayaka-学校天 48-

GACHI1106 美实实录 Gachi 采访 137-

GACHI1064 Yumi-实录 Gachi 采访 120-
天美传媒

TMW220 天美传媒 情侣爱抚露馅服装店被迫肉偿 林嫣(茶理)

TMW215 天美传媒 骚货人妻背德SEX 花花

TM-0165 王小妮.妈妈的性奴之路.性感少妇被儿子和同学调教成性奴

TMW226 天美传媒 万圣酒吧女上位 夏晴子

天美传媒&麻豆传媒联合出品 TM0038 美艳姐姐亲身诊治早泄弟弟 白晶晶

TM-0155 李思思.不穿内衣的大学生

天美傳媒 TMW101 潛入AV攝影現場超真實做愛過程 尤莉

天美传媒 TMW-207 重机女神美鲍肉偿弥补过错

天美傳媒 TMP0032 約炮大神的秘籍 沈湘妮(湘湘)

TM-0043 犯错的女教师

天美传媒 TMBC033 大考末到时的大屌味道 斑斑

天美傳媒 TMW153 怎麽可以吃兔兔只能床上玩兔兔 黎兒
东京热

N1168 起起落落立即退休阴道暨射击生活
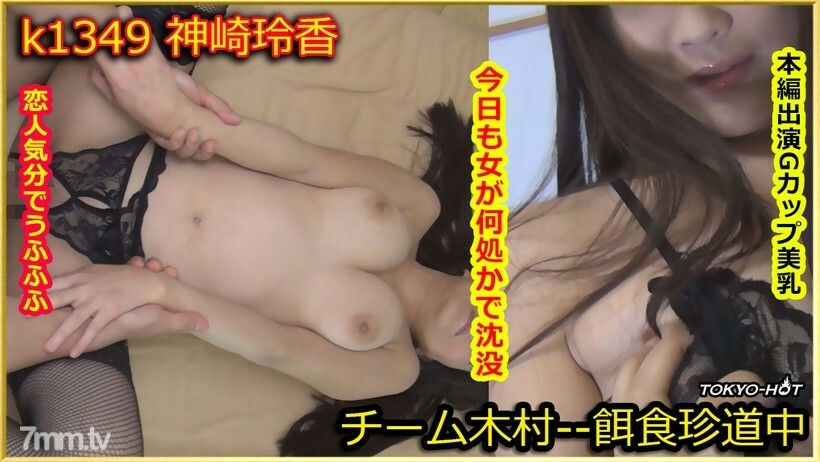
K1349 猎物女——神崎玲香

JPGC0042 【自拍发视频】来南帕的屁股光gal感觉跟男朋友的造型不一样(带马赛克)

N1263 TOKYO HOT 强烈性高潮地狱女学生特别版第1部分
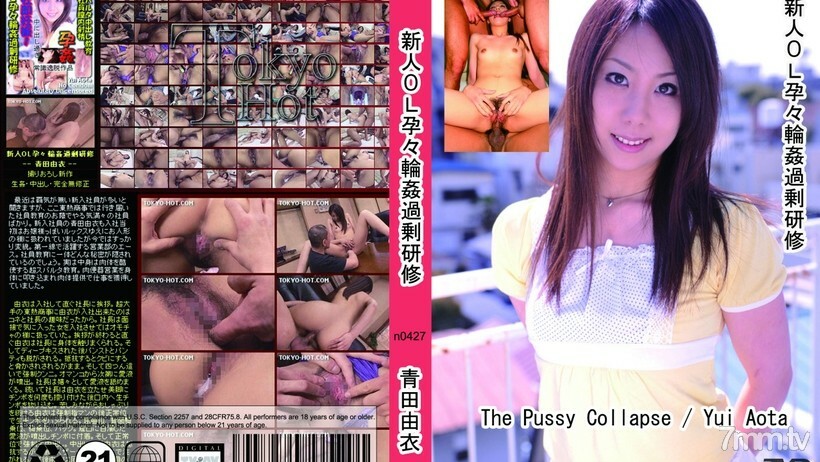
N0427 Rookie OL Conceived Wheel Can Overtraining

KB1584 Team Kimura Extra Edition --福田莉奈
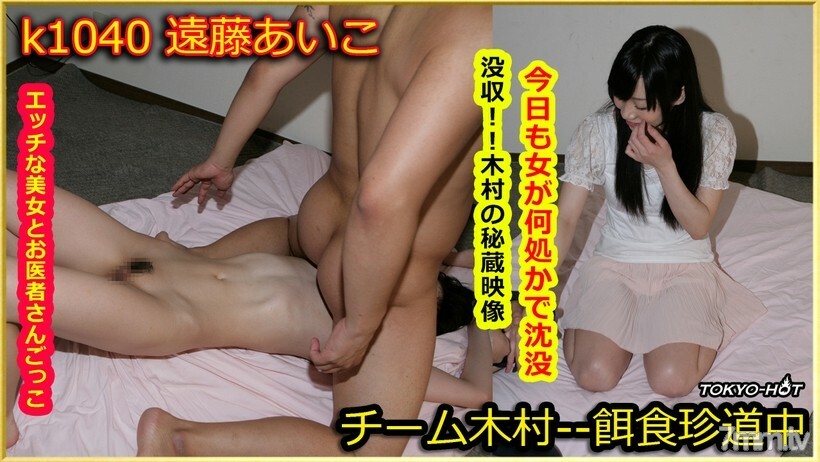
K1040 猎物女——远藤爱子
JPGC0118 三站!奇闻趣事和口交和手淫等......都是完全的业馀爱好者!

RB025 隐藏的相机与大山雀已婚女人赛夫勒
N0730 Tiara Ayase TOKYO HOT 42 葬礼

SKY-146 天空天使 Vol.98:Emiri Senoo

SKY-168 天空天使 Vol.113 佐佐木玲
黑料事件

《一家三口乱伦》重磅爆料!妈妈教女儿如何伺候爸爸,母女俩一起被干,女儿好嫩

『惊天大瓜』台湾知名富豪和儿媳乱伦还生下孩子
2025年10月最新,重磅核弹,上海戏剧学院毕业,短剧演员,【小小松菜莱】。露脸露点,拍过陈翔六点半,大尺度

【绿帽大瓜】中学老师王娜出轨偷情泄露,当当网高级教师,事发之前是与公司高管偷情自拍眼镜男是原配老公,全网同情 (2)

爆料校园春色:老师大霹雳倒立操女学生!引发校园风波

【黑料事件】南京艺术学院胡雅婷外表清纯可爱,被学生会渣学长破处视频流出

最新爆料广西小伙女友出轨老头性爱打视频羞辱一怒之下偷偷解锁女友手机曝光私密照老头有低保,老头啥都好

第193弹 霸凌几时休苏州校园暴力事件扒光衣服暴力羞辱,对白清晰!

【某某门事件】第268弹 中信建投东北项目经理王德清跟实习生工地车震!母狗本色内射淫穴精液流出!

最新长春厦航空姐门被富二代调教成女奴 女主刚结婚3个月 捆绑口塞各种玩具调教 完美露脸爆网疯传

【网曝门事件】极品韩国一线、二线明星、嫩模车模大尺度性感私拍流出女明星美臀
极品警花张津瑜和吕总啪啪不雅视频高清版 (4)
女同系列

重磅【童话故事女孩】最屌喷射女王 浑身雪白粉嫩 淫水滋闺蜜一脸 百合 (3)

金枪不倒淫荡姐妹花全程露脸大秀直播,穿上假鸡巴内裤草起逼来比男人都猛,各种体位抽插蹂躏边亲边草好骚啊

初下海少女姐妹花!女仆装性感诱惑!互摸调情,吊带黑丝袜,摆弄各种姿势,骑在身上摆臀,一起自摸扣骚穴

极品姐妹花淫靡大秀,两根阳具玩的真嗨,淫叫连连,美女同步潮吹喷泉,榨干你的精液

【全裸露點無遮】掉掉vs蒂蒂の變態PARTY!!! 雙頭龍の插入!!! 影片長36分鐘!!! 聖誕節特別企劃!!!

俩一起互相舔吸服务阴道搞到高潮湿湿
雙女開花,女人最懂女人啊,舌頭伸進去攪動,看看我倆誰的比較粉啊
豐滿70後調教女王的00後小母狗,讓小妹舔老茓,像個母狗壹樣舔,老茓嫩茓對比展示

同性恋3姐妹全程露脸大秀直播,互相抠弄骚穴,吃奶舔逼淫声荡语互动撩骚听指挥,道具抽插玩菊花高潮喷水
娃娃脸童颜大奶妹妹,带闺蜜双女诱惑,脱光光一起看穴,假屌骑乘位,翘起屁股特写,上下摆弄欲罢不能

颜值姐妹花双女诱惑!白嫩美乳骚穴互插!张开双腿震动棒猛捅,闭眼享受娇喘呻吟,搞的骚穴湿哒哒

台湾淫荡小母狗!双女激情诱惑!圣诞情趣装,扭腰摆臀,互舔骚逼一脸淫骚,猛扣骚穴流白浆
中字无码

明星颜值女神小骚货2,越看越带劲,看起来挺文静,床上骚出水,一插进来秒边小荡妇!超级反差
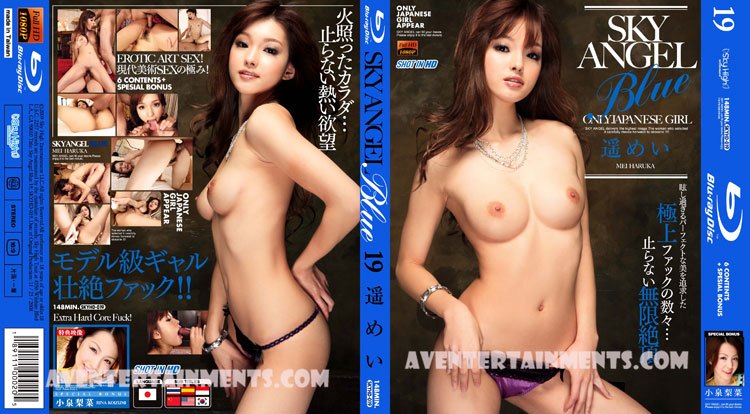
SKYHD-019 スカイエンジェル ブルー Vol.19.遥めい

061315-899 侵犯欲求不滿的巨乳人妻鈴木里美半推半就中出成功
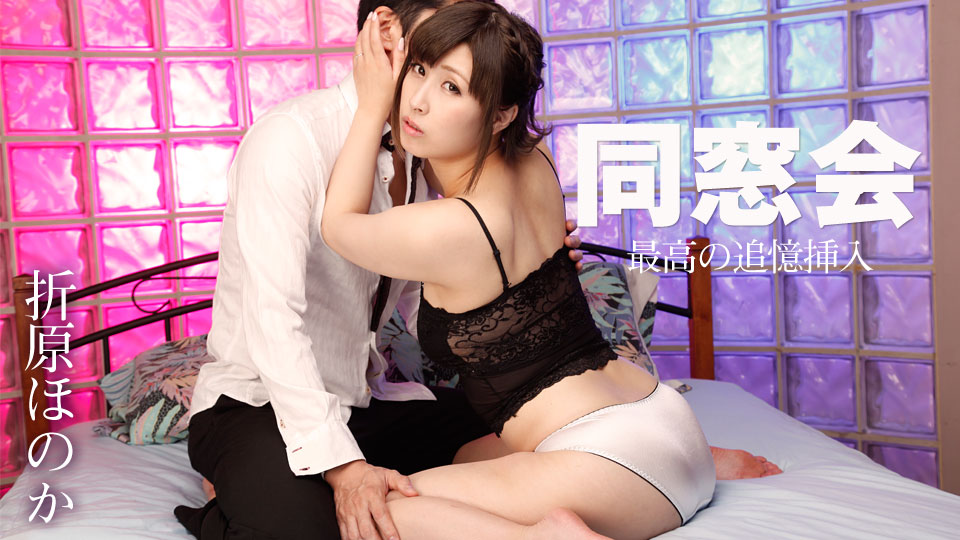
040219-888 校友会~最佳回忆插入~织原穗香

天然むすめ 100618_01 素人初撮り!わたしヤリマンです 根元えりな
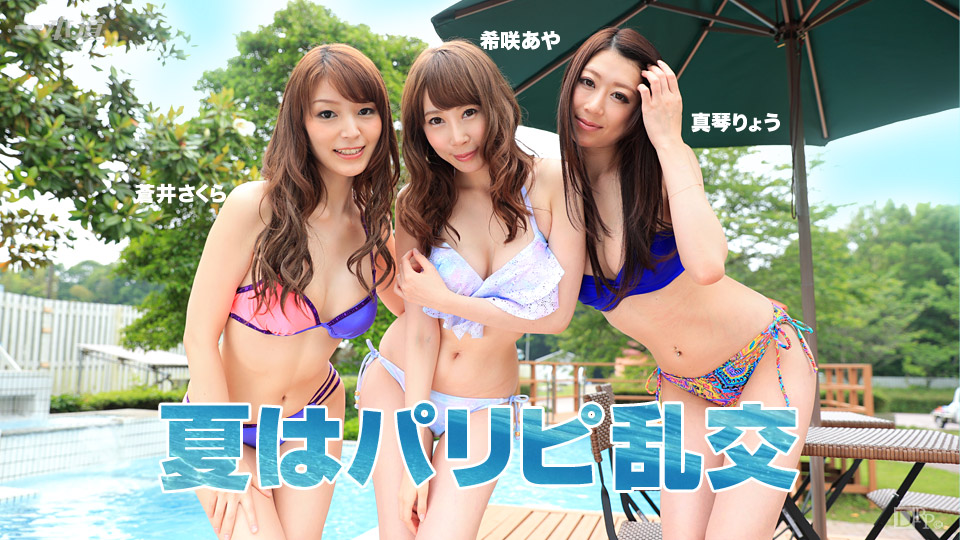
080416-353 夏日大乱交
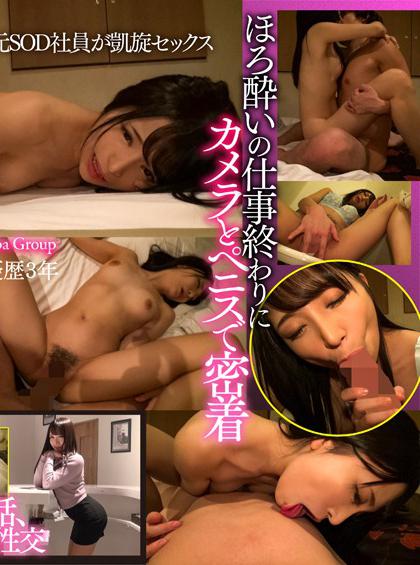
STKO-005 SOD酒場ドキュメント ほろ酔いキカタン送迎ナンパ 加藤ももかの場合

111315-189 迷恋肉欲的OL美少妇
MDB969五星级的超级乘骑位性爱特别版

MKD-S91 無碼中文字幕 KIRARI 91 人妻不倫溫泉 : 水野葵
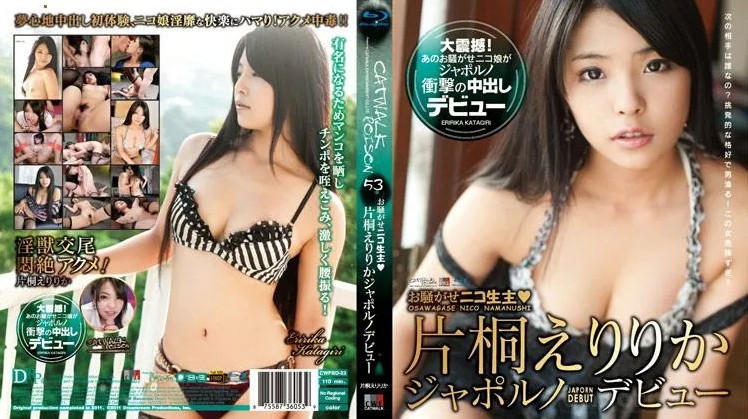
CWPBD-53 キャットウォーク ポイズン 53 : 片桐えりりか

HEY-107 小仓小姐的特别服务:由纪诚
女同性恋

同系列】我的心理辅导师爱上了我。

人妖渴望肉棒

的欣赏漂亮妞裸体互相的调情色情服务。

又是一场饥饿的按摩.

上京!ボンビーガール 気持ち良ければイイ??覚悟で2連続中出し 生交尾2回戦 ゆきなchan(仮)mp4

【ASMR】感性天使與惡魔互摸呻吟

国)专科门诊小姐库克伯医生(1993)。

第三性的超后宫逆3P

郊外旅行.

丰满肉弹蕾丝边

坚韧的公鸡.

被专业肉棒干到爽翻天!喜欢做爱的淫荡美人姐姐两人组。高潮、中出、女同性爱乱交! 未知演员 RKI_676
主播视讯

SP站喷水小天后【Hahaha_ha2】极品女神录播 绝世尤物性感逆天颜值女神09(6V)
绝顶高颜值妈生脸美少女主播「sisi」超骚长舌舔假鸡巴,跳蛋自慰塞黑丝里沾满全白浆

乖巧的女友露脸跟小哥激情啪啪大秀发骚,口交大鸡巴活好棒,粉嫩骚穴还没毛掰开给狼友看特写无套爆草爆菊花

颜值萌妹【猫猫在校】假屌抽插调教自慰,深喉日嘴抽奶干穴 2(6V)

高颜值爆乳妹子浴室洗澡自摸 穿上情趣装露奶诱惑掰开逼逼特写非常诱人 很是诱惑喜欢不要错过

校花下海【邪恶双马尾】双马尾校花下海直播 超高颜值粉嫩小穴3 (2)

高颜值风韵成熟御姐【佳瑶】巨乳嫩鲍鱼,真是巨粉,呻吟又好听,哥哥们用香蕉插我好吗 淫语挑逗!

长得像鞠婧祎的娇小妩媚大眼女主播「Qiu_Kiyomi」长腿蕾丝油黑丝袜、乳夹艳舞,跳蛋、假屌塞逼

大二极品颜值女神!放假下海收费房!外表甜美文静,脱光光自摸,多毛骚逼扒开,近距离特写

人气女神【Kiki-2025】12月3日-12月10日 女神强势回归!护士紫色丝袜、口爆,拉珠 边喷边搅3(6V)
超淫日系母狗【hikarun】被主人各种拘束 乱玩骚穴菊花 淫语潮吹痉挛 6(4V)
E罩杯巨乳极品尤物!新人下海收费房!一对豪乳黑丝美腿,振动棒插肥穴,翘起肥臀极度诱惑
野外露出
进入厕所尿尿合集
2600网约外围女神肤白貌美翘臀美乳人见人爱的尤物
毛茸茸的女孩子在跳舞

《上错车》上错轿车找对郎,因祸得福,捡到极品美女玩极限姿势抽插做爱!

户外车震达人神田咏美3

第一女探花和2位中年老板约炮,前后的洞都被填满

淫乱女导游 电车上的安抚计划

3000元足浴会所撩了个极品女技师

短发10级清纯甜美耐看小美眉,居然敢在空旷的公园里露出大奶子_3.
ED Mosaic 暗黑邱比特 随机搭讪情侣与陌生男子做爱.

甜味弥漫萌白酱之黑丝袜03

吊带白裙高端外围舔屌口交展示口活掰穴正入抽插猛操扶着屁股一下下撞击
传媒出品

【桃视频】媚惑按摩师巨乳帮你全身按摩 RR-007

【P站凌薇】女神的欲望解放 MD-0194

TM0007 朋友妻可以骑 -罗瑾萱

【桃视频】女神的秘密(下)

XK8131 偷窺之校園性暴力的秘密 清純學生妹凌辱後的報復

【桃视频】真实春药 肛交解禁 淫乱做爱实录

PMX065 爆乳女學生破處幻想 玩弄下體爽到顫抖喘息

LB023 雙子座命運第一期 趣味十足的淫亂懲罰

【桃视频】妹夫强袭
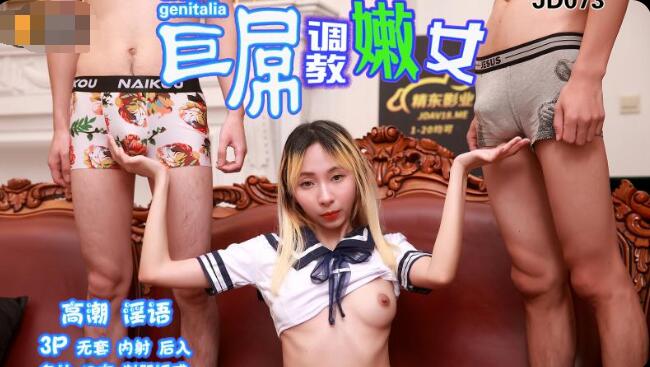
精东影业JD073巨屌调教嫩女

【桃视频】密室内射无限强制中出 PH-048

精东影业JD081吸精九尾狐家族
素人自拍
19岁的大奶女学生为了赚外快和大叔在酒店做爱!的啊

【粉嫩少女】 001

大学同学出去开房啪啪半天射不出来!

素人自拍元氣少女玩弄自己的小籠包等待男友插入

街头素人搭讪2 洛雪.

极品人妻技师买钟回酒店无套内射爽歪歪

文轩原版 00后外围小姐姐的!

小美女jk小短裙装露美腿白丝

难得一间极品女优下海被内射

欢迎主人疯狂蹂躏内射

淫蕩家政婦做家事時自慰想被操 兩名猛男3P連續狂操淫水直流菊花[1]
多角度多姿势爆操双马尾洛丽塔女友喵喵落地窗翘美臀无套后入吊椅怼操内射.
日本片商

憧れの先輩が犯●れてボロボロで助けを求めてきたので…欲情して追姦中出ししてしまったオレ。 琴音華
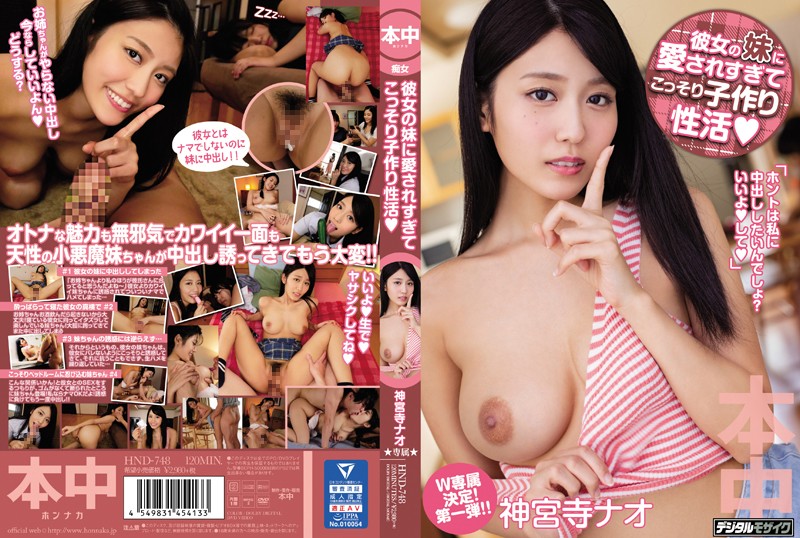
HND-748 彼女の妹に愛されすぎてこっそり子作り性活 神宮寺ナオ

任意支配顺从的女佣的!
学生的第一次黑色紧身衣跨脚性爱体验!
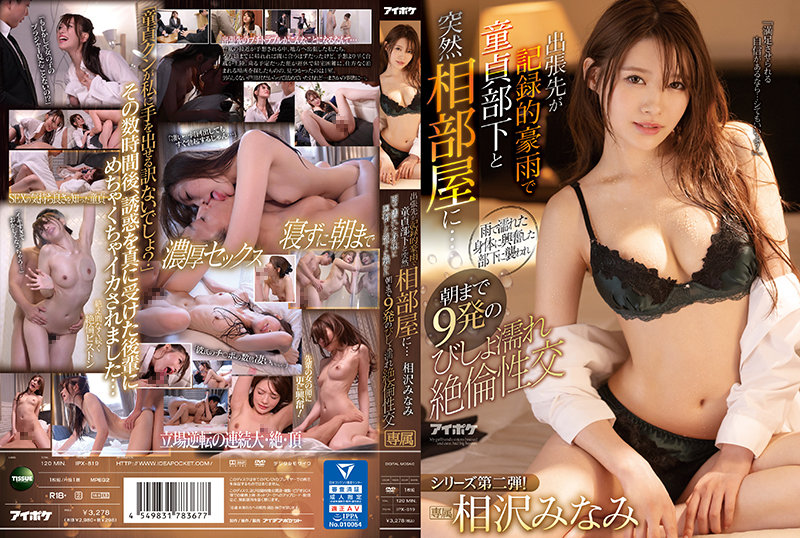
出差處的破紀錄暴雨 和處男部下只好共處一室... 被雨打濕的身體 性興奮的部下向我襲來 濕潤絕倫性交 相澤南
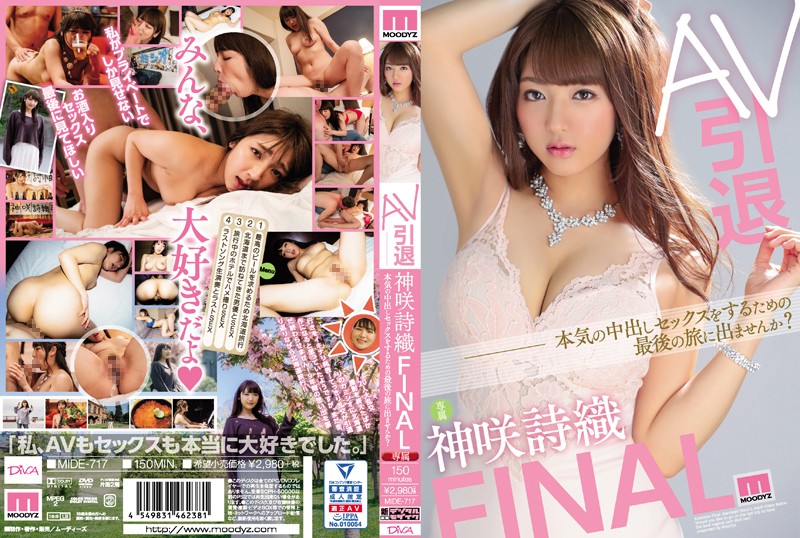
MIDE-717-CN AV引退 神咲詩織FINAL 本気の中出しセックスをするための最後の旅に出ませんか
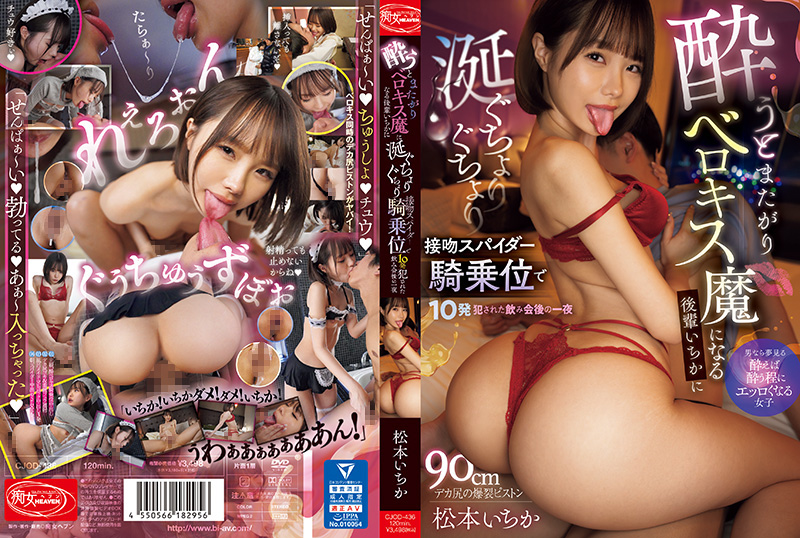
酒会结束后的一个晚上,醉酒后跨坐在自己身上并成为舌吻高手的初中生 Ichika,以接 松本一香 CJOD_436
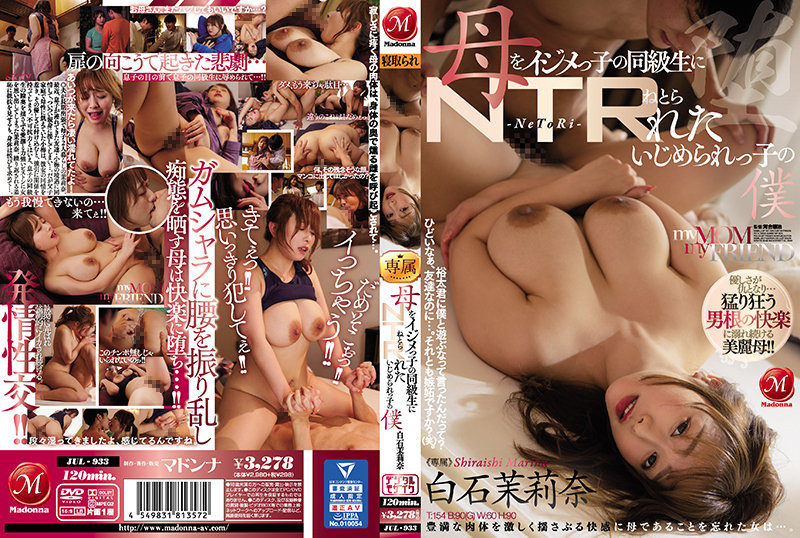
被欺負兒子的同學NTR 白石茉莉奈
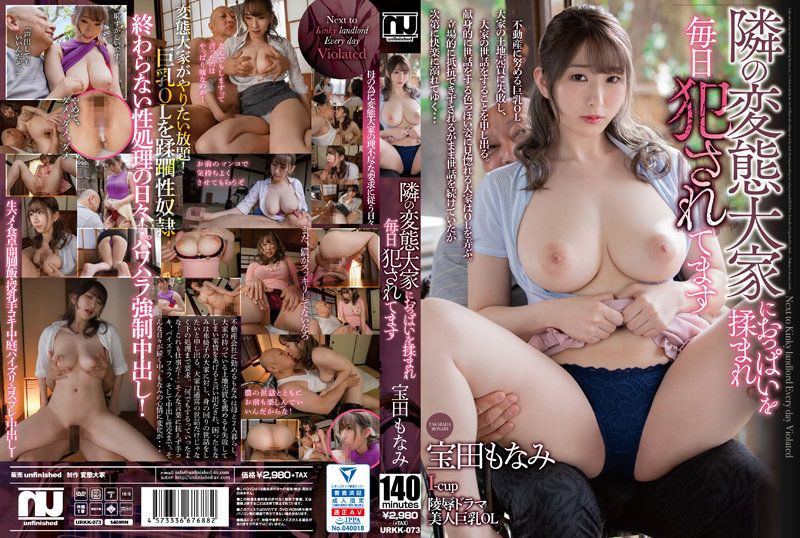
被隔壁的变态房东每天揉捏胸部 宝田萌奈美 URKK-073-C
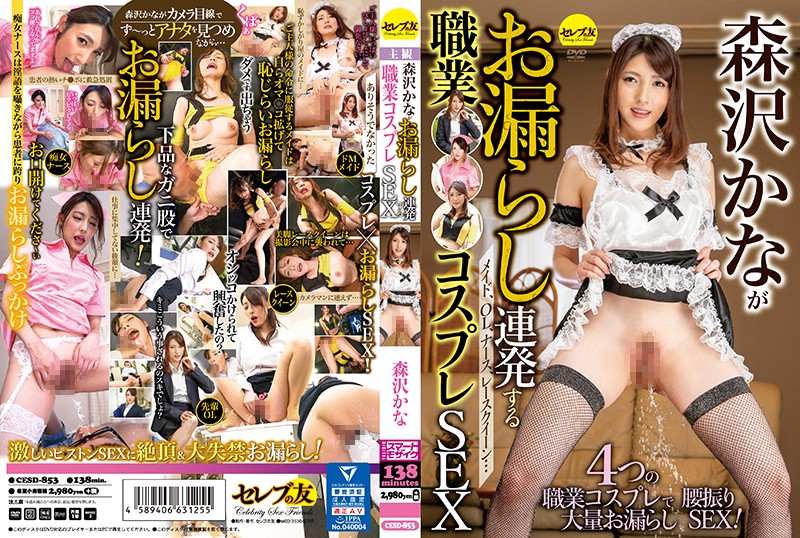
CESD853森沢かながお漏らし連発する職業コスプレSEX.
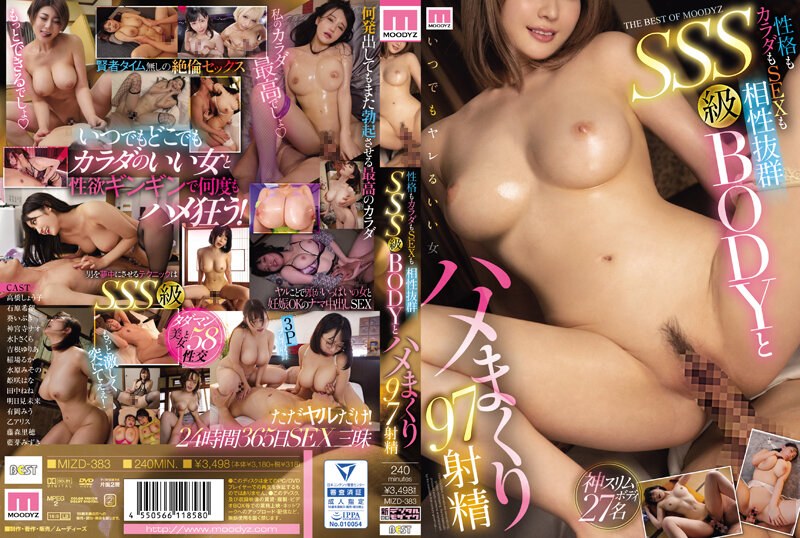
性格もカラダもSEXも相性抜群SSS級BODYとハメまくり97射精...!
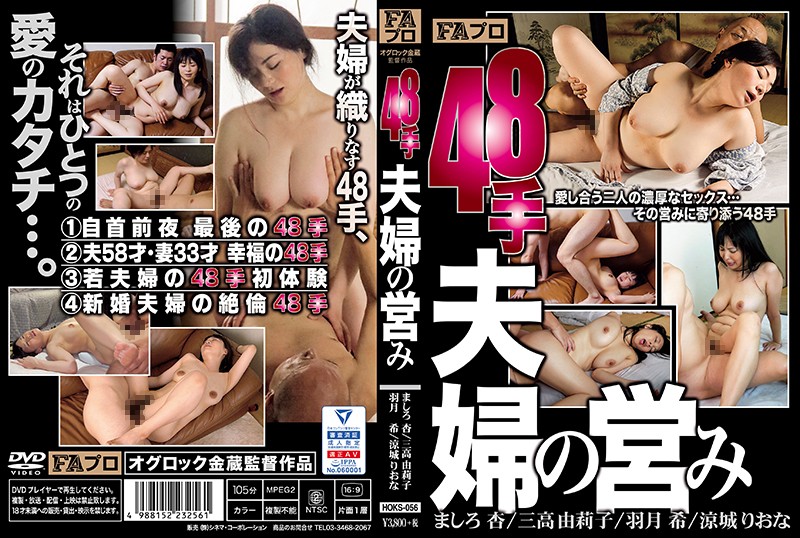
HOKS-056 48手 夫婦の営み
闷骚护士
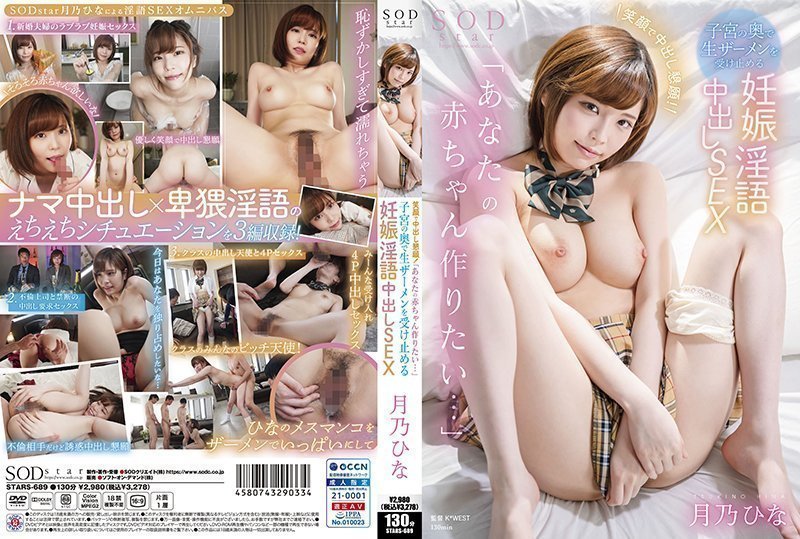
9 笑顔で中出し懇願!「あなたの赤ちゃん作りたい…」子宮の奥で生ザーメンを受け止める妊娠淫語中出

东京浣肠 将素人妹子的肛门搞坏阅覧注意的不道德作品! vol.03

PKPD-259 中出し部屋呑みドキュメント 永遠の彼女にしたい女優NO1·紺野ひかるちゃん
っちも好きで選べない!可愛すぎる2人が俺のチ○コを奪い合うヤリまくり性活!!紺野光波多野結衣。。
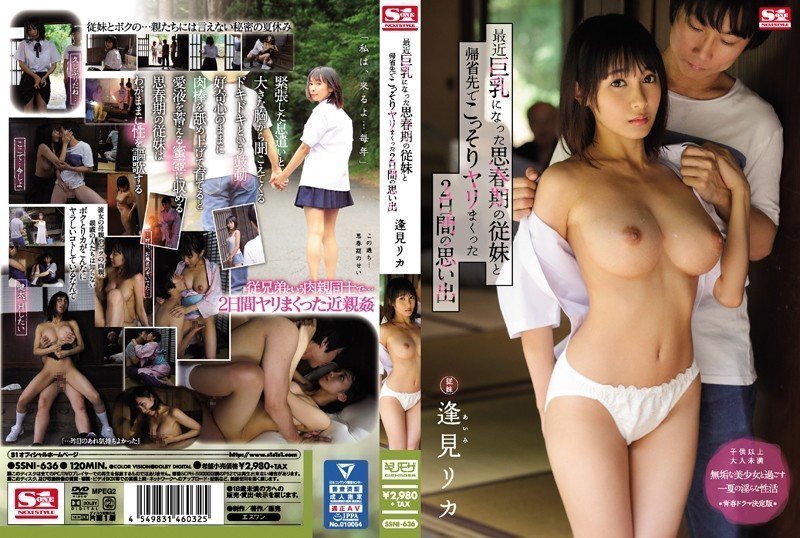
兩天的回憶與我剛長大的青春期姐姐在家裡秘密傳出

ABP-797 绝对铁板画面 15 完全第一人称视角!!!水嶋那奈赠送的十分色情的4个画面
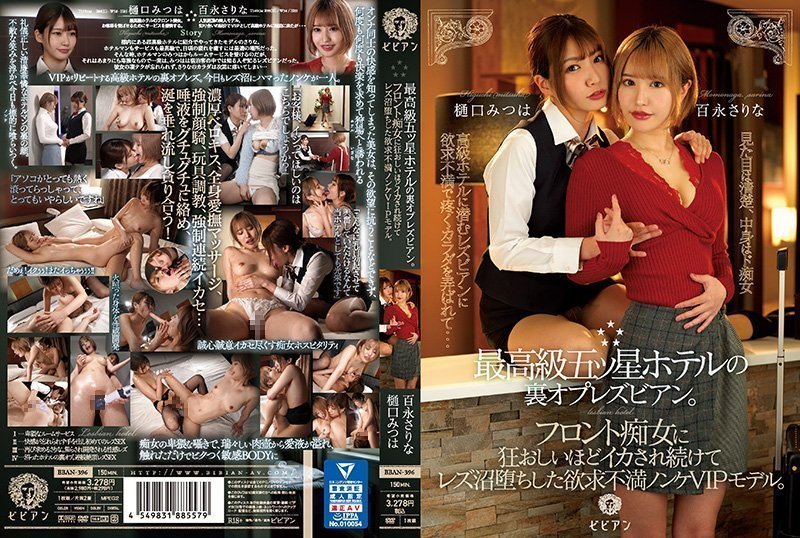
一名在顶级五星级酒店幕后工作的女同性恋。黑川纱里奈,樋口三叶。
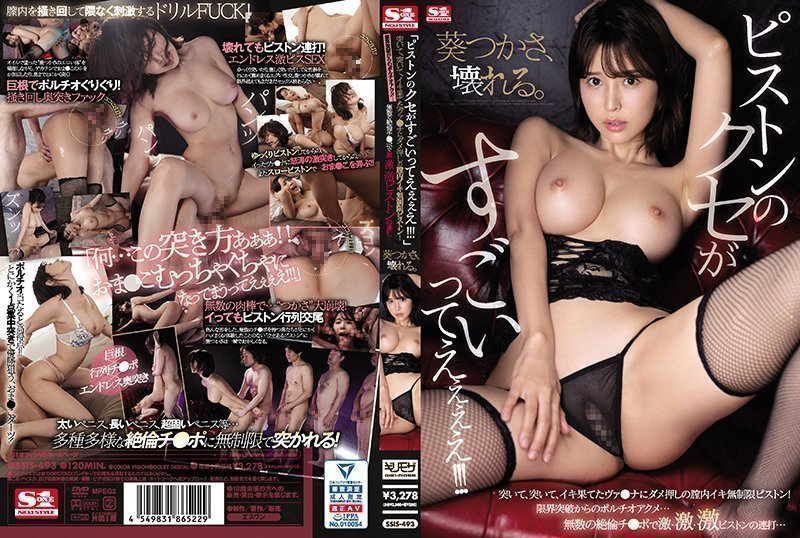
SIS493【好強烈的活塞運動!】突入高潮的盡頭仍然是無限制活塞!葵司。。
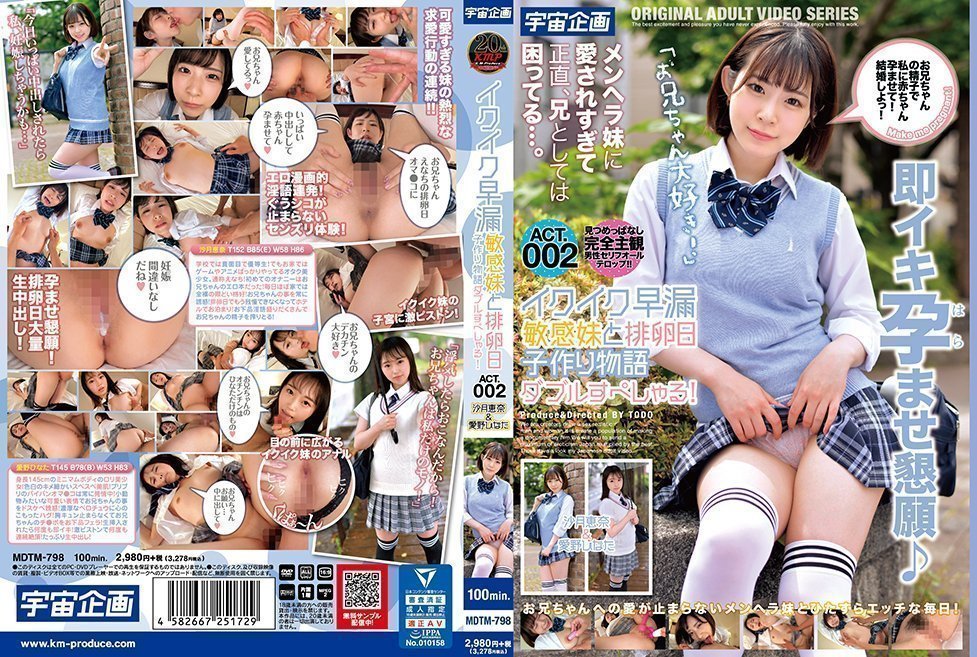
和早漏敏感妹妹的排卵日造人 沙月惠奈 沙月恵奈,爱野ひなた MDTM-798-C.
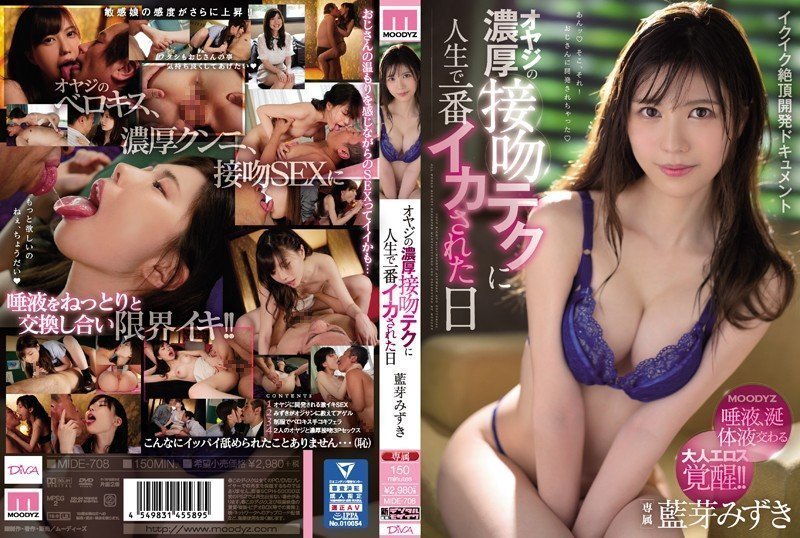
MIDE708CN 被大叔濃厚接吻技巧人生最高潮的日子 藍芽水月.
萝莉萌妹冷冻热狗也能插
上班的时候女同事发情了的!
恋腿狂魔
SETM039カップル○襲催○ガスNTR記録映像集3組184分
日本-彼女系酷カン嬲カン汁カン地獄

黑丝美腿闺蜜姐妹花

VRTM457「もうケンカやめなさい」近亲相姦爱を育む兄妹が喧哗を装い亲に隠れて喘ぎ声を押し杀しながら超危険な中出しSうEX.
个人训练NTR~个性最差但做爱最赞的垃圾前男友,对他的力量系-根尾朱里。.
无法对老公说出口…我被公公持续侵犯…!

在空无一人的午休办公室里年轻儿时玩伴居然拜托做爱!!
お兄ちゃんの大切なリアルドールを壊しちゃった妹。大ピンチ!もうこうなったら私がドールになりきり的!
失禁拷问田径部王牌抖Mう觉醒.
最棒的情人、最棒的内射 海老咲あお YUJ028
MIDV680デートも楽しいけどやっぱりナマでしたい制服デートして、ホテルで変態中出しエッチしたい4シ
MILK-174 予約半年待ちの神メンエス嬢 生ハメ中出しOKの裏オプ行為を完全盗撮 スタイル·顔·サービスSS
剧情介绍

剧情介绍XKYP001 約炮性感美女是我的野蠻客戶

调教人妻小母狗 皮鞭肛塞口交

清纯的小表妹不为人知的另一面.

约炮肉丝高跟制服小护士太激烈制服都被扯烂

身材极品的人妻嫩模展示超高难度性爱技巧

美熟女少妇你们不要着急嘛弄得我都不会了你能做多久呀你喜欢我这种类型吗喜欢比较成熟的骑乘大叫春.

【无情的屌】,23岁,165cm,四川小美女,重金酒店来一发,肤白貌美乖巧听话,一对美乳好评

【网曝门事件】东方国际气质美女经理酒醉被上司带宾馆各种玩操自拍流出 原版私拍146P 高清1080P原版无水印的!

【水果派】小恶魔系姐姐-欲练神宫,必先破处!1

牛逼小哥8000块找少女破处一男三女一起玩的啊

人小鬼大-舒淇演

-xuesheng-【学生妹】小学妹为了钱放学后就出去买被壮男叫到酒店里多种姿势狠操她的嫩
美女写真
秀人顶级网红『尤妮丝』风骚白领下班超诱惑 透明骚丁 极品肉臀必冲 受不了必须射爆 (2)
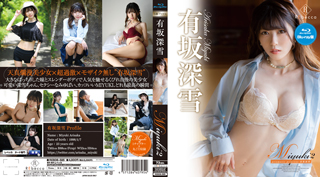
REBDB-585 Miyuki2 prismatic princess・有坂深雪 ブルーレイエディション
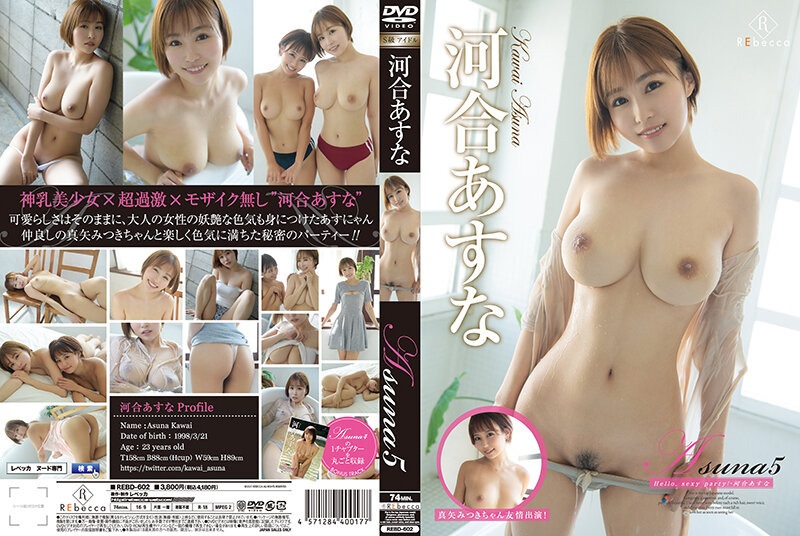
REBD-602 Asuna5 Hello, sexy party!・河合あすな
Neesi boob 椅子上的爆乳钢琴教师
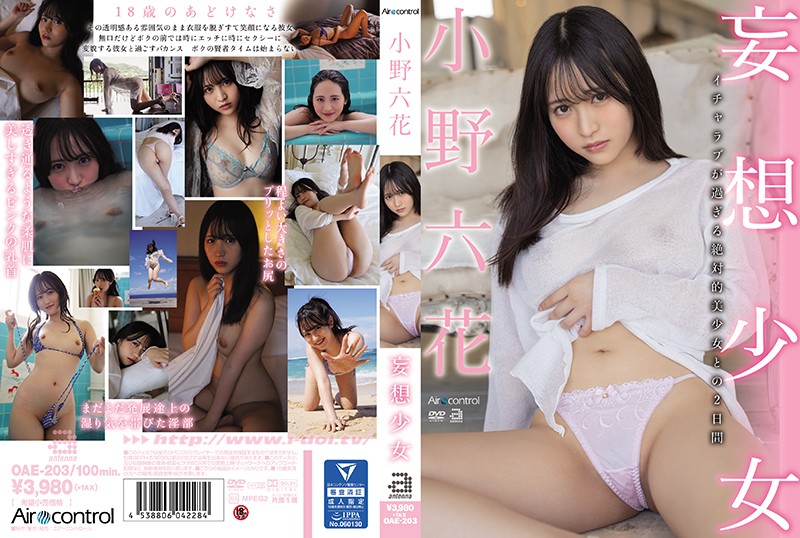
OAE-203 妄想少女 小野六花

REBD-502 古川いおり-南海綠洲

高颜秀人网女神【小蛮妖】最新12月新作,性感婚纱外拍,钻石内裤勒逼掰逼,模拟口交
火爆模特逆天超美巨乳女神【黎菲儿】美少女的居家色诱晃动的巨乳让人血脉喷张
秀人极品嫩模『田冰冰』绝版全开大尺度 牛仔裤夹逼首次炸露浪穴 超爆挺乳 超清4K原版

极品Cos爆机少女『喵小吉』三月新作《人类补奸计划》性感明日香的使徒榨汁
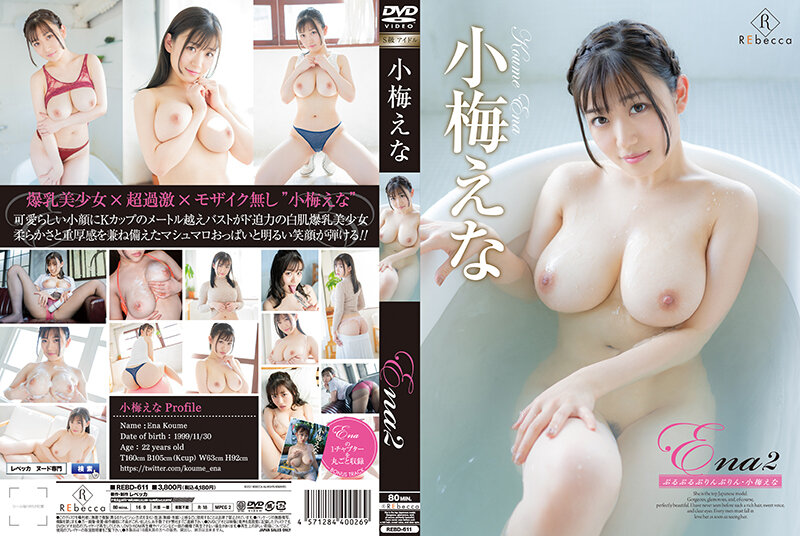
REBD-611 Ena2 ぷるぷるぷりんぷりん・小梅えな
乌克兰超级名模Emily bloom 花花公子写真
10musume
101014-01 Gokkun 首次以女仆的身份出现
MUSUME-091522_01 女人的机制~用性感觉测量无法停止抽搐~
092410-01 给厚脸皮的黑加仑装上马鞍
060617-01 护士喜欢性

041423_01 校服时代
MUSUME-060722_01 如果您向时尚的商务旅行发型展示 AV ! - 高藤一花

120721-01 一个朋友的妹妹偷偷摸摸的故事

MUSUME-042421_01 醉酒后失去自制力的荡妇
072118-01 第一次精子暨吞咽体验

102020-01 我今天没穿内裤上了火车

011822_01 让我们在热带水疗中心玩耍

082020-01 因为是泳装所以会喷出巨大的胸~
同性恋

第一次搞鲜肉

风骚的清晨

第一次被黑人操的经历

趁室友睡着偷偷抽插狂干

沉溺在另一半强力性爱
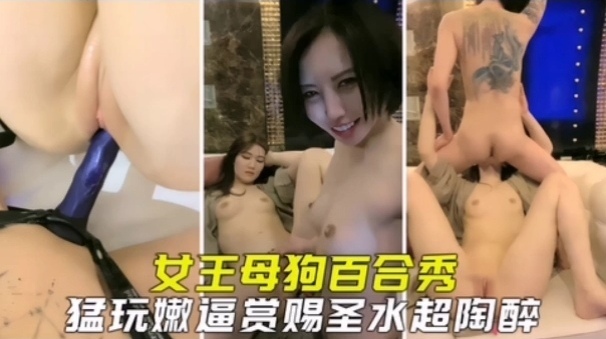
双女百合女王母狗百合秀母狗被肆意玩弄圣水喝的很是陶醉1

充满肉感的蕾丝边情事

颤抖的高潮

爱你自己,但让我更爱你

被虐待狂性恶魔打屁股
爱裸背

黑人好会玩
精东影业

JD-053 妹团之人类高质量女性相亲记

精東影業 JD137 歡樂小醜的性幻想1 昀希

JD-042 我不是赌神

精东影业 最新出品 JD075美丽的儿媳儿子不行就让我这个公公满足你

JD-048 少妇为救老公.色诱王局长.万万没想到被干到高潮

精东影业出品国产AV佳作之『姐姐的爱』寂寞姐姐发骚自慰只好让弟弟的大鸡巴来满足
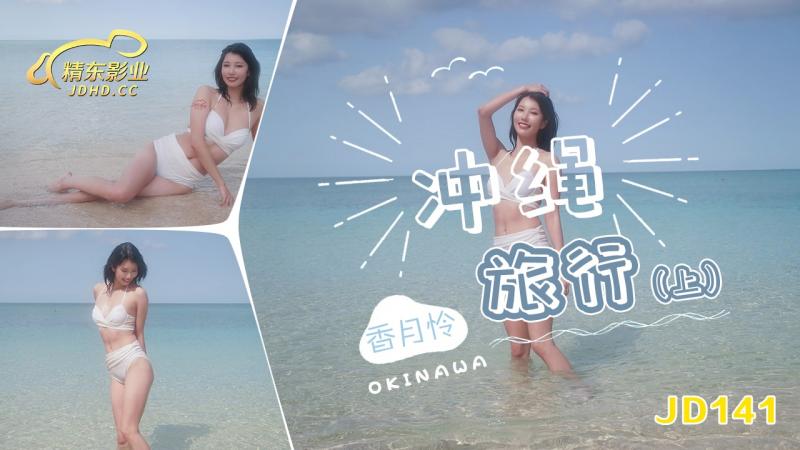
精東影業 JD141 沖繩旅行 上集 香月憐

精東影業 JDKR012 爸爸活 本橋香澄

精東影業 JDBC022 美女空姐求我幫她止癢 李允熙

国产AV新片商精东影业最新出品 JD005 叔叔酒后乱性与侄女乱伦

新时代国产网黄,爱情迷你剧【密友】第一集,国语中文字幕,真刀真Q,推荐

精东影业 JDBC069 情色教授对女学生的生物教学 李薇薇
国产乱伦
第一人称看丝袜表姐骚逼插出白浆丝袜表姐是个骚母狗上演各种制服诱惑表演太精彩了

4K高清街拍偷拍JK学生妹精选合集

性感吊带黑丝制服哥哥快来操我的逼

勾引离异姐姐被连续内射两次

大吊哥约操颜值妹妹酒店做客
高端气质眼镜妹
乱伦嫂子高潮喷水

极品女神自慰喷水哥哥快来干我

19岁极品学生妹水装自慰福利

混血长腿妹妹极度骚气

户外勾搭骚姐妹约帅哥粉丝到户外荒郊野战

极品高中生萝莉学生妹被大哥包养开车在路边车震
主播直播

斯嘉丽巨胸微胖5

直播_金丝眼镜白衬衣,黑丝OL装扮,和猥琐头套男做爱啪啪最后深喉口爆一嘴!

美女落九川说话嗲嗲娇嫩小美女 ,小小年纪这么骚 ,手指扣穴揉搓 ,被舔这里很舒服 ,淫语骚话不断,高潮震出白浆

异国女团呀 骚货双人直播大秀 01

#甜腻小喵_腿模小姐姐振动棒插穴,浴室洗澡湿身诱惑

极品可爱短发巨乳骚妹子自慰 #直播3
AVOVE直播 大神精选 21.01.01‖酒店‖浅蓝包臀裙‖灰丝高跟‖后入内射.
约炮白嫩高中女孩奶子发育的很丰满有点害羞小B操着爽.
宿舍集体淫乱新东方女生宿舍3

#小思思_姐妹花情趣装激情大秀,给逼逼和菊花倒点牛奶给好姐妹舔_01

萨勒的芬妮这么出装可以加攻速暴击吗~.

十个眼镜九个骚还是个小白虎 白虎嫩逼很干净 很紧致 完美筒体 高清720P原版.
糖心Vlog
【雪乳尤物】菲欧娜 - 补习老师的肉穴奖励 肉棒被乳交吸食逗硬了 无毛穴上位插入暖暖包裹 汁液泛滥口爆食精

糖心Vlog 91大神的嫩萝玩物 白虎鲜粉蜜穴榨精劲射 萝莉小奈

超级硬核 芭比女神究极梦幻粉乳 辛尤里 激啪蹂躏情色女王 爆刺肏穴呻吟抖乳 激怼艳臀女神真淫荡

黑猫露娜酱 可爱甜美女仆装反差性交 嫩穴被美妙后入 小表情真是太上头了 吮茎榨射

软萌软萌的妹子 白白嫩嫩 丝丝滑滑的 卡哇伊的不得了 萝莉小公主上身全攻速套装,妹妹超甜

糖心Vlog 美乳女仆的肉体侍奉 小欣奈(萝莉小奈)
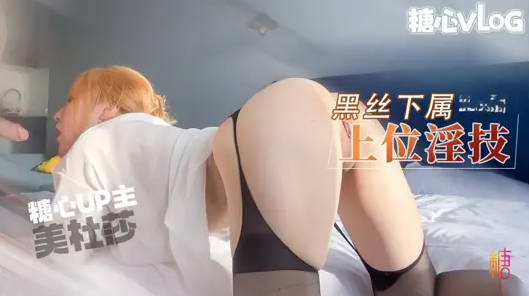
美杜莎 黑丝淫荡莎莎醉酒勾引上司 满眼肉情色欲诱人胴体 温暖蜜穴主动含茎 超淫榨精内射

极品白虎名器01年在校大学生 米娜学姐 清纯篮球宝贝剧情版 幻想阳具速插嫩穴爆浆潮喷

塔塔 黑丝OL秘书气质直接爆表 美若天仙看脸直接硬 被肏的抚媚表情更绝 犹如茎入其穴 先撸十发打底

情深叉喔-我的色播妹妹18岁妹妹主动献身求保密被中出

最新精致容颜网红小美女 早川井子 放学回家看到哥哥手淫 妹妹粉嫩白虎主动迎上 沦为哥哥的性爱玩物

糖心Vlog 补习老师的肉体教学小娇姐姐
国产色情

高颜值长相清秀妹子户外车震双人啪啪大秀非常淫荡猛吃JJ再开始抽插大力猛操很是诱惑不要错过

颜值妹子和鲜肉男友啪啪无套打桩表情一脸享受11。

SWAG爆乳黎儿-淫荡人妻生育后主动向月子中心寻房医师寻欢的。

无情的屌丶探花大圈极品尤物

骚货母狗被两大哥狂插 (1)

风骚的足浴女技师

风骚小姨子活好不粘人【park1】全程露脸给大哥来个莞式全套,口交乳交毒龙啥都会,大鸡巴无套爆草直接内射还舔干净

青涩超嫩18萝莉嫩妹被炮友狂操,慢慢脱光光小小奶子,舔屌口交活很生疏,骑乘抽插特写扛起双腿猛操

小阿水 0

黑丝高跟露脸女模特让大哥抱着掰开骚穴给狼友看真骚,口交大鸡巴让大哥在床上各种抽插爆草,对着镜头浪叫
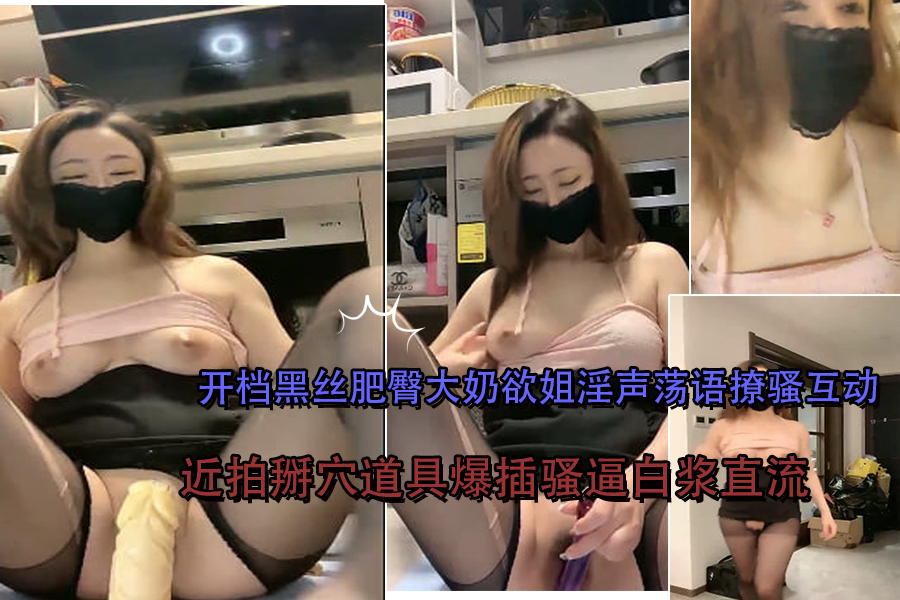
开档黑丝肥臀大奶欲姐淫声荡语撩骚互动近拍掰穴道具爆插骚逼白浆直流

#国产AV 麻豆传媒 麻豆US LAA0062 私人购物者❤️
日本有码
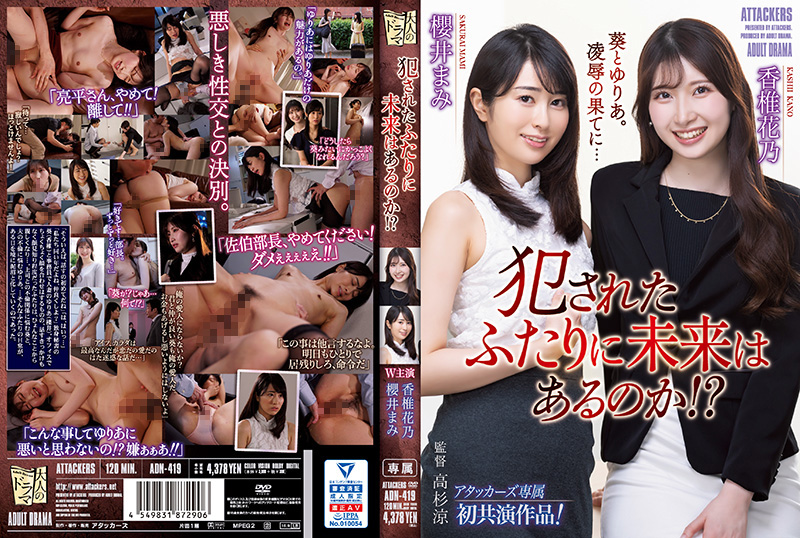
被侵犯的两人还有未来吗? 香椎花乃,樱井麻美 ADN-419-C

Paco111619_207一ノ瀬兰変态熟女の裸エプロン姿は激烈勃起もの!
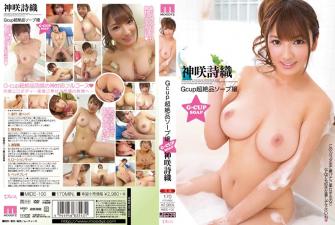
Gcup超絶品ソープ嬢 神咲诗织
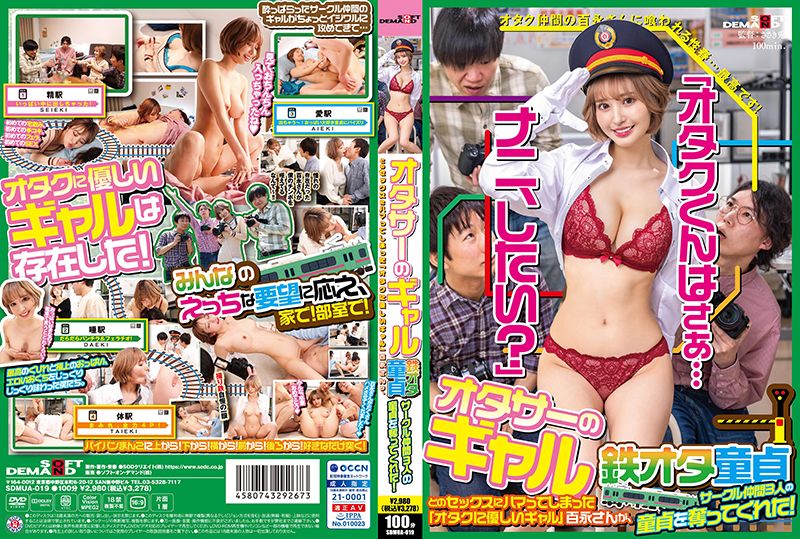
社团里的辣妹 沉溺于和处男身的宅男SEX 百永纱里奈 黑川纱里奈 SDMUA-019-C.

9 発射後も全然プレイ続行絶対連続搾精ソープ 富永葵
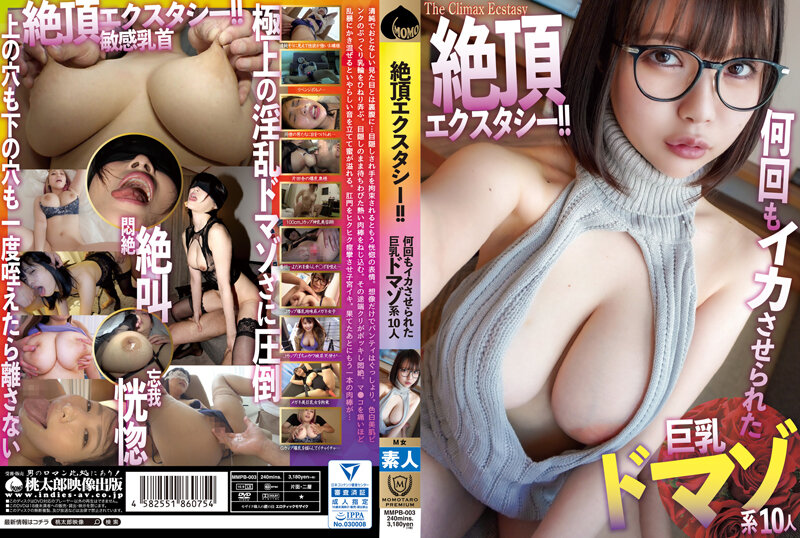
絶頂エクスタシー!! 何回もイカさせられた巨乳ドマゾ系 10人的
手指插入性骚扰声音耐心挑战的!
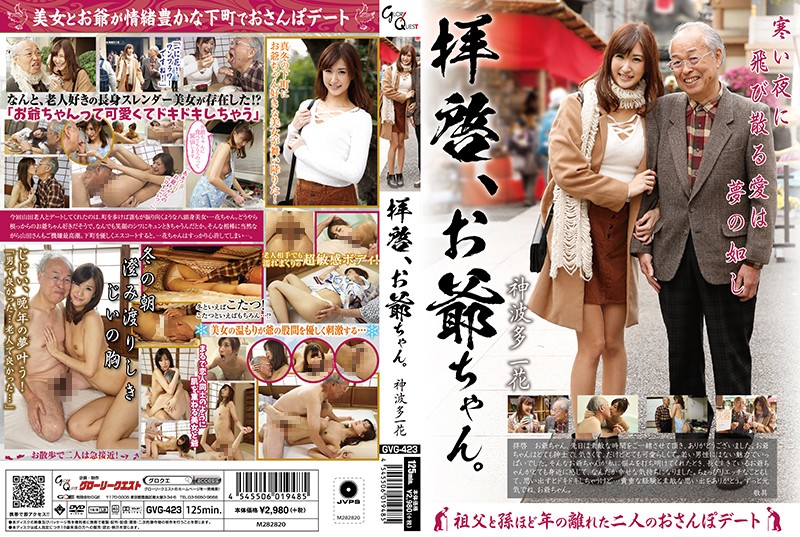
GVG-423 敬启者 爷爷来干一炮吧 神波多一花
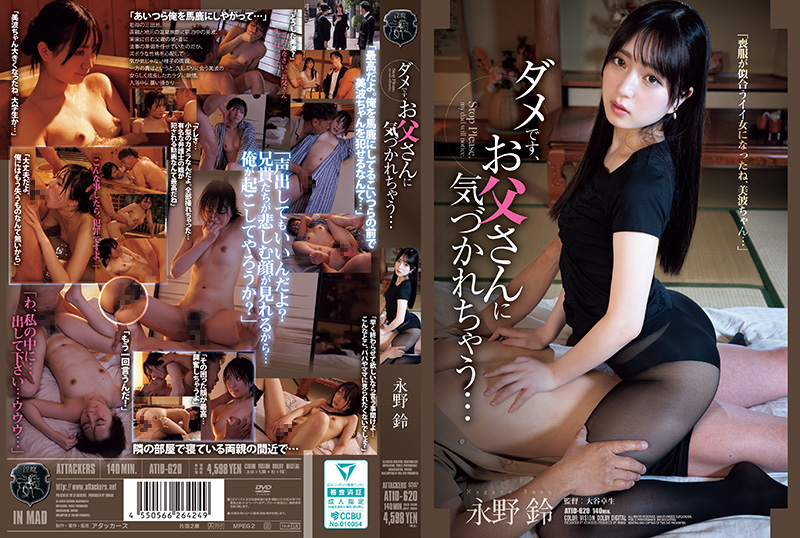
不行喔,会被爸爸发现… 永野铃 ATID-620-C
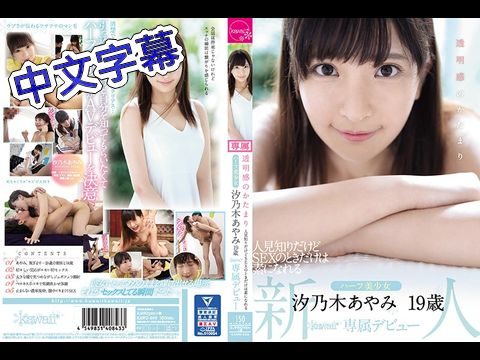
KAWD-996 透明感成群 雖然害羞在做愛時呈現自我 混血美少女 汐乃木綾美19歳kawaii專屬出道1
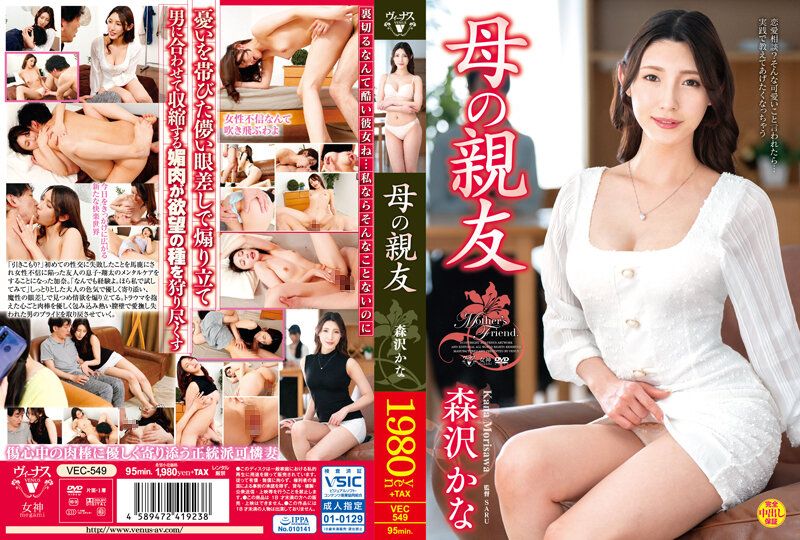
操妈妈朋友 森泽佳奈 VEC-549-C
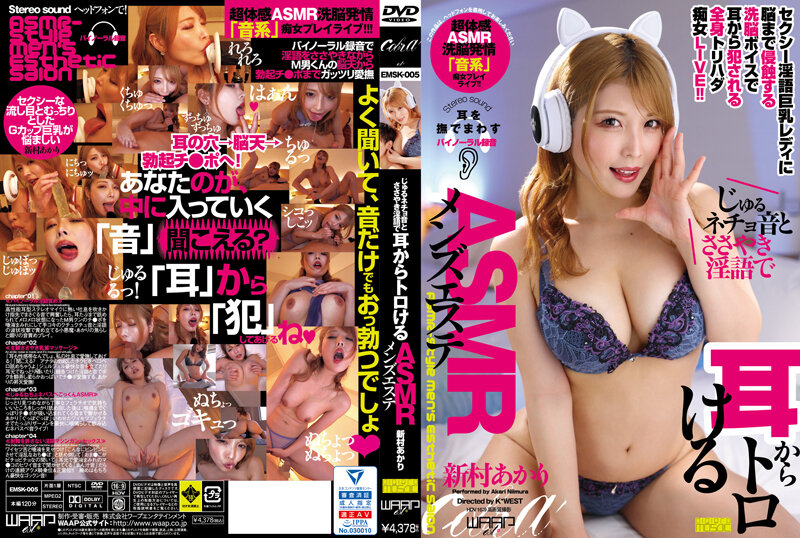
EMSK-005 粘稠水聲和耳邊淫語 ASMR男性沙龍 新村晶
人妻熟女

CMI-095 卑劣至极的影像 人妻第17人
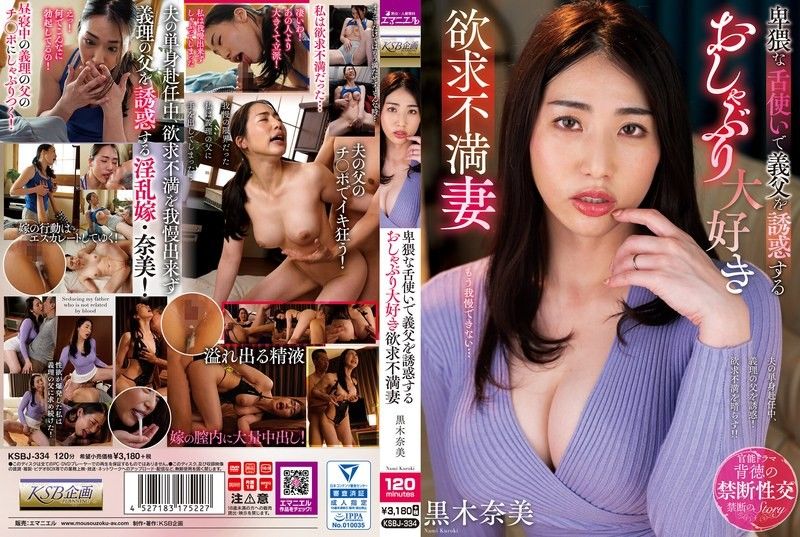
黑木奈美,一位沮丧的妻子,她喜欢奶嘴,并用淫秽的舌头引诱她的公公 黒木奈美 KSBJ_334
GIGL-525 老家垫底学校毕业⇒来东京5年了,现在还是自由职业的我竟然来了桃花期!?同年龄的女孩子把根本不受欢迎的我当做帅哥一个人住的她经常来我家陪我说话的阿姨然后就跟她出轨了。
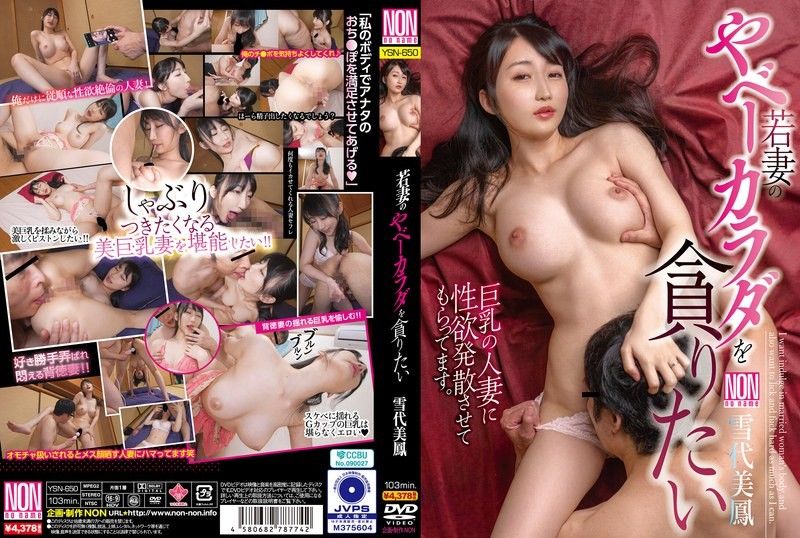
我想吞噬年轻妻子疯狂的身体 Yukiyo Miho YSN-650

今夜、僕は童貞を捨てられるかもしれない―。
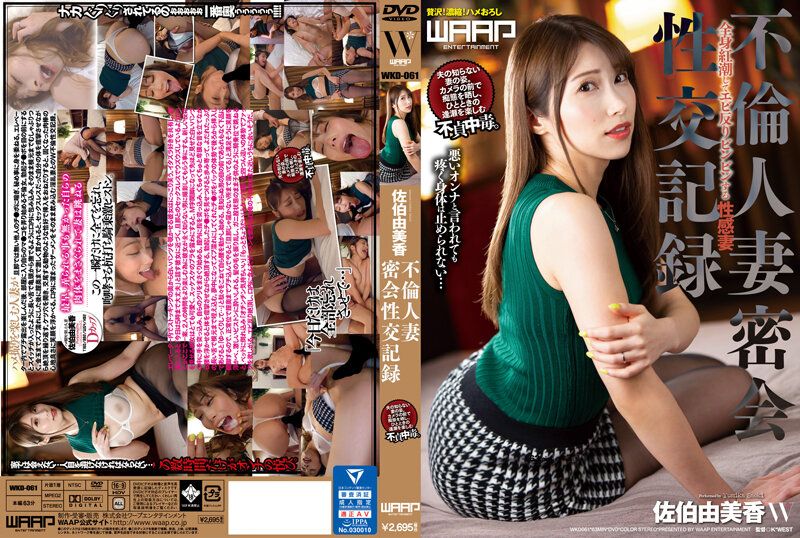
偷情人妻幽会干炮纪录 佐伯由美香 WKD-061-C.
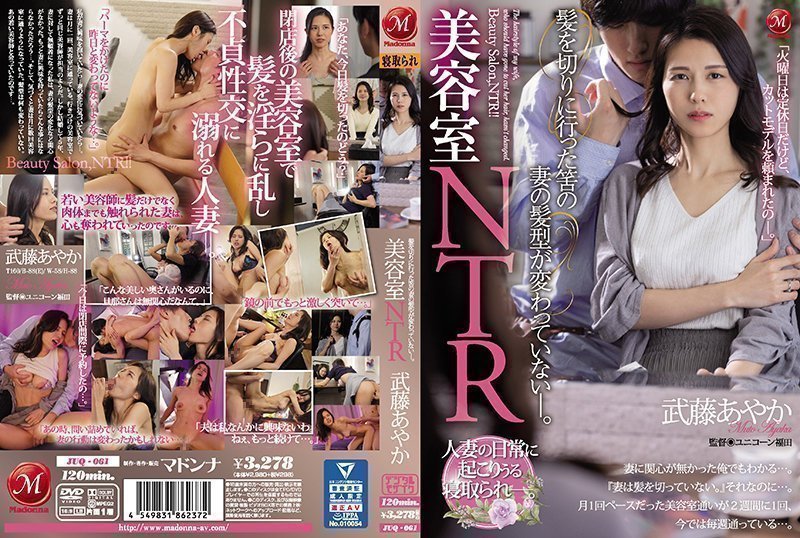
美容室NTR 髪を切りに行った筈の妻の髪型が変わっていない―。的!

クンを待たせてる部屋の鍵
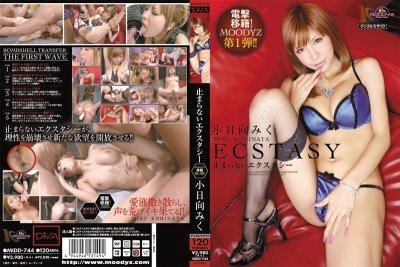
MIDD-744 止まらないエクスタシー 小日向みく
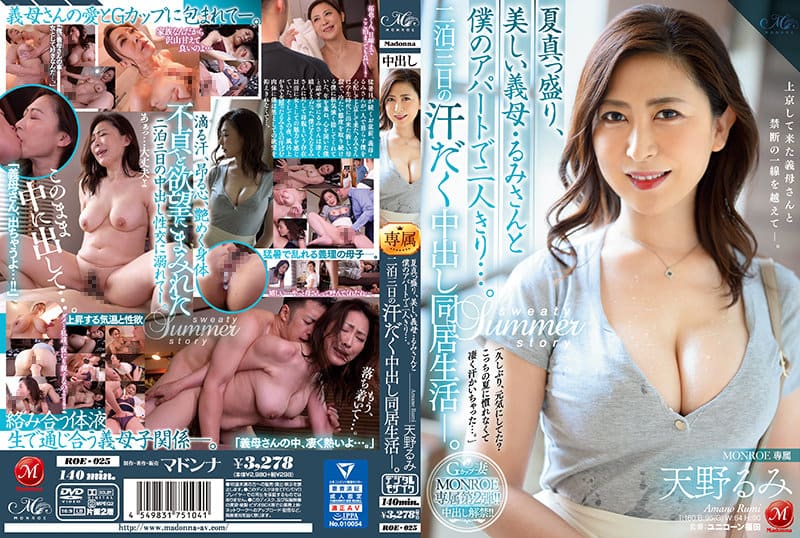
中出し解禁!! 夏真っ盛り、美しい義母
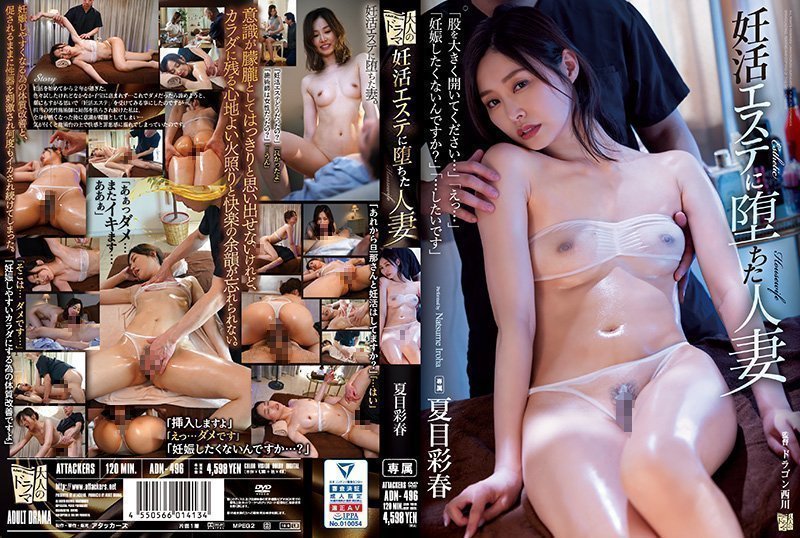
活エステに堕ちた人妻。
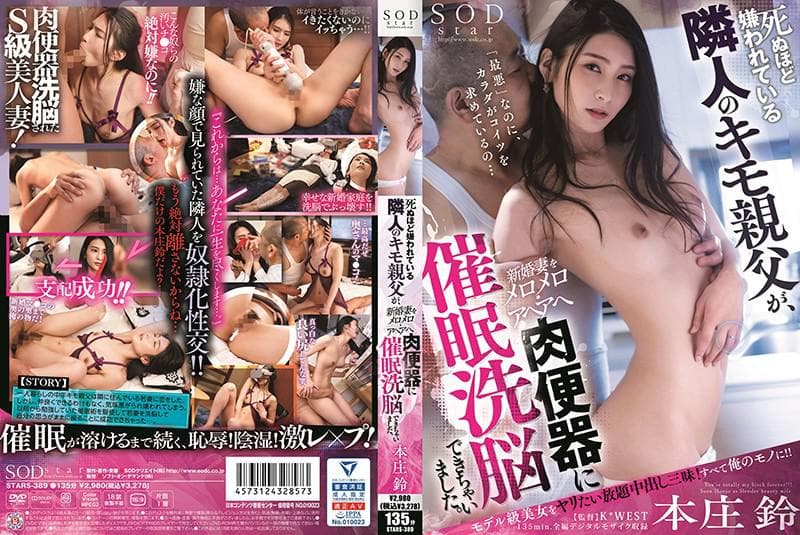
新婚妻をメロメロ・アヘアへ肉便器に催●洗脳できちゃいました
台湾swag

台灣 SWAG 完美露脸 小三接老婆电话 巨乳水蛇腰 桌底下帮老板口
台湾SWAG_10分钟包含了各式露脸口爆中出颜射特写抽插嫩穴swag最淫荡主播
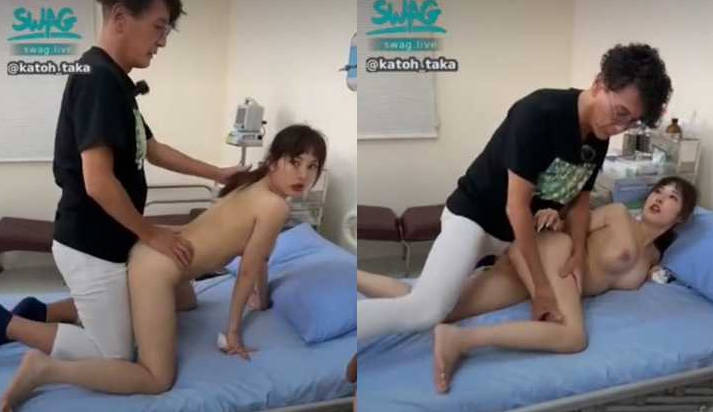
加藤鷹が潜入!AV撮影現場を大公開 - SWAG.live @katoh_taka

台湾SWAG vivibabe 露点 大屌粉丝操翻我的穴

8月流出国产搞怪A片贱货美女小媛肚子好饿来了一份人体寿司宴香蕉要和肉棒一起吃才最棒狠狠干她国语对白
台湾SWAG tiababe 妹妹在旁邊 照幹不誤 好下流
最新国产剧情毛片制服双马尾可爱漂亮学生妹语言动作勾引助教用身体辅导学习说要想吃助教蛋白质地板上大战对白刺激

台湾SWAG monlingwu 吴梦梦 女僕咖啡

台灣SWAG 淫色微电影我的机器女友男朋友请射进来小沐不会怀孕
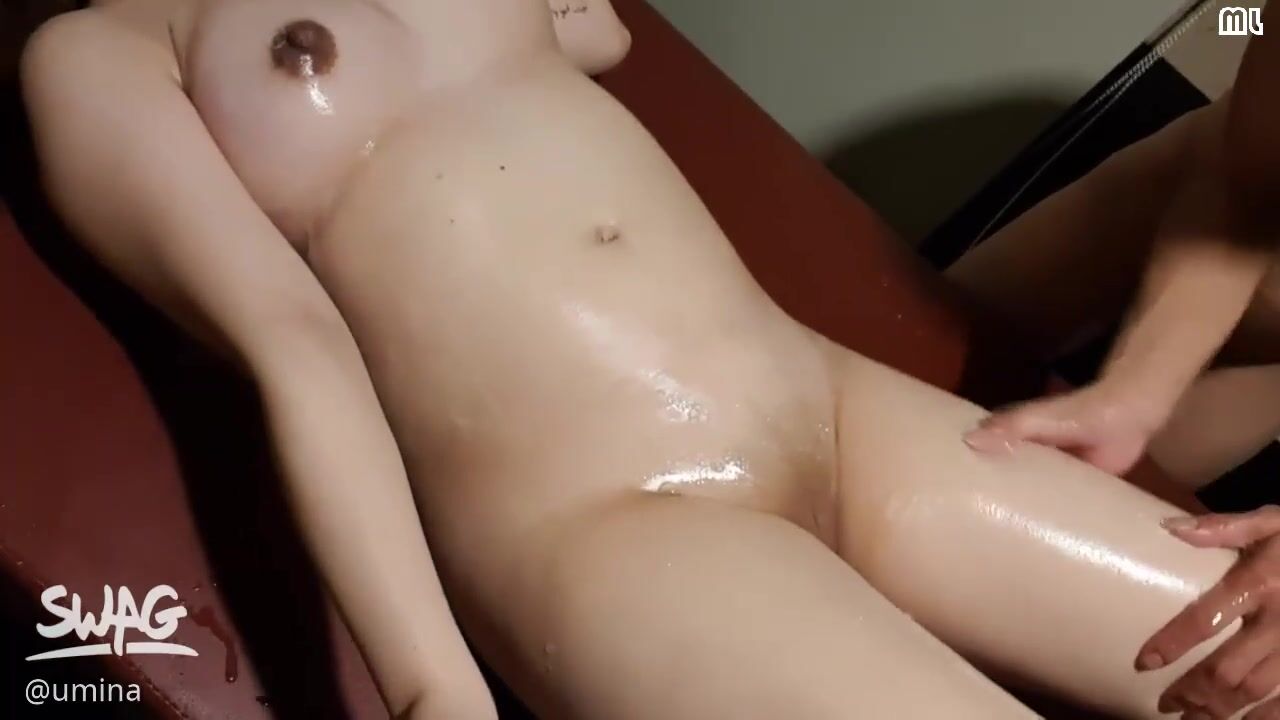
台湾SWAG umina 色情按摩spa初體驗

台灣 SWAG 垂涎闺蜜老公许久 终于逮到机会趁闺蜜怀孕 帮忙解决老公性需求超主动服务

台灣 SWAG 最大耻辱演出-变态医生の新生入学健康检查 阴道收缩肌肉测试就是插入做爱 爆操肥美鲍 颜射口爆
日本素人

ARA-220 据说长得像【Kyary*Myu*Myu】的19岁G罩杯女大学生Mimi-chan以20岁的年纪重新登场!这次申请的理由是“我想资助我的出国留学……”,但yariman的状况还活著,而且总是循环4.5人的热爱SEX的Yariman女大学生! “男生对巨乳的抵抗力很弱♪”...从某种意义上来说,聪明的屌丝女大学生摇著大奶,让她活了! “你喜欢胸部,对吧?是还是不是?” “这里~♪”我很生气!
K18-KYOKO-01 Iku SEX / Kyoko 多次同时摇晃大山雀

SIRO-3842 【初拍】网络AV应用→AV体验拍摄985 IT公司办公室的姐姐。我们将有一个具有出色按摩效果的 G 杯和一个略带粉红色的 omako,与 4 位经验丰富的人一起仍有新的感觉。
608-YUA-01 纯美少女的蜜 SEX / Yua

LUXU-442 豪华电视488

LUXU-1563 豪华电视1538“本来对AV很感兴趣,所以申请了,因为我已经30多岁了……”在机场当地勤的美女第一次出现在AV中!洒下沉稳大人性感的纤细美人,除了男友以外,还用棍子重复射精! !! !!

SIRO-4482 【第一枪】【柳腰后推】【少女脸变成大人脸的瞬间】一个真人大小的大学生,对淘气的事情感到好奇。她用微笑来欺骗自己的尴尬,但她把笑容变成了一张邋遢的脸,带著一系列超出允许范围的快感..申请业馀,第一次AV拍摄224
NTK-105 大奶好屁股卖啤酒的小嘉,带了制服给男友送惊喜礼物!从你自己的角度来对抗 Ji-ko,并采取最好的服务奇闻趣事!制服女友No.20
399-MIHONO-03 蚀刻出连裤袜在镜子前被撕裂和打扰/美穗野
MAAN-442 女神今年又来夜池了!加尔! ??京东! ??play! ??已婚女人! ??超越所有流派的半美人! !!出众的风格(paipan) & 没有男朋友& 行走的性感符号,你不能离开这样的顶级球w 用一个硬活塞淹没一个一直活著的矛男人女人,好像它是一个广义的性感区! !! [夜间泳池接送]
MIUM-578 [天真的 Ataoka Bishoujo] x [超然受虐狂 de M-chan 角色在晚上在东京游荡] x [水手服 refre 假装和双三次 Anan 在痛苦 de M 在她可怕的凌乱的房子里粉碎 oraora 性爱] * 无论如何,这很危险(太色情)她可爱的脸被扭曲到她疯了的程度。 : 夜游街头的“激稀有素人”! !! 38

GANA-827 位于高田马场的飞镖酒吧南帕
中文字幕
ABP881淫蕩幸運星8春咲涼.
NSPS-781 我讨厌的男人一直亲吻大崎静子的那个晚上

MKMP-274 Sakura Kizuna 时间暂停的世界 时间停止,永远承诺● - 佐仓绊

JUY-728 新人 菅野真穂 35岁 AVDebut!!这个人妻有着异常的性慾真是很危险呀。
MIDV-437-C 大嫌いな研究室のセクハラ教授が相性抜群の絶倫デカチンだったなんて··· ~相部屋NTRにキ
420STH042CTSUKU(26)素人ホイホイStayHome·素人·ハメ撮り·ドキュメンタリー·.
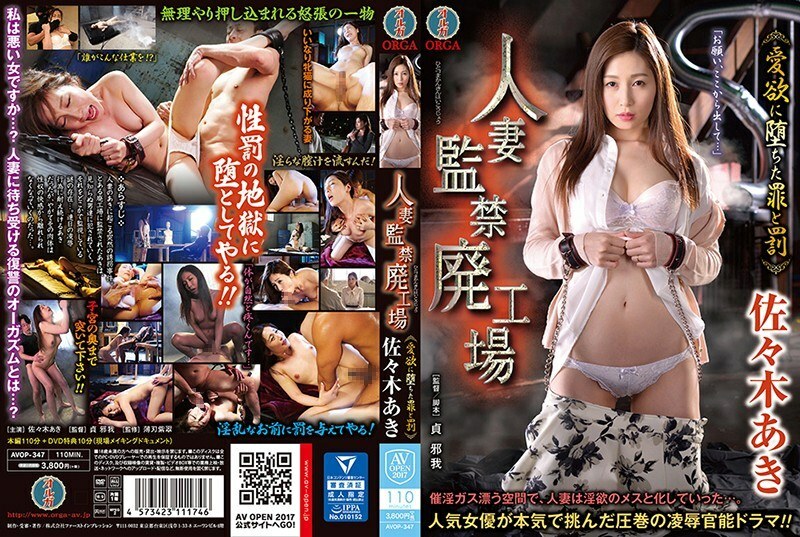
AVOP-347 已婚妇女月子废弃工厂~堕入情欲的罪与罚~佐佐木明~ - 佐佐木明希
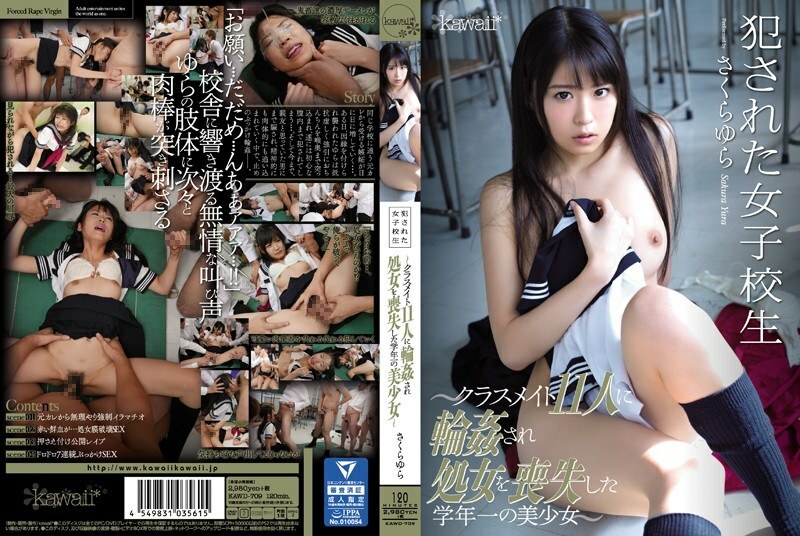
KAWD-709 罪犯● 被强暴的女学生~被11名同学圈套后失身的一年级美少女~樱由良 - 樱由罗
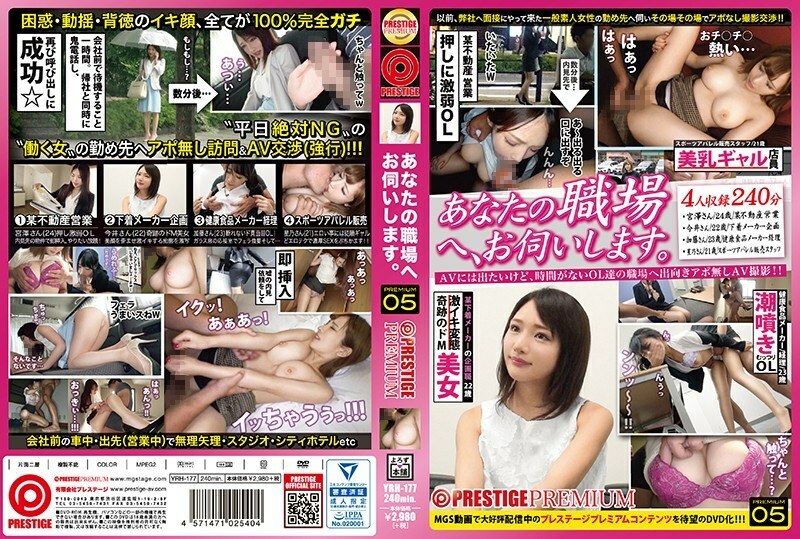
YRH-177 我会参观你的工作场所。 × PRESTIGE PREMIUM 05 某房地产销售宫泽先生(24) 推极弱OL 内衣厂商策划今井先生(22) Miracle de M 美容保健食品厂商会计加藤先生(23) 不要拒绝认真的OL!运动服装销售星野山 (21) 听话的 gal 为色情的东西
JUY-955 住对面的人妻 八乃翼
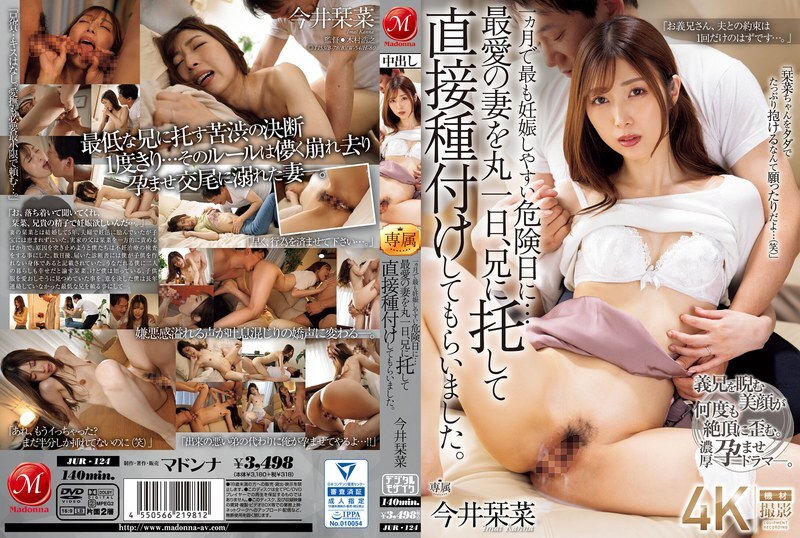
JUR-124 在这个月最有可能怀孕的最危险的一天……我把我心爱的妻子带到我哥哥那里一整天,让他直接给她授精。 今井佳奈 - 今井刊菜
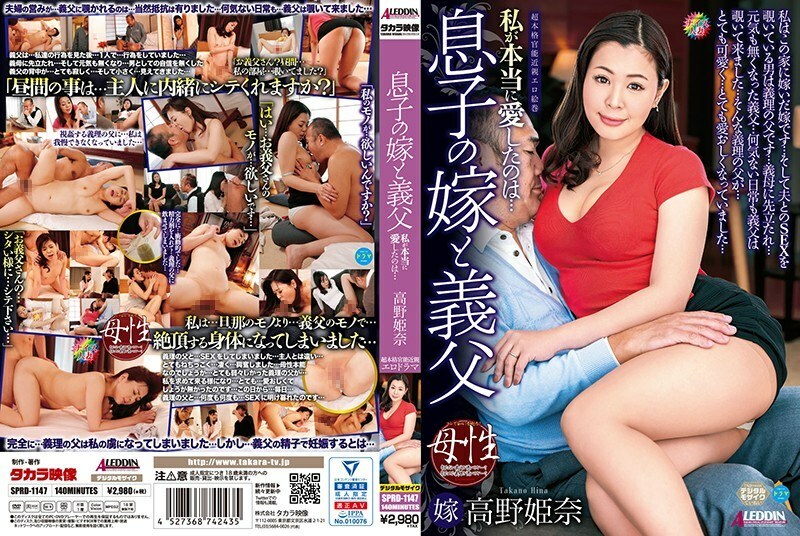
SPRD-1147 儿子的儿媳和岳父 Himena Takano - 高野姫奈
日本精品
CAWD-001 無法忘懷無套做愛… 大小姐大學上課的Gカップ巨乳女大學生懇求中出出道
ADN687夫に紹介されたマッサージ師にムチムチの下半身を焦らされるように施術されて耐えきれずに自らセックス

6PAPA-022 パパ活慣れしたSSS級現役女子大生を騙して即パコwwイヤと言えないどМな性癖見抜いて無許可の中出しwww
被轮奸直到怀孕的美丽女孩的!
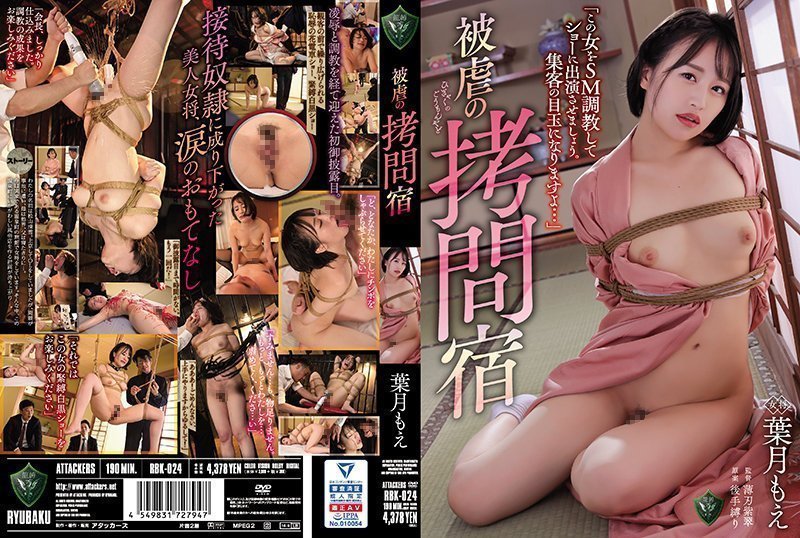
RBK-024 被虐の拷問宿 葉月萌
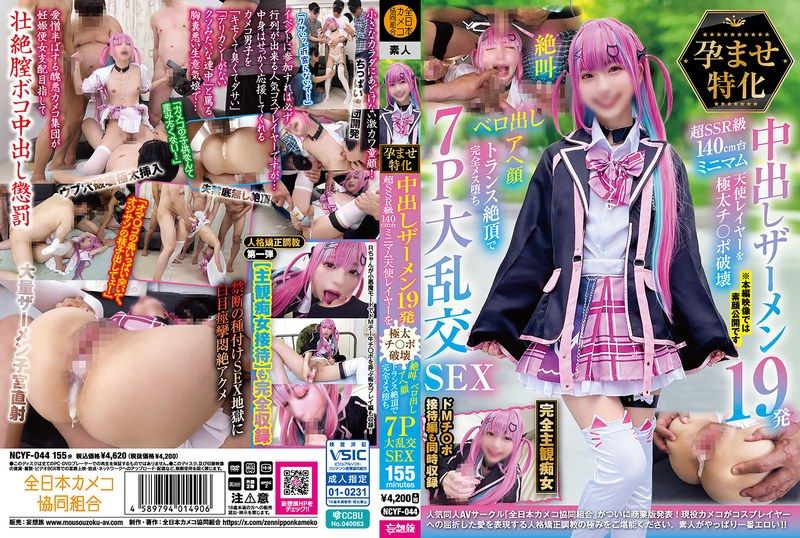
怀孕特化 无套中出19发 超SSR级140cm左右迷你天使角色扮演者被粗大肉棒摧毁 未知演员 NCYF-044
老公床上不给力慢慢地我对儿子动了う心思.
7 FALENOからAVデビューした16人の美少女達がカメラの前で披露した初めてのセックス8時間!!
无内管理人的SHARE HOUSE 波多野结衣 NACR-583-C.
永瀬みなもう..
电击支配,性奴调教的!
性欲无限制的怪兽级熟女 HUYU 54岁 NONSTOP 6SEX 五十嵐ふゆ,石川芙美乃 GOJU-224-C
蜜桃影像传媒

PMS002-EP2 蜜桃影像傳媒 女仆咖啡廳 EP2.出發 孟若羽 雷夢娜

PM065 蜜桃影像传媒 蜜桃成熟时 首部曲 高校女球经被学长轮奸 李薇薇

PM086 蜜桃影像傳媒 操爆黑丝小妈来!让小妈用骚逼给你家的感觉 米欧

PM088 蜜桃影像傳媒 重生之再遇白月光 唐雨菲

PMX140 蜜桃影像传媒 黑丝OL寂寞发春 骚穴空虚想念猛烈冲撞的快感 唐茜
蜜桃影像傳媒 PME046 饑渴小姑勾引外甥求幹 雪霏

PMUP007 蜜桃影像传媒 情色的精油按摩服务 肌肉狗

PMS002-EP4 蜜桃影像传媒 女仆咖啡厅 EP4.感谢祭 孟若羽 雷梦娜
PMFC003 蜜桃影像传媒 二舅介绍的长腿平面模特 七七

蜜桃影像傳媒 PME031 忍不住強奸護士妹妹 金寶娜

PMUP001 蜜桃影像传媒 当饼干姐姐成了女王大人 饼干姐姐

蜜桃影像传媒 PMC443 为了钱让哥哥上自己女朋友 艾熙
国产SM

学妹被迫击炮调教母狗

国产摄影调教满怀心事的援交少女到高潮喷水...

渣男分手曝光报复前女友乔佳被玩成了小母狗逼都玩黑了

稀缺流出台湾极品私模被大佬迷J酒店无套内射.
cosplay无毛学生萝莉满级抽插欲仙欲死

广州暨南大学小母狗极品白虎馒头逼女大钟绮晴被男友投稿性爱视频应征夫妻一起玩交换

反差婊骚逼女友喜欢被凌辱调教带狗链学狗撒尿各种假吊自慰器猛插白虎小骚逼

自拍泄密约炮骚货眼镜小母狗把精子都吞了下去
被炮友无情捆绑调教各种自慰啪啪

骚到爆炸的母狗校花道具喷水翻白眼三

野狼出击探花造孽啊19岁小三个壮汉轮操娇喘震天响起来..
COS蕾姆让男友干,他比以前更猛了...
精品推荐

私拍泄密时尚学生妹被肉棒征服技术厉害口爆射满脸附生活照
女友喝醉怎么干都行

调教内射巨乳骚母狗_口交侍奉后入蜜穴深插内射

国产AV 糖心Vlog 捆绑凌辱 强制高潮 韩国人妻

搭讪女神护士-尾随侵入强势输出

空降女优陪你激情过春节

卖萌希瑞反差女神被手绑起来别滴到乳头啊不要爸爸不要

MD0082_情人節特別篇男女上錯身靈魂交換肉體交合官网秦可欣.

情侣泄密幼稚园老师兼职赚外快被曝光
捆绑调教首次3穴全开

PH044_校園壁咚強制執行(下)麻豆.

【星空】卧槽了个DJ我的很大你忍一下-许诺。
童颜巨乳
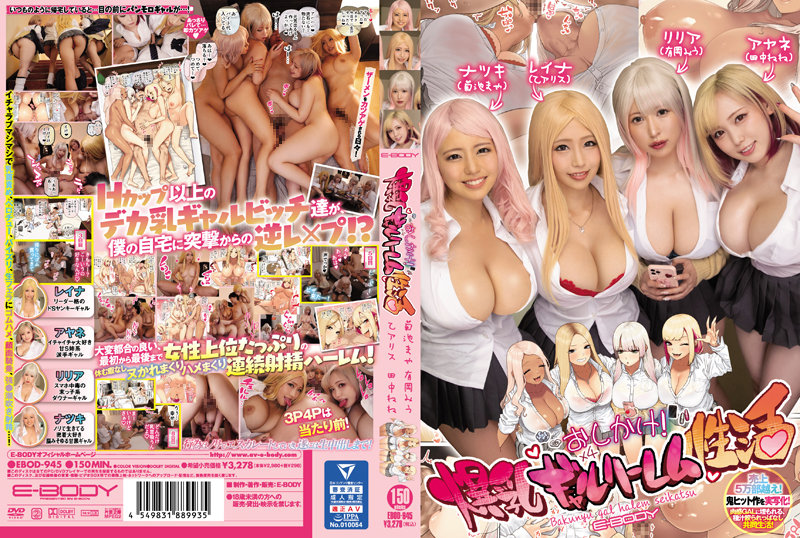
おしかけ! 爆乳ギャルハーレム性活 乙愛麗絲 有岡美羽 菊池真矢 田中寧寧
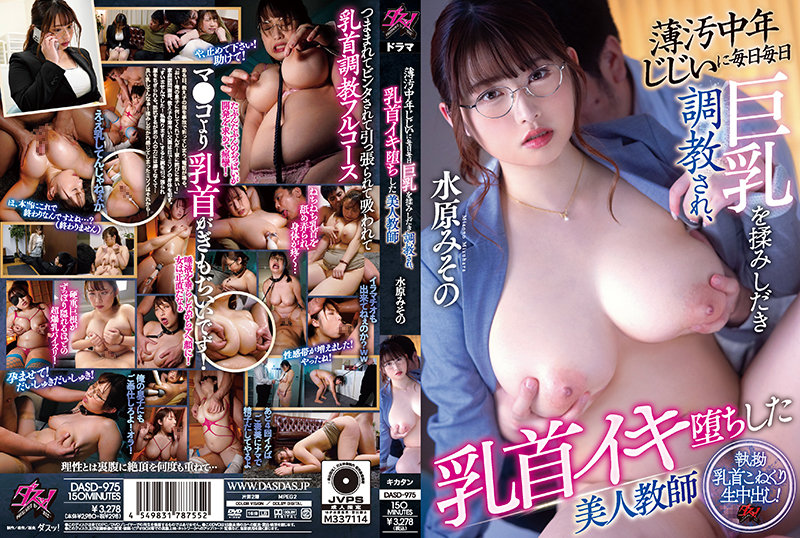
每天被中年大叔揉捏巨乳調教 墮落的美人教師 水原美園
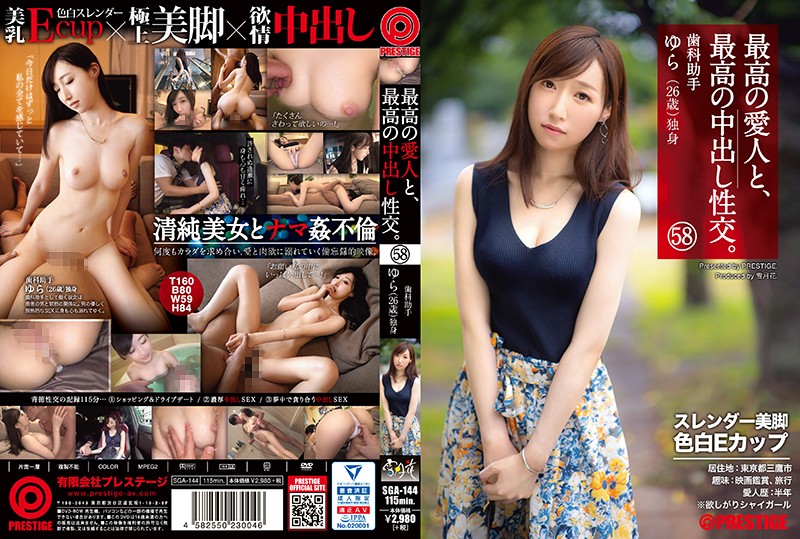
SGA-144 和E罩杯清純巨乳情人在最棒的酒店體驗最爽的偷情內射不倫性交 皆川優菜
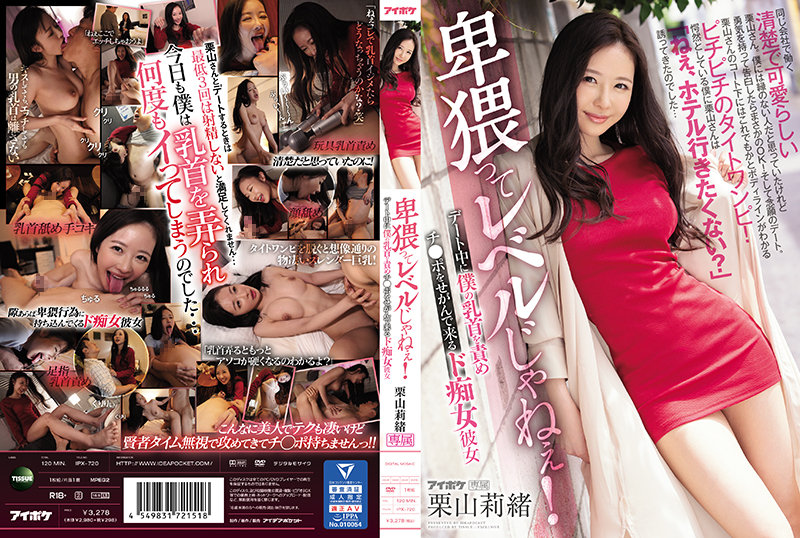
IPX720 約會時一直責弄乳頭撩撥肉棒的痴女女友 栗山莉緒。.
爆乳天国むちむちリラクゼーション 篠田步美

259LUXU1115 ラグジュTV 1101 人に見られる事で興奮するM気質な美脚現役モデル。美体にローションを塗りたくられピストンの連続に恍惚の表情を浮かべイキ乱れる!..
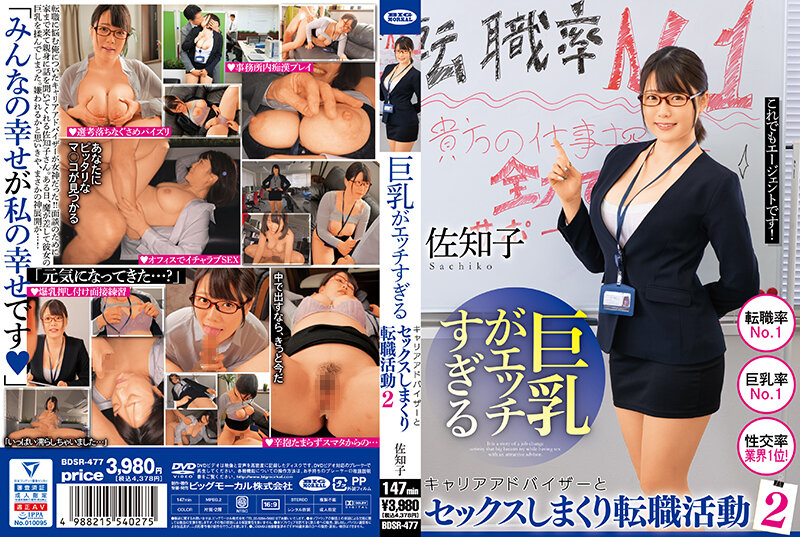
和巨乳中介的SEX 準備跳槽的我 佐知子
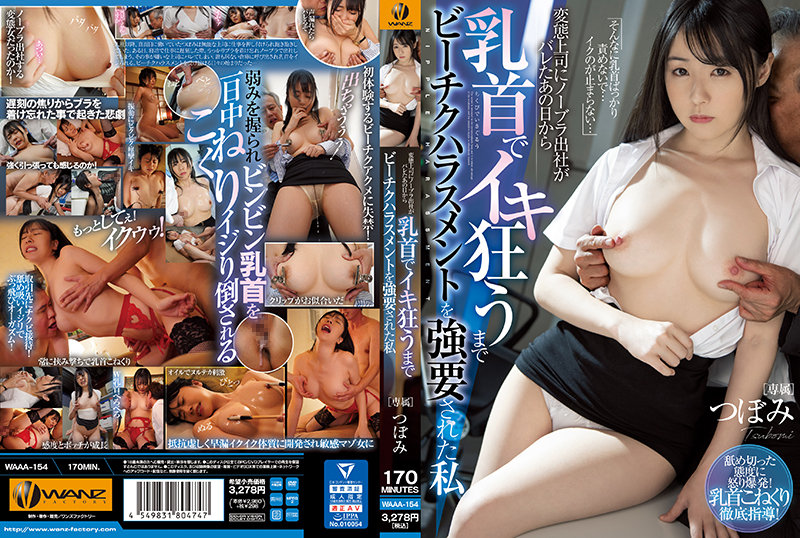
変態上司にノーブラ出社がバレたあの日から 乳首でイキ狂うまでビーチクハラスメントを強要された私 蕾
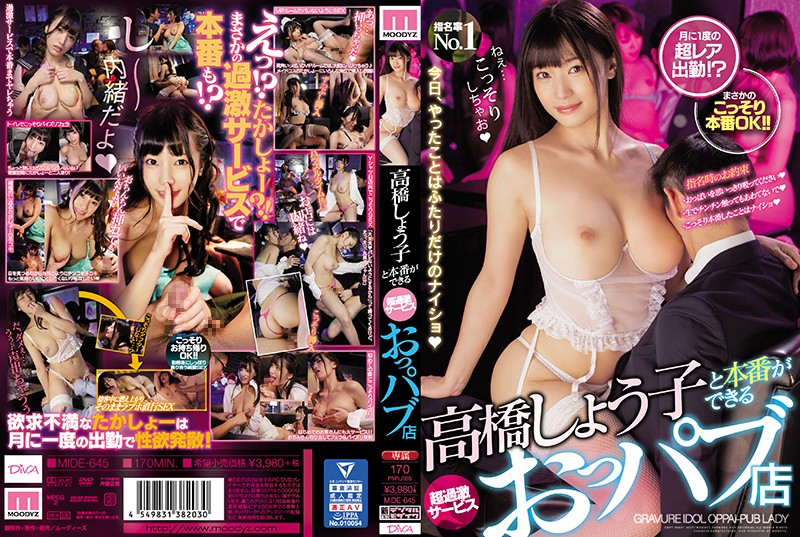
MIDE-645 超高級風俗店的巨乳風俗娘高橋聖子偶爾也會違反規則允許你插入
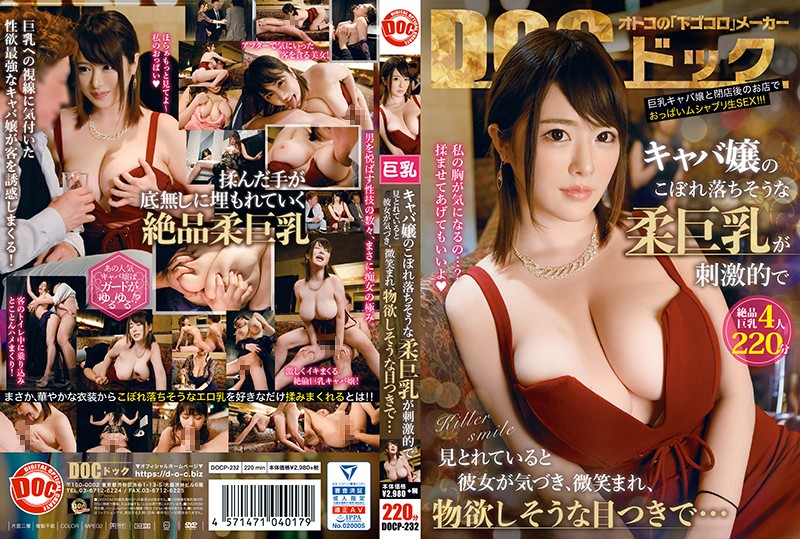
DOCP-232 キャバ嬢のこぼれ落ちそうな柔巨乳が刺激的で見とれていると彼女が気づき、微笑まれ、物欲しそうな目つきで… 織田真子 辻井穗乃果 心實流菜 坂上莉央
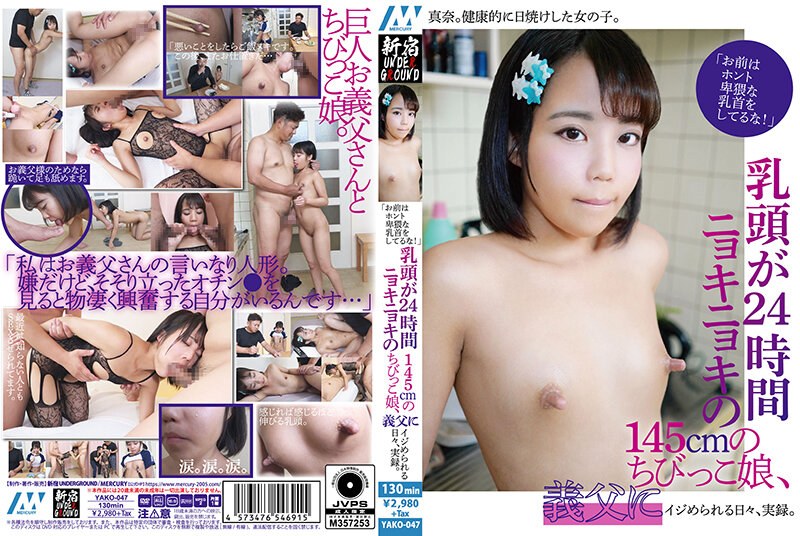
な乳首をしてるな!」乳頭が24時間ニョキニョキの145cmのちびっこ娘、義父.。
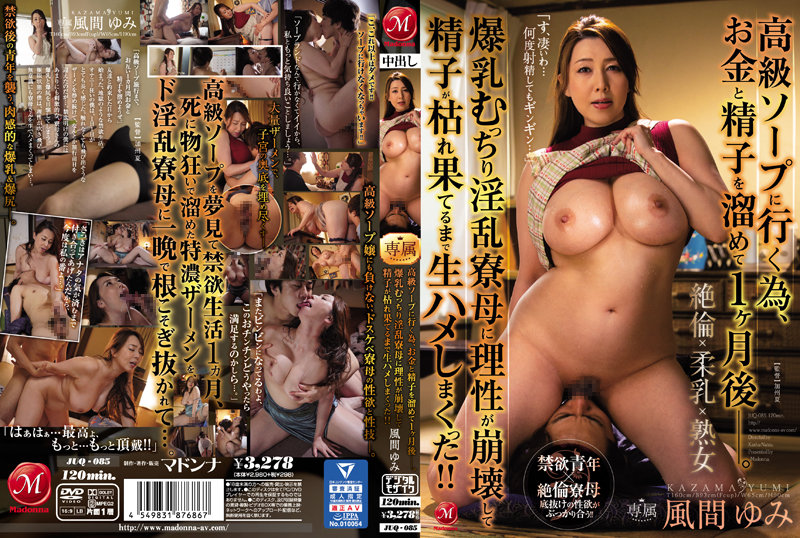
為了去高級洗浴店而攢下錢 卻被爆乳淫亂宿管榨到枯竭的我 風間由美
唯美港姐
拍写的真的陷阱.

精选#自拍#骚逼母狗被操屁眼
[在线]国产公共浴室更衣间近距离偷拍年轻靓妹

2021最新流出厕拍大神野狼

金牌小姐姐.
恬晚透明丝袜

美少女《小骚》被炮友和粉丝轮流干

大战高级妓女之丝袜痴女高清无水第二部呻吟超给力的的!

密友的第一季-第0集.

为救欠赌债男友被迫肉偿还债

喵喵是个猫顶级短发酒窝美女

冉北北漂亮女主播下海
网红流出
仓本C仔最新力作-家中爆操身材超性感女神级美女冬月枫,黑丝高跟职业装大鸡巴舔硬 撕开丝袜干的的!

美女洗完澡自慰跳蛋塞入逼逼进房给炮友口交啪啪。

巨乳邻居被我操到高潮不断的啊

奶茶雪儿小姑娘在_让蒙面小哥玩弄,_,床上爆草主动上位蹂躏抽插,浪叫呻吟不断...

模特写真拍摄丶探花约模特拍摄

【涨姿势】处女杀手“老王”教你找处女!走上破处巅峰~
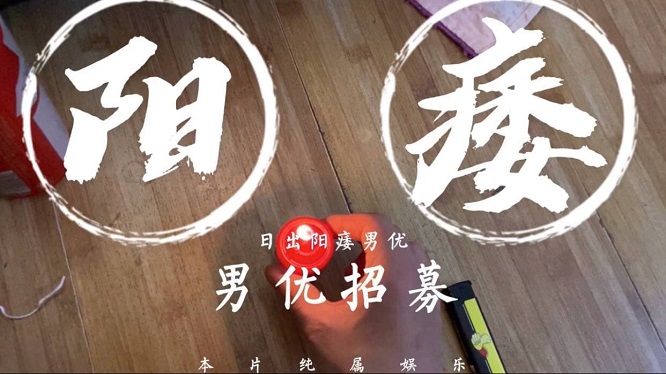
【日出文化传媒】阳痿男优最终还是阳痿,男优招募

【骚妻纪实】从学生时代到婚后全纪实!淫荡娇妻榨汁狂魔!

嘿咻男邱比特_街頭配對性交..

性冷淡的人妻,被灌醉后疯狂做爱!

丝袜苗窕大奶痴女淫声荡语撩骚互动玩奶扣逼假屌自慰
再次约炮纹身女孩,洗完澡69互舔 后入猛操 小姐姐被操的尖叫不断
亚洲有码

229SCUTE1227 白晢美少女沉醉性愛快感騎上小哥身上自覺的動起來
GVH-356 没胸罩没内裤挑衅的好色人妻
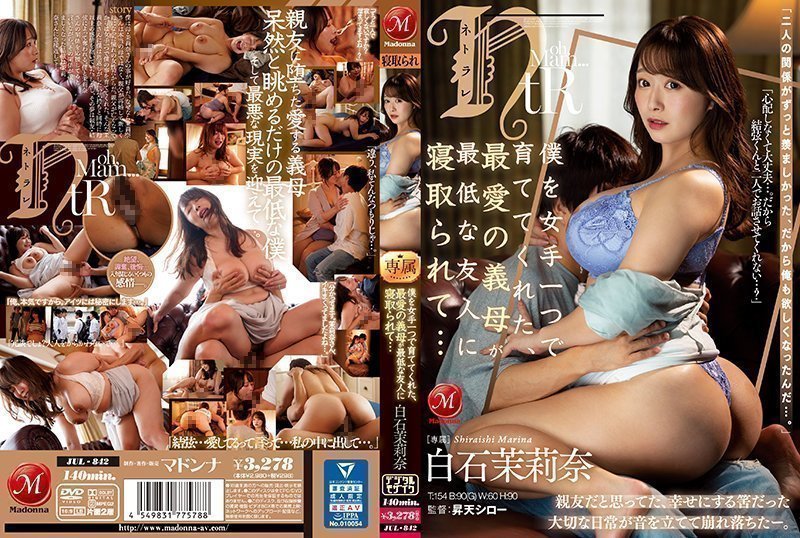
JUL-842 被母親一個人養大 最愛的義母卻被渣男友人NTR了... 白石茉莉奈
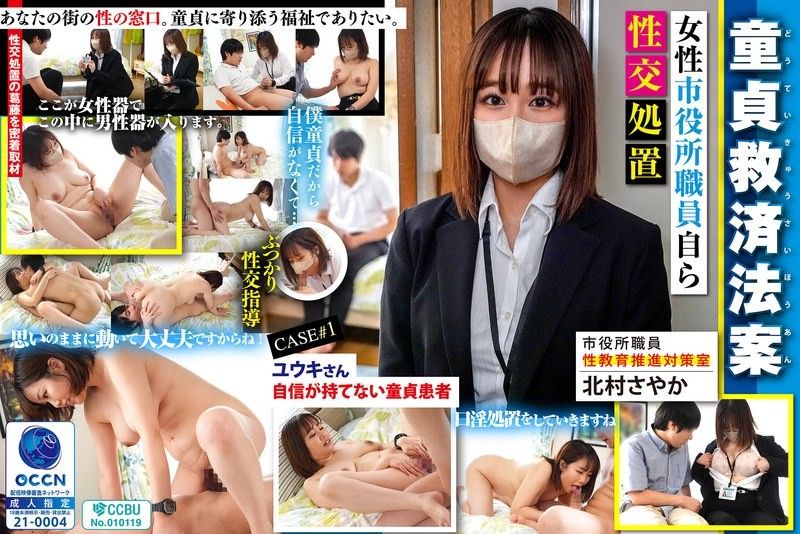
处男救济法案 由纪编 JOY-005
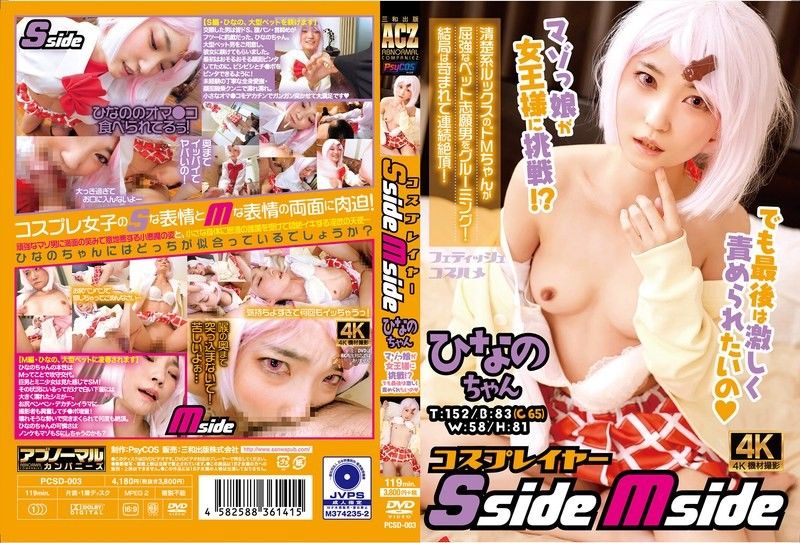
Cosplayer Sside Mside Hinano PCSD-003
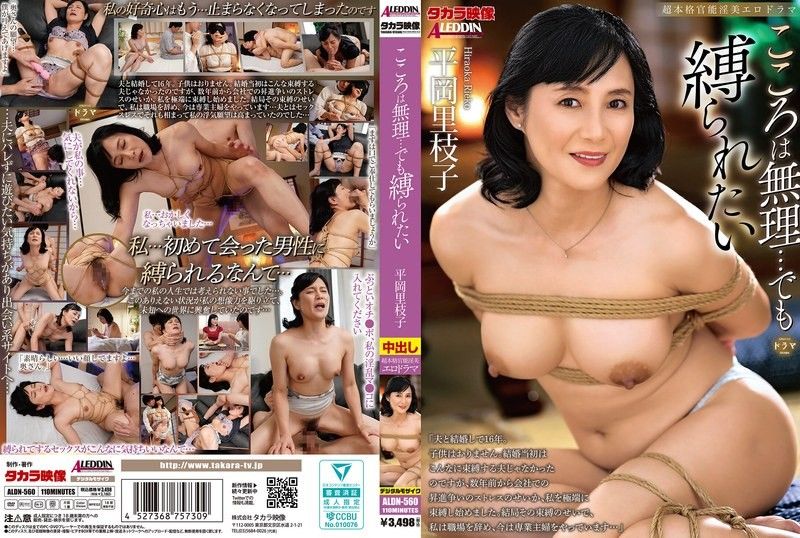
心里不允许…但还是想被束缚 ALDN-560
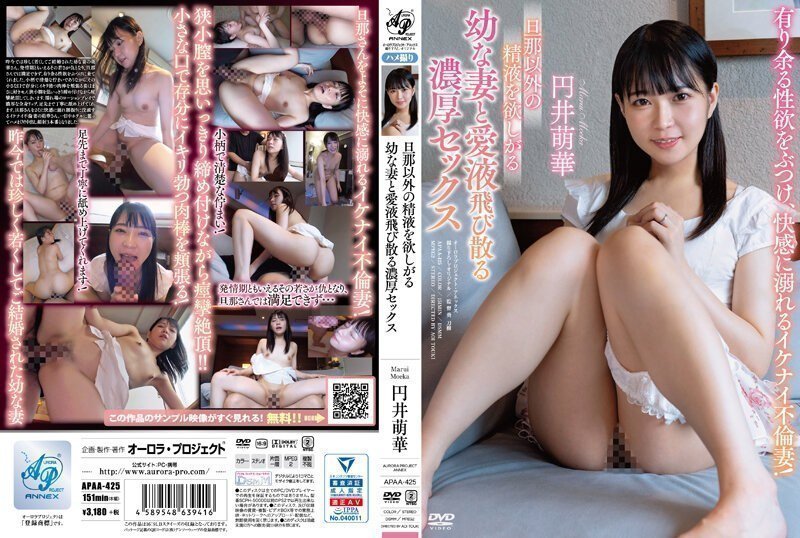
旦那以外の精液を欲しがる幼な妻と愛液飛び散る濃厚セックス。
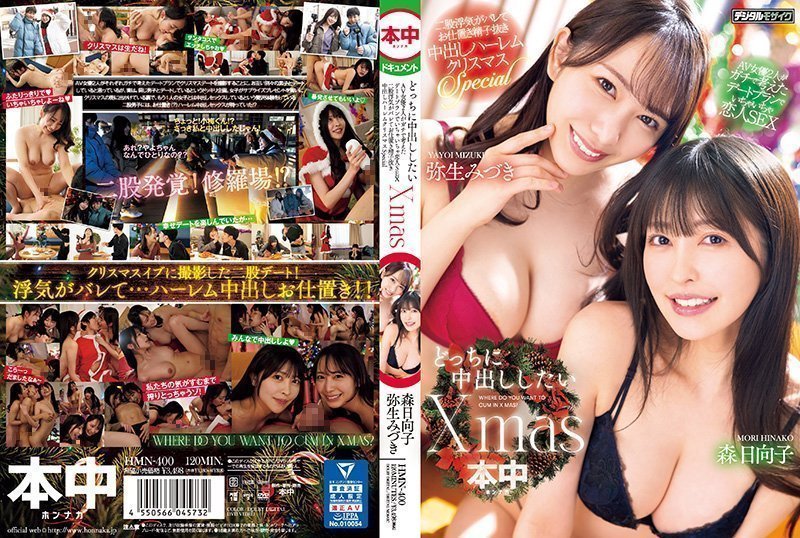
HMN400どっちに中出ししたいXmasAV女優2人がガチで考えたデートプランでいちゃいちゃ恋人SEX
498DDH165美しい肢体を震わせて他人チ●ポにがっつく欲しがりエうロ女.

新人デビュー超乳神Kカップ!完璧なボリュームと美しさ!磨き抜かれた乳フェチプレイで乳の魅力引き出す! Boin「雪城れん」Box

GRCH-351 「君の匂いが好きなんだ」気になる同僚が匂いフェチで…ワキ#首#足#アソコ…えっそんなところも嗅ぐの!
MMRAA349美咲そのかコスって!恋して!
一本道

012111_013 做好辍学准备继续AV!
081115_131 Miyuki Susuki 讨厌的寡妇

PONDO-031424_001 尿尿J杯美女

050623_001 流浪村

040420_995 M 荡妇 丽娜

PONDO-041824_001 无胸罩凛香酱~乳头揉捏极致~

081422-001-2 M 荡妇 Ema Kato

011822-001 放学后的淘气事件

120225_001 我最喜欢的食物是香!我有一个可以当特殊身体道具使用的振动器,而且内衣非常结实。

122918_789 模特系列 Nana Natsume

120719_939 无尽的性爱 Natsumi Hirose

022221_001 极限射击菊川三叶
星空无限传媒

星空传媒 XK-8164 公路皇后网红女机车手被强行插入淫液不断喷射-七月

星空无限传媒 透视黑丝女王的足交极致体验 思思

星空传媒 XK-8171 七旬老汉诱拐花店老板娘

星空传媒 XK-8176 女大学生地铁冤枉大叔风波

XK8192 星空无限传媒 俏皮性感情趣内衣来袭 悠悠

杏吧&星空无限传媒联合出品国产AV佳作 XKXB8012『妻子的好闺蜜-2』闺蜜的性爱报复-程雨沫 瑶贝

星空传媒 XKTV-103 挑战停车场找爸爸享受极致服务-小莫
星空传媒 XK-161《酒馆性事》引诱表弟朋友的大肉棒插我骚穴 小野

星空无限传媒出品XKG051 醉酒女友面前 - 偷上极品御姐少妇寂寞丈母娘

XKXB8012 星空无限传媒 妻子的好闺蜜2 瑶贝 程雨沫

星空無限傳媒 XKG112 婆婆催生兒媳借種公公 香菱

XK-8099 《元旦庆典》.女优狂欢啪
多人多P

男之娘女性高潮 4P 狂欢美容院 PTS-536

约2个极品00后妹子双飞 双飞...

绿帽老公携饥渴娇妻与单男疯狂3P私拍流出 水手制服装前怼后操 蒙眼玩更刺激的!

上集饥渴4p纯肉体欢愉饭店4人乱交

幸福老哥两个嫩妹双飞!双女69姿势边操边舔逼!交换轮流抽插.

人美逼遭罪跟好姐妹玩4P轮流展示给狼友看被小哥激情上位顶着骚穴草
果茶酱四男一女酒店淫乱男男男女

花電車女

惠奈酱 03 4p.

总被安排和中年店长深夜加班 胸粪NTR 八木奈々 MIDV-188-C.

KTV包房和3陪小姐在里面干看表情就知道她很爽的的!
アマチュアハメ撮りグループからの投稿作品です
日本无码
【轻度猎奇】高颜值日本气质素人少妇「mari wam」OF露脸私拍 反差美人妻沉沦精液地狱【第二十一弹】
SR140 新卒採用記録 No.140 かえで PART4【個人撮影】

日本摩洛在性感的摄像头独奏

边做边说「不行了」
指マンオナニーでイキまくり!岡田あい
到12#15 6480→5480【晒脸#连续中出】10个男人把有华丽的苗条顺从的JD做成自己的性欲处理。-cd4
就算找也找不到的压倒性美女乙叶酱的第一张脸照! !不仅长得可爱,还性感爆棚,巨乳,12月MVP。

FC2素人女主之【はるかちゃん 遥酱】 较小可爱,清纯可人,温柔纯欲!

【无修正】美魔女的人妻对年幼的君的愤怒无法抑制情欲。时隔2年被芒果舔的快乐不止喘着粗气疯了!老公发狂悲伤-cd2
日本吹箫双公鸡筱
FC2PPV-1253598 【個人撮影】いおり31歳 ショートSEX リマスター版【期間限定】

极上泡姬物语 Vol.109 佐佐木佳奈 caribbeancom012023-001
可爱学生

发丝❤️学生制服撩起衣服裙子自摸!特写粉穴,手指插入猛扣,娇喘呻吟

孩子们在外面玩游戏,在屋里就干上了。

性感美女咖啡馆黑丝撩人

【重磅泄密】艺校极品反差舞蹈生被套路自拍第③弹

妮儿学姐:哇哇我天好痛啊,巨痛,我的菊花被你插得受伤了!
女警下班后被强制綑绑猥亵到高潮

TM0145內射妹團援交女學生-李師師

耶诞特辑性感尤物part2

太子探花在校学生纯天然美少女极品尤物女

万人求购两个高中生白嫩脚丫玩弄大叔硬梆梆的鸡巴

-xuesheng-石家庄第三十八中学之老师周末也疯狂

中午约21岁大学生,清纯可爱,上下皆粉嫩,阳光下做爱高潮
Caribbeancompr
022616-508 KIRARI 118 连拍三连胜的最佳女主角

111817-002 工作胸部疏忽的乳房〜导师版〜

CARIBBEANCOMPR-111816_003 8位美丽的成熟女性溺水与他们的老板作弊 - 真琴凉
021017-005 S 型 165 首次亮相

021023_002 月刊铃村彩叶

011625_001 一条主干道最佳 2024 ~第 3 部分~
110922_001 珍藏阴户精选~请看尤里的阴户~

072024_001 频繁造访业界~首次造访报告妇幼小规模计画平均规模~

112516-002 母乳

041525_001 我的性朋友,距离我第一次遇到已经过去很久了,我仍然处于自慰的状态,但我的许可已经到来了!在处罚期间,我被迫离开监狱,处罚被改变,我再次被传唤。

110316-004 一个又一个,Dopyudobu 展开美丽的身体! ~
120822_001 即使是地下偶像也可以在阴道射精后进行清洁口交
国产专区

調教束縛奴役我的性感秘書 乳夾爆裂絲襪蜜穴任由玩弄 成為胯下玩物
【SSRPeach】台湾清华大学外文系臀后健身教练「Ellie」OF剧情私拍 性感女私人健身教练上门教学被猥亵无套后入

“不要欺负妹妹了”乖巧少女被牵引着调教楚楚可怜都快哭出来了,被主人爆操口爆
小妹爱爸爸露脸孕妇挺个大肚子还要伺候大哥激情啪啪,口交大鸡巴样子好骚,激情上位让大哥无套射在逼里面了

气质颇佳颜值爆表妹子,全裸自慰,三点全露超级粉嫩咪咪头,下面粉嫩一线天,手指不停揉搓阴蒂和阴唇

丝袜高跟包臀裙大长腿女浪露脸跟纹身小哥激情啪啪,口交酸奶大鸡巴好骚,让小哥从床下干到床上后入爆草射嘴

极品小美女【初小】与炮友在沙发上艹逼,各种招式来了个遍,特别是骑在身上摇曳,简直爽翻了!
稀有露脸 高端ACG业界女神爆机少女 喵小吉 巅峰金属大作《赛博朋克·超梦》壁纸党典藏必备 每期都是精品
十个眼镜九个骚,公司里有个这么骚的女同事,我都没午休,沉浸式插入嫩穴,纯欲小可爱紧致无敌嫩
【腰以下多是腿极品模特】齐逼牛仔短裤,美腿高跟鞋,足交极度诱惑,69姿势舔骚逼,无套激情爆操

猥琐小哥下药迷翻漂亮的女友各种姿势操偷偷爆她的菊花
熟女控福利,賢惠溫柔型40多歲阿姨酒店和紋身情人幹完休息聊會臊
主播秀色

网红泄密快手大奶美女主播南瓜妹大尺度私拍展示好身材_被干的豪乳乱颤_嫩逼直流水
为了赚流量直播主们手段尽出,特地到游乐园的摩天轮啪啪

纯欲天花板超仙嫩模年年汉服私拍流出

实拍实录淫荡短发女友公寓阁楼开炮.
连衣黑裙漂亮御姐温柔风情长发飘飘白皙性感说自己一米七二高穿上开档黑丝骑乘套弄夹的真爽

高颜值娇小身材萝莉萌妹子大黑牛自慰,近距离特写震动头部插入呻吟娇喘,很是诱惑喜欢不要错过!

车上跳蛋户外撒尿,约人开房啪啪,直播完想要钱被举报给派出所,被审问得痛哭流涕

这娘们无敌了吧超骚全程露脸激情大秀深喉大鸡吧让大哥狂干

XK8057 貼身秘書-小芳的!

-杜美莎保时捷车上凌辱车震-黑丝长腿骚货对着镜子插入
清纯学妹为君摇同学老师眼中女神

性感主播被顶到子宫了
明星换脸

AI-迪丽热巴-强制体验拘束固定的性爱体验后已无法停止03

AI-宋轶-鞠婧祎两位长腿模特洗礼了2019年的最后一个月第一部
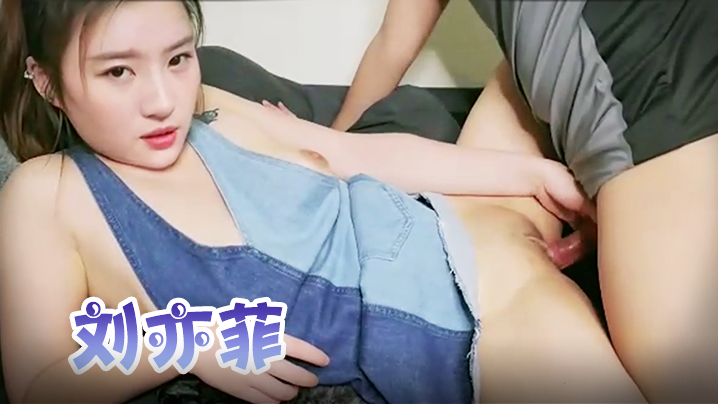
刘亦菲 被小鸡鸡狂操

雪炫 高难度瑜伽性爱

AI换脸赵今麦可爱美少女2

AI-杨幂-美腿疯狂抽X

唐嫣 大尺度私拍忍不住被摄影师插入

AI-杨幂-高傲女上司被下属抓到把柄之后的那晚
杨颖 白嫩嫩的身躯

Al克里斯滕middot;里特 自慰被爸爸撞见

Al名井南性感兔子

[AI换脸]迪丽热巴 JK制服激情中出
网曝系列

重磅泄密艺校班花许婷嫩B吸肉棒又纯又欲
【为国争光】土豪小哥专业草老外,双飞大屁股大洋马,口交大鸡巴看着真销魂,激情上位揉捏骚奶子,后入爆草抽插蜜桃臀1
网红娜娜 我想你啦 阳台幻想剧情道具啪啪

极品尤物爆乳网红你说呢美腿脱衣热舞小肚兜一脸骚

小哥强推倒小女友~刚开始不情愿,被操爽了就放很开
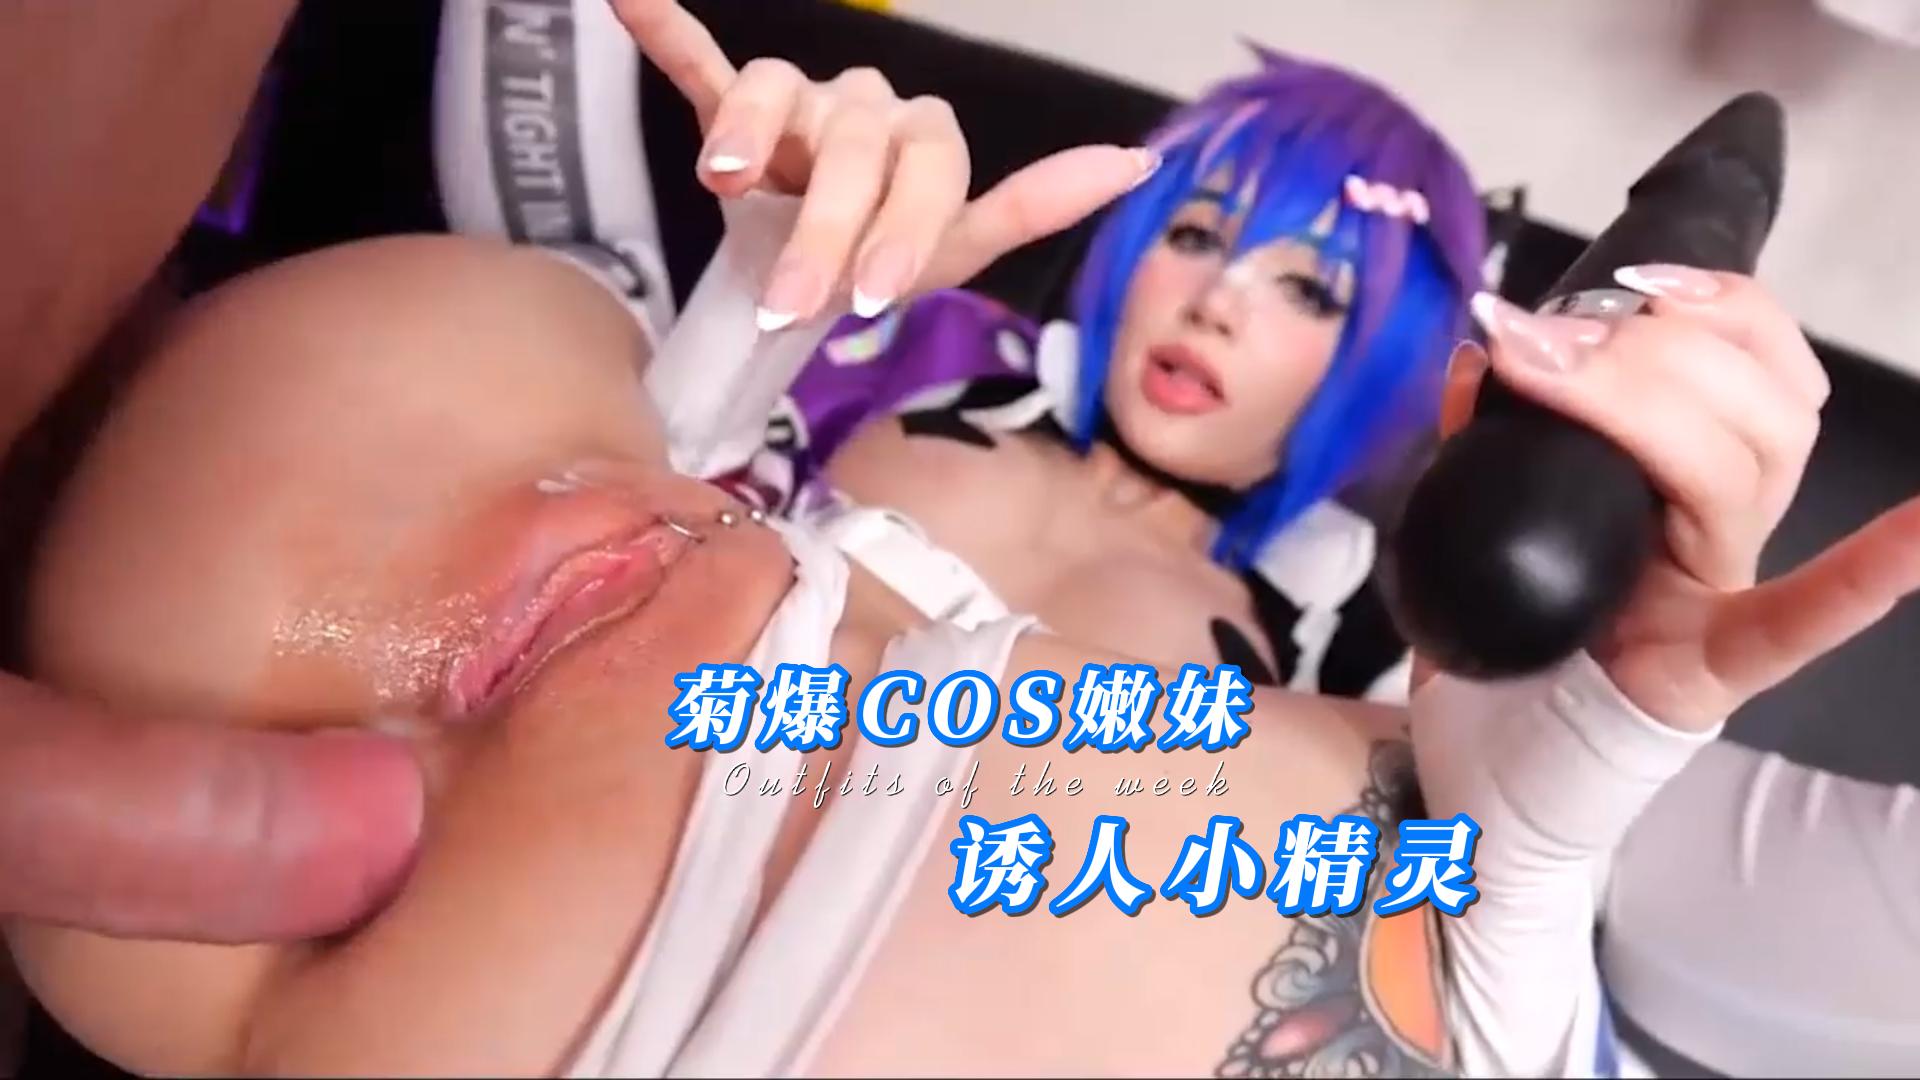
菊爆COS嫩妹,诱人的小精灵。

良家黑料极品学妹5部精选完美露脸生活照保守的开放的调教不同类型少女感受极致反差婊

真实吃瓜黑料曝光高颜值极品身材无毛白虎萝莉女大学生服从金主爸爸的要求假阳具自慰自拍穿上制服诱惑勾引肥嫩的美鲍超级多水立挺的奶子非常迷人道具插逼强制高潮喷水骚的没边

饥渴的性爱纠缠1的!

精品泄露操完接着回去上课车震广西百色农业学院校花李婷婷

原创混剪暗网流出缅北猪猪挨打合集和喝尿合集
【真实破处】纯情学生妹初夜祭献 5000大洋卖掉处女身 极品嫩穴紧致无比 润滑液划逼磨枪 鲜艳落红无情夹吸精关爆射中出。
丝袜OL

230OREBMS071 お小遣いに惹かれ応募して来た素人女たち ひめか..
ボクと彼女と幼馴染(女子)の3人で宅飲みしてたら何と幼馴染が夜●いしてきた!ボクの彼女に!悔しいけどあんなにエロい彼女今まで見た事ありません。
舔舐後庭 黑宮詠美
Madonna10周年纪念作品玛丹娜熟女祭十年一度的盛大祭典到底让谁来举办爱液飞散的妇人会对抗之乱-下JUX-215

【只讓你體驗的特別服務哦】人妻美容師的誘惑 夫婦經營的美髮沙龍 黑川堇
明明妻子的那裡很狹窄 卻一天天在變大... 水戶香奈
MEYD-701全肯定情人接受所有廢柴的我,與有夫之妻無法擺脫的泥沼不倫 佐山愛
【只有3天的首映,没有转售】和艾丽卡一起过万圣节吧!也试着再次挑战了等待搭讪!-cd1
STARS-289 笑瞇瞇地讓我戴綠帽愛惡作劇的同事 青空光
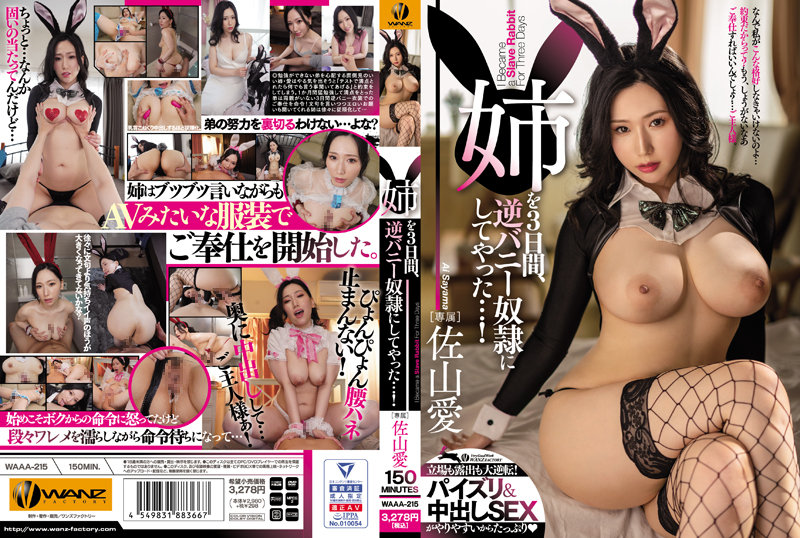
讓姐姐在這三天 成為我的奴隸 佐山愛

女老板出差时羞辱发抖,中出火车猥亵者吉泽由纪 吉泽友贵 JUR116

Beautiful and Young Japanese Woman "masaki Uehara" and my 1st Creampie SEX
卡通动漫
ナチュラルアナザー1

被狙击的女神天使安泽尔蒂亚1

轮奸俱乐部1

倒下的两个法尔默

shaggySUKirara_live2d动漫原神完整版带ASMR音频MP4

Pantsushi沙漠中的欲望NIERAUTOMATA
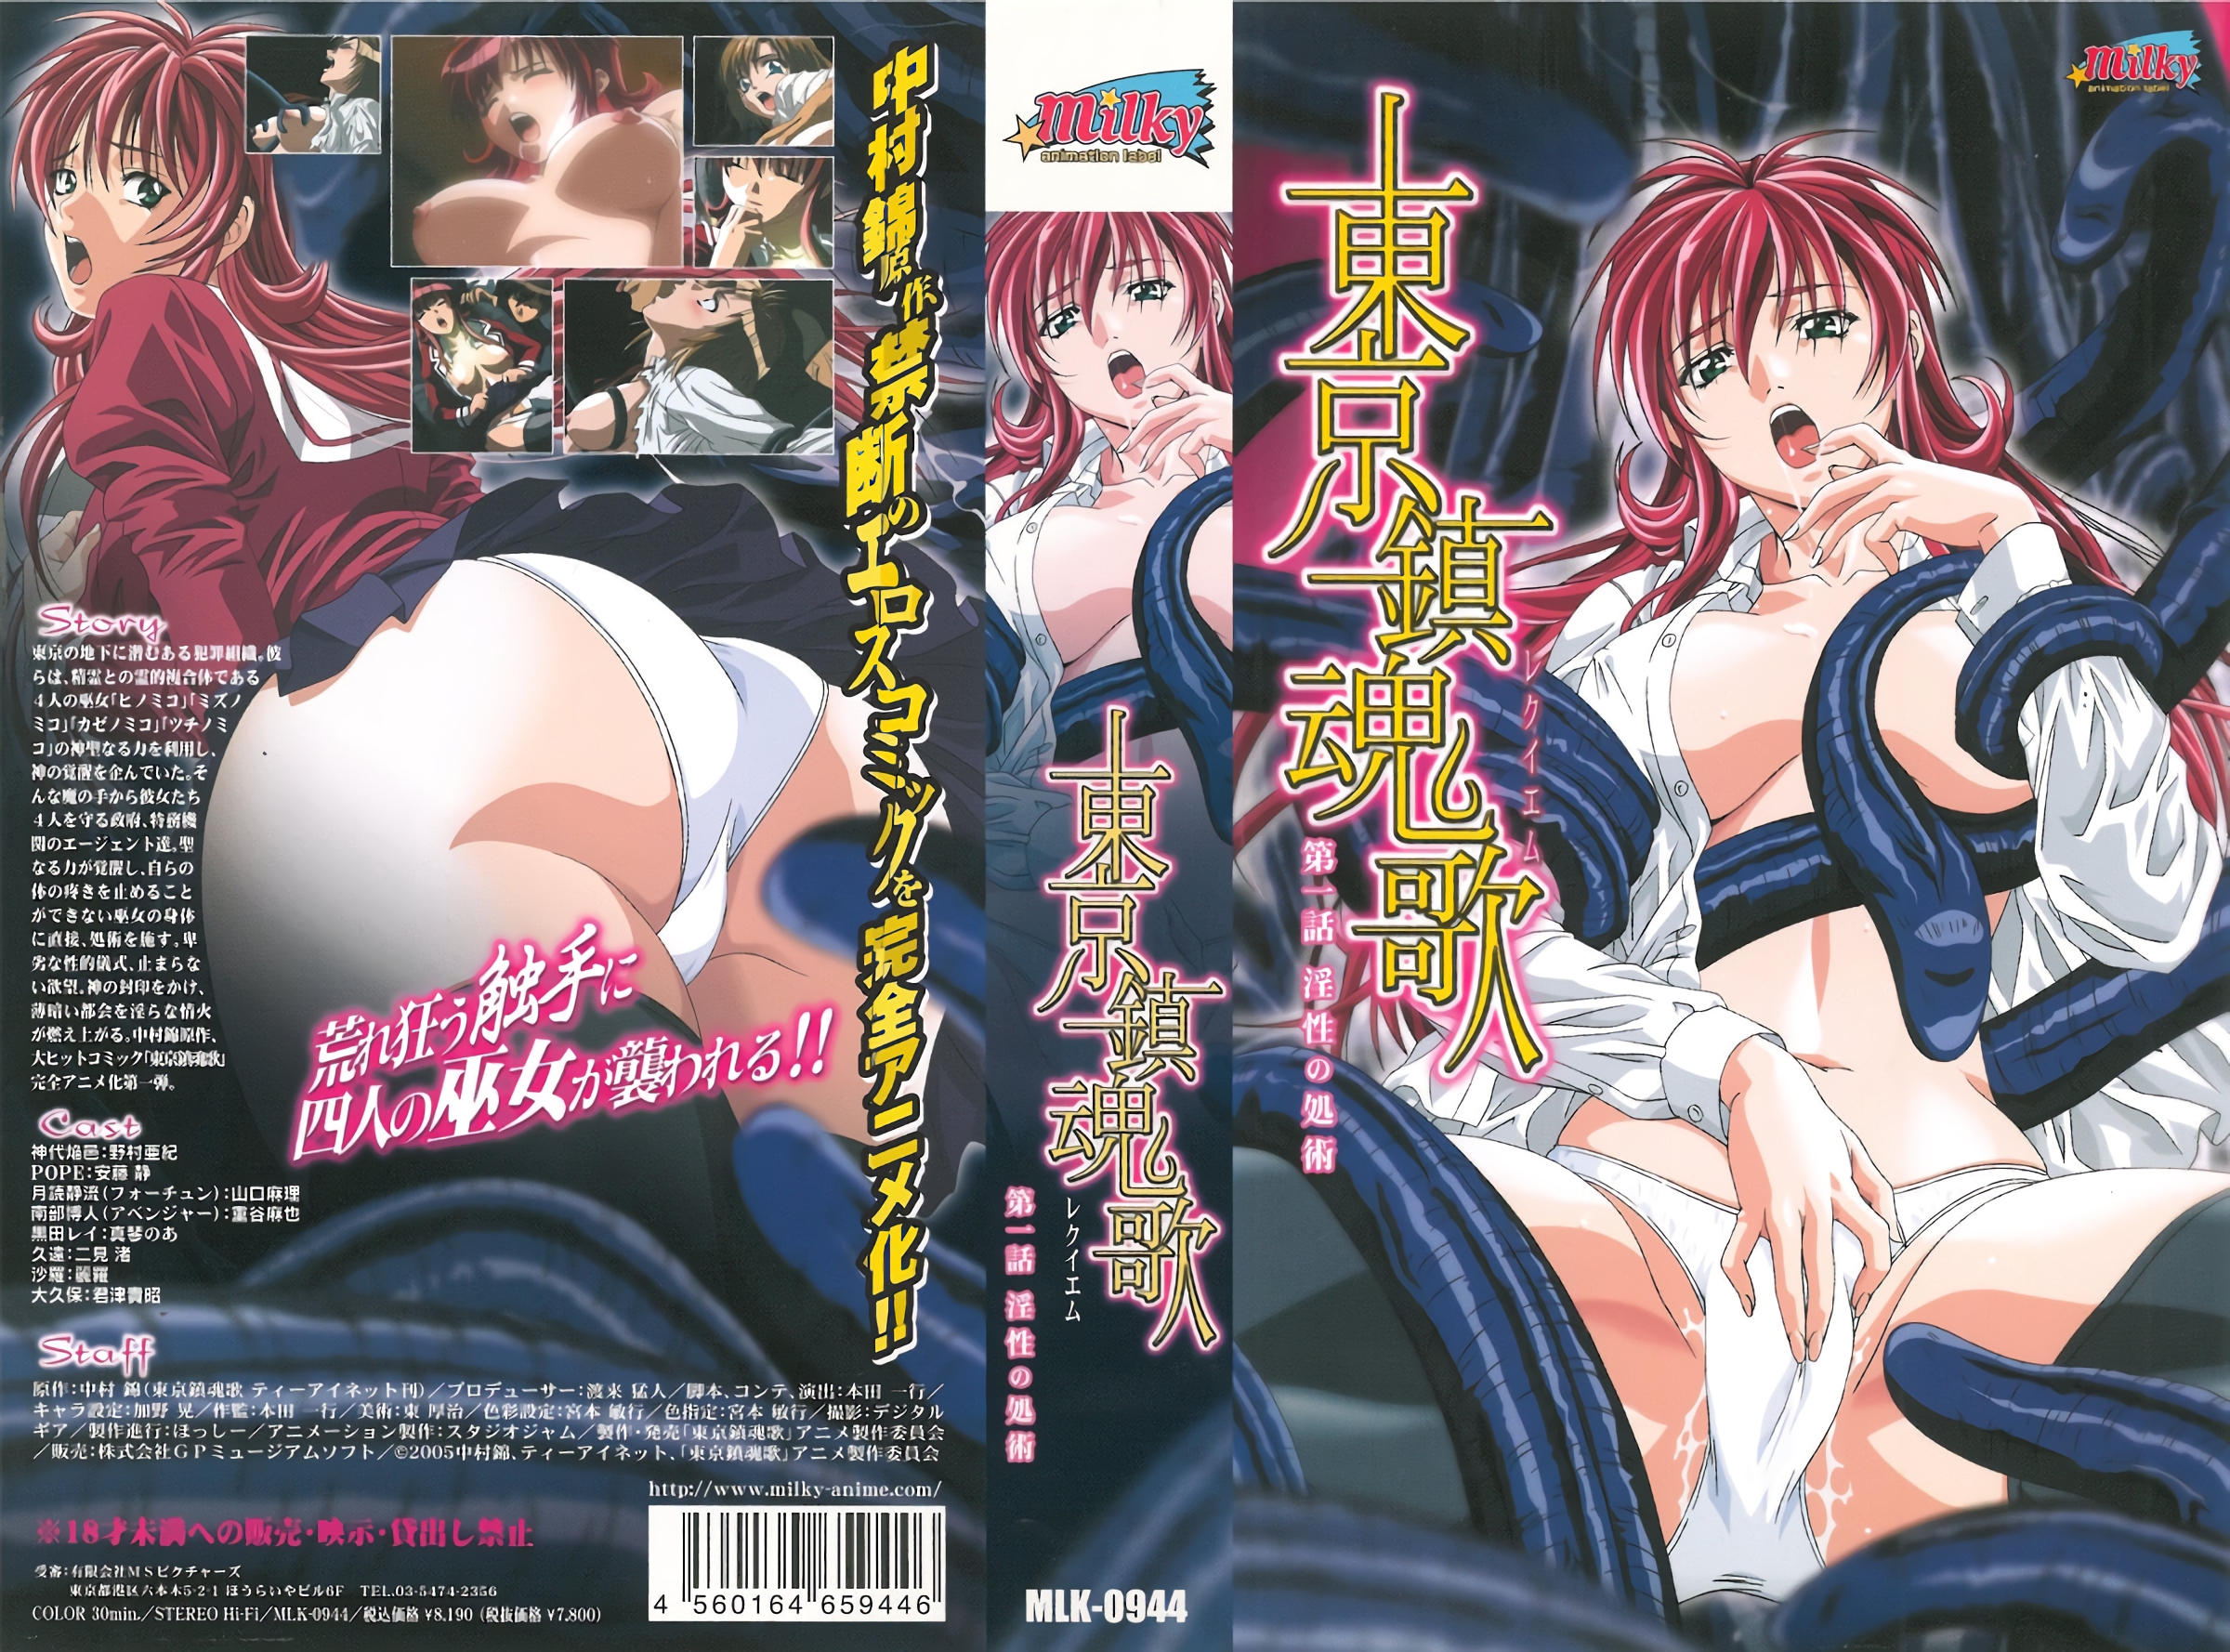
[milky] 東京鎮魂歌 第1話 淫性の処術

フリフレ2妹・菫~背徳の再会
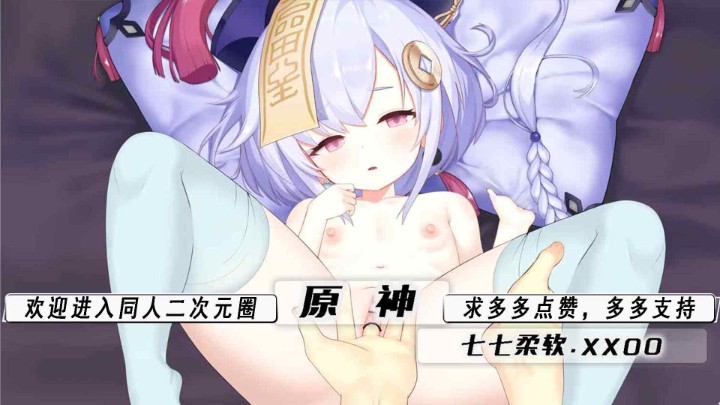
原神-七七柔软

Oni-chichi翻新厚脸皮的肝脏中文字幕
抖S女友和抖M男友第1话

NamaLOReFurachimono动画中文字幕
国产精品
性感的黑色丝袜极致诱惑1

『明日花未久』勾引按摩技师 按着按着就按到床上去了淫叫爸爸

浴室的激情鸳鸯
翘臀美乳辣妹自慰玩自拍

女神杨幂-性爱主播 边操边播 中文字幕 神级超逼真

【元气兔】民国妹妹求收留猥琐男要求肉偿口爆吞精1

猥琐大叔和00后18岁萝莉年轻无敌粉嫩,猥琐大叔和她搭配就像是父女组合 (3)1

女工鮑鮑換飯票1

【绝版资源】AV拍摄现场是怎么调教插逼拍摄 导演你怎么硬了
可爱少女第一人称口爆吞精!肆意玩弄精液带你身临其境1
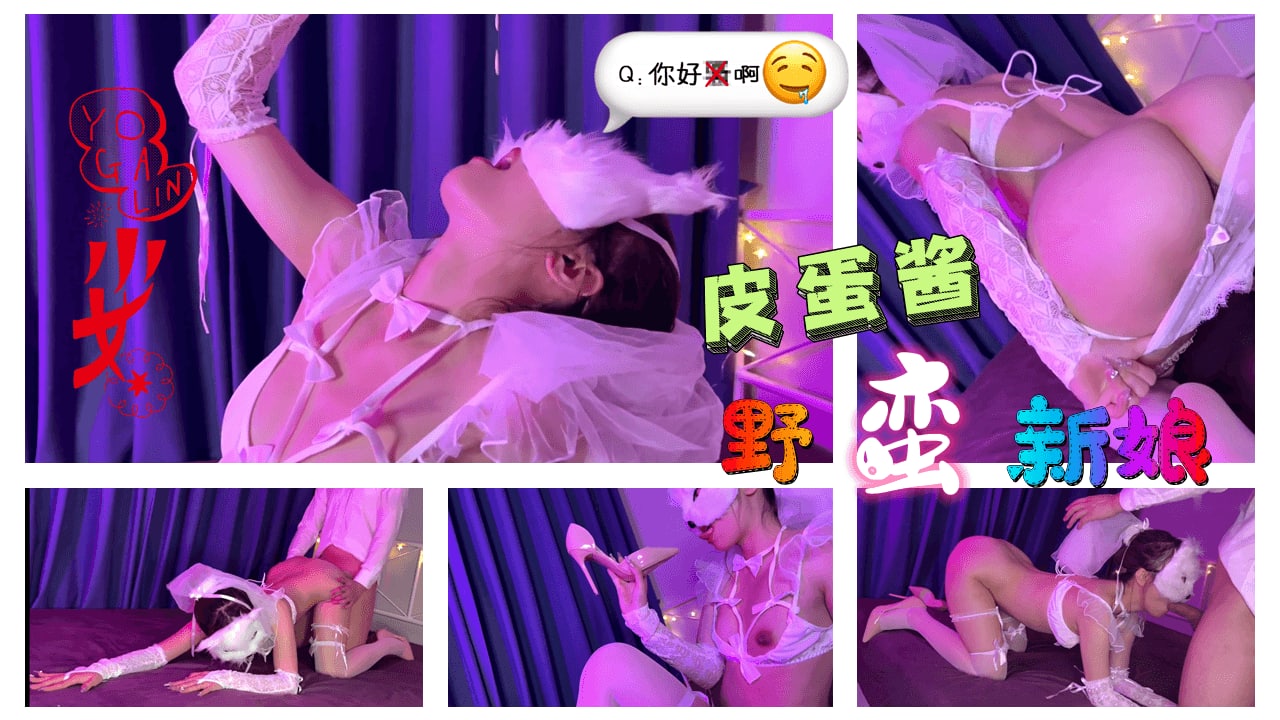
皮蛋酱005-野蛮新娘1

大神王胖新作-爆操高颜值熟女 操的叫老公1
三级伦理

激情边缘

我为商务谈判的失败负责

狂情

成人恋爱环境

小鹏奇啪行 日本季 第8集

德古拉之吻

赤足惊魂

双人姐妹花

七金尸

猎杀豪放女

女孩们的滚床单故事

法外之徒:卑劣的街头
Caribbeancom

CARIBBEANCOM-052124-001 放学后请做好准备~与穿著制服的顺从女孩发生性关系~

082421-001 连续插入愤怒的波浪180分钟〜不会在连续激烈的活塞中停止的极致冲刺! ~ Part 2 樱木莉乃

062414-627 巨乳导师 - 精液治疗捕获 - Rie Tachikawa
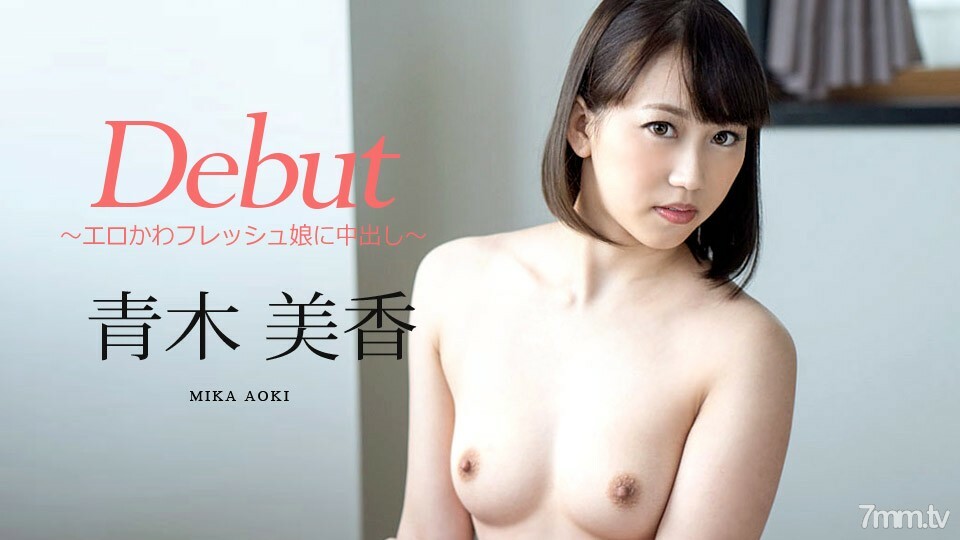
011120-001 出道 Vol.55 ~ 为色情 Kawa Fresh Girl 的中出 ~ Miika Aoki
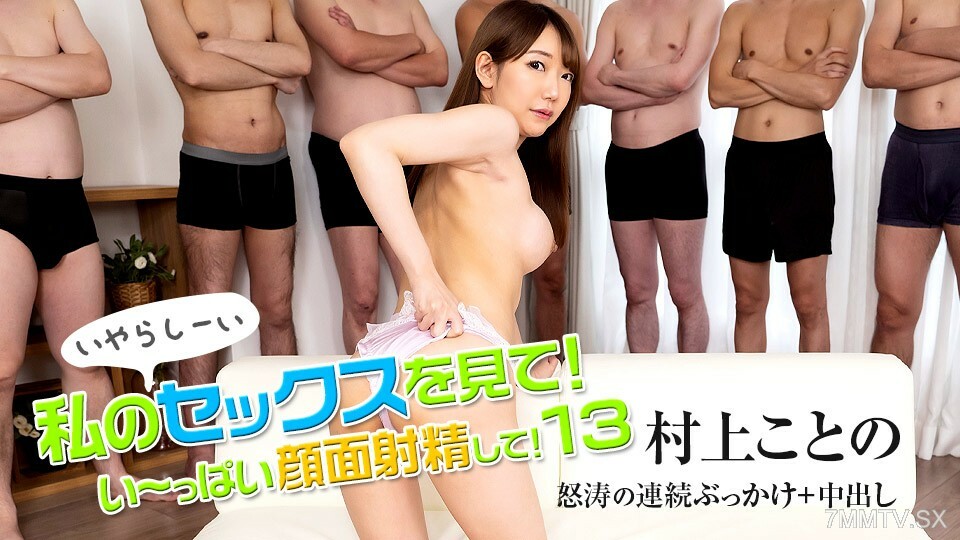
042923-001 我爱你!求我大量射精! 13 村上琴野

090110-469 禁忌关系9·第2部分青山雪菜(Yui Ayana)

102324-001 绘本最上还是最上

CARIBBEANCOM-030525-001 阴部图书 丸山希
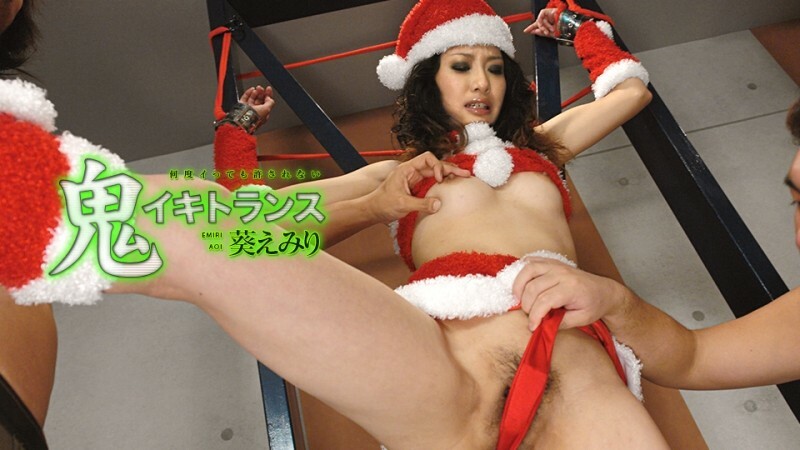
CARIBBEANCOM-122207-629 Oni Iki Trance 2 [AI 重制版] - 葵えみり

082522-001 THE Undistained -Blow Job- Non Suzumiya Miyu Morita Ryu Enami Chika Yoda

030811-638 F杯软奶原小雪
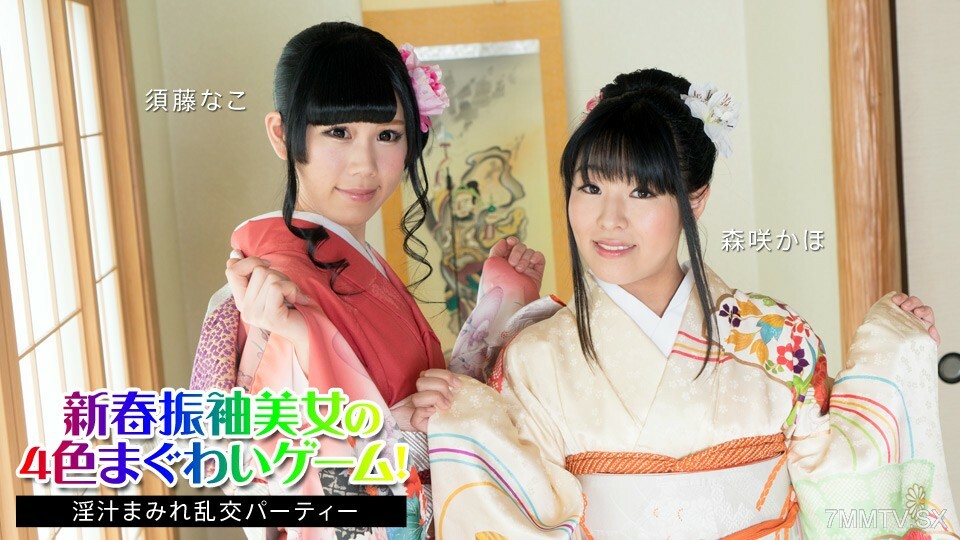
010824-001 新年的振袖美丽的四色枪戏! ~果汁疯狂学园~须藤奈子、森崎佳帆
人妻斩
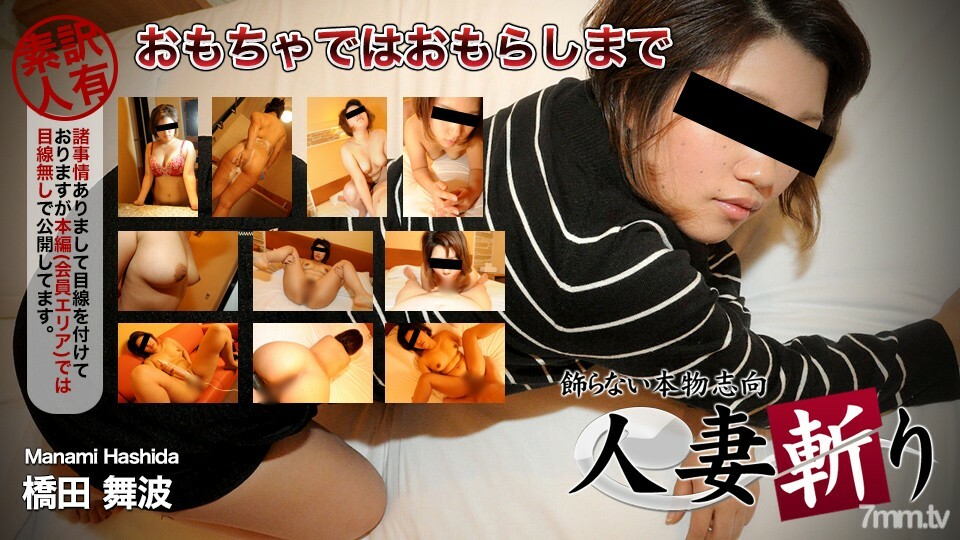
C0930-HITOZUMA1266 Mainami Hashida,24岁
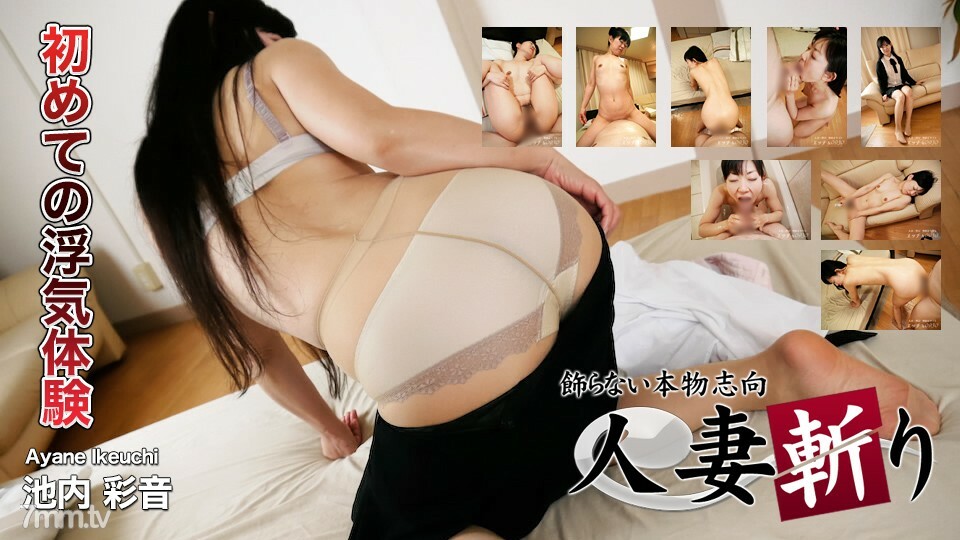
C0930-KI191105 池内绫音 41 岁
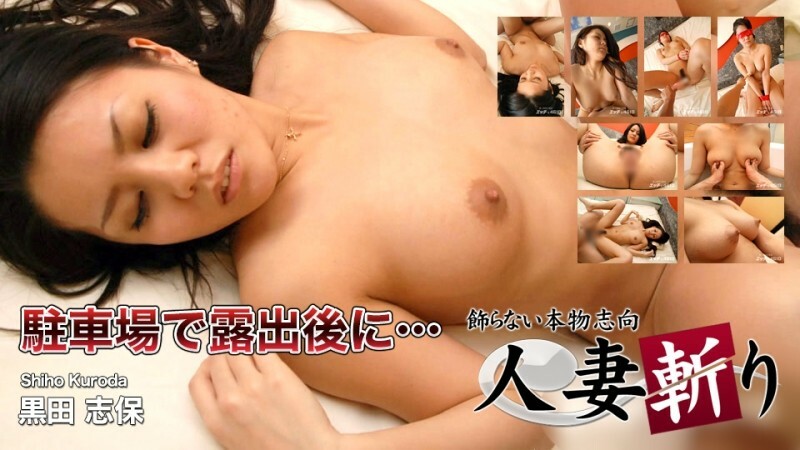
C-241112 黑田志穗
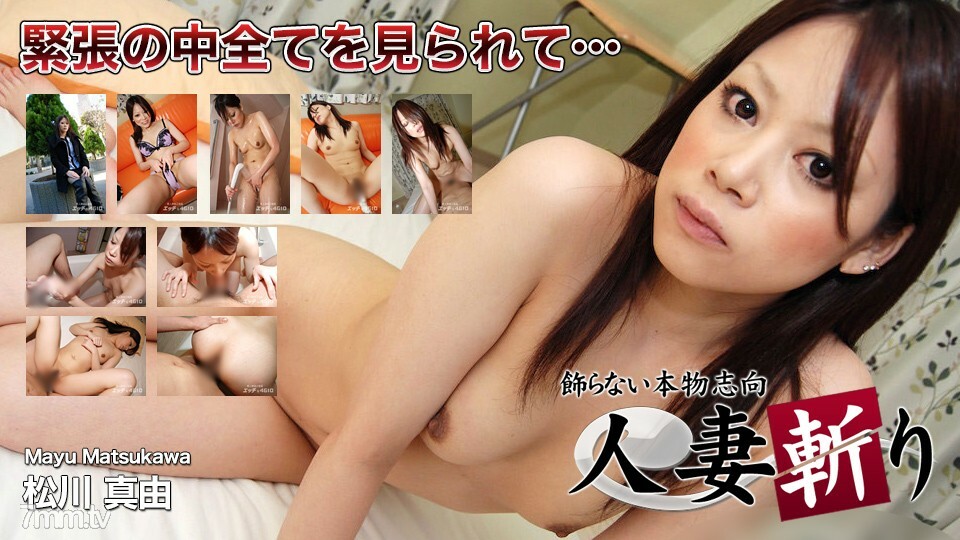
C0930-KI200329 松川真友 24 岁
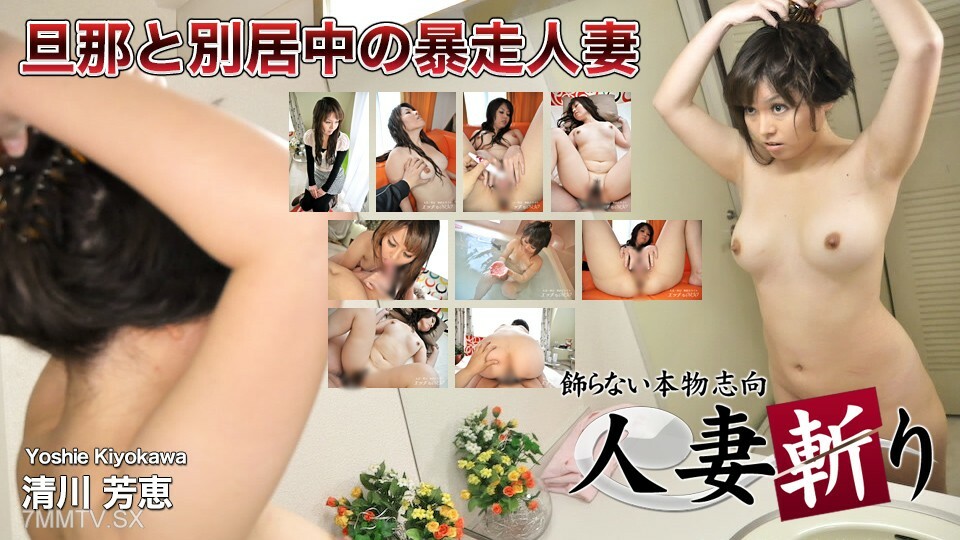
C0930-KI231029 清川芳江 32 岁
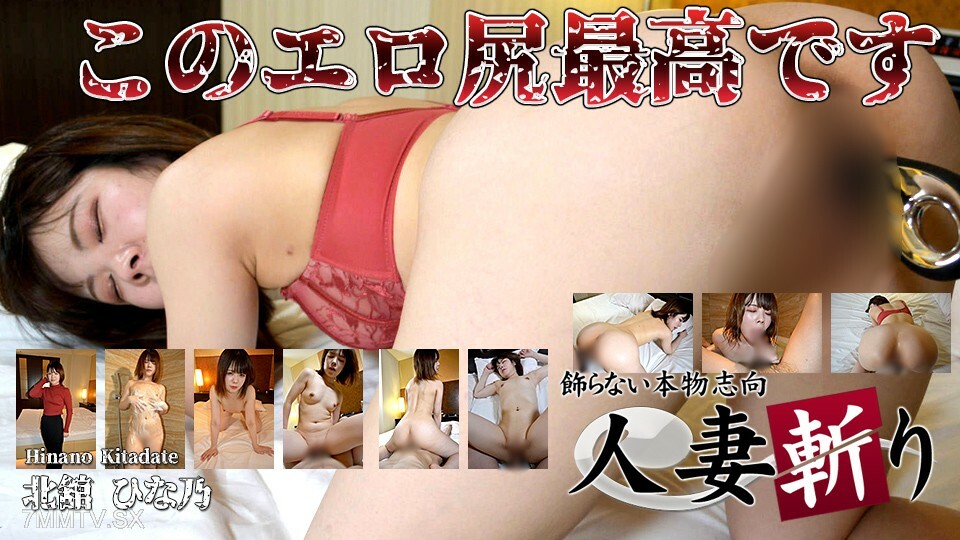
C0930-PLA0107 北馆日野 30岁
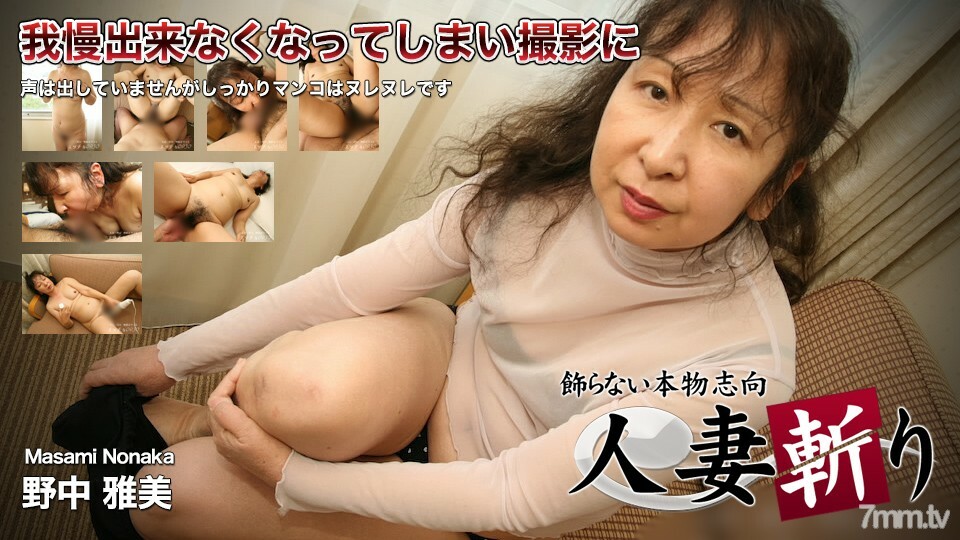
C0930-KI211214 野中雅美 53 岁

C0930-HITOZUMA1245 前崎花惠 27 岁

C-1386 横园幸

C0930-KI241029 49岁村冈玲子
C0930-KI220827 自拍自慰功能
C0930-KI190505 Hisae Maeno 32 岁
葫芦影业

爱豆传媒 ID-5261《狂飙2》先亲程程后摸腿 我是莽村李宏伟 芸溪

HUL-020 旧上海四女子往事.第四集.葫芦影业.连续剧

HUL-027 淫荡女室友爱处男

绿头鱼实验室之荧光套套测评

HUL-037 推拿风云.按摩献身至尊服务

HUL-031 性瘾妹妹爱上爱教男

蠢贼幸运日

皮卡丘血战蜜桃巨乳

HUL-022 旧上海四女子往事.第六集.葫芦影业.连续剧
赌桌作弊肉棒惩处

HUL-028 我要你做我的奴隶

陪玩约聊骚
其他传媒

素人女优酒店上门面试被冒牌摄影师无套内射之假戏真做

爱豆传媒 ID5322 欲望同学会再操初恋 诗琪

JDSY053 香蕉视频传媒 蕉点 社畜大叔偶遇神待少女

爱豆传媒 IA-003 美乳姐姐和健身教练的深层运动

爱豆传媒 ID5309 假恋爱真骗钱极品主播反被操 紫寒

起點傳媒 性視界傳媒 XSJKY045 漂亮大奶女醫生幫我性治療 羽芮(壞壞 林沁兒 芳情)

起点传媒 性视界传媒 XSJKY096 到同事家吃饭上了嫂子 阿蛇姐姐(欣怡 绯丽 宛琦)

扣扣传媒 FSOG060 超嫩极品白虎网红学妹 三月樱花 Cos神里凌华被侵犯 小穴裹紧肉棒颤挛抖臀爽翻

大像传媒之女優的SM初體驗-莉娜

XJX0019 香蕉视频传媒 性感黑丝SM女王降临 强忍射精冲动 调教变态男友 饼干姐姐

DA-004 大象传媒 火辣女同事的性感诱惑 李娜娜

DA74 大象传媒 上司睡了我老婆 初嚐禁果的慾望給老公戴綠帽的背德人妻 宋雨川
亚洲无码

【无码】心跳不已 ~情绪高涨的女友~ 小美川真由 1pondo-021823-001 小美川まゆ 021823-001
(COS☆ぱこ)M1ヲタ理系さんを捕まえました!ので…アズレン加賀さんにえっちに搾り取られちゃいました【個人撮影】_fix

【FC2PPV967816】粉嫩的逼被蒙面男イ操爆了

1Pondo 040125_001 おしゃぶりオーダーもOK!可愛いウェイトレス

日本街头素人学生妹

干倒喜欢汗臭男!的变态OL!!

导致带有柔和乳沟的窄镜头!

被住在楼下穿着情趣内衣超美的大姐姐诱惑成为她的宠物!

gachi1133 オムニバス −マンコレ番外編 中出しマ〇コ−

是个负债累累的漂亮妻子,撅着圆润漂亮的屁股,能接受中出,被插进去就活不下去的妻子。-cd2!
中出し精子舐め舐め
DKGX-001-流出 新型拷問診察室 狂辱激淫XTC vol.1 晒しもの女体改造! エリート女医、慶-cd1
伦理三级

爱的精灵【国语无字】

眉开眼笑【无语无字】EP05

【三级】《忏悔:松冈真知子的秘密》

情人节必看精选作品.
明日之星【无语无字】EP07

三级-千真万雀【无语无字】EP04
爱的色放【韩语无字】CD1

柏林性爱死

蒙眼高潮更容易?.

西施【国语中字】EP01

【三级】《俄罗斯妈妈》

至尊杀手【国粤语中字】CD2
欧美情色

两位美女在房间口爆大雕 ‘继母性教育系列’ S7:E1

【原档首发】让精液射满她的阴部
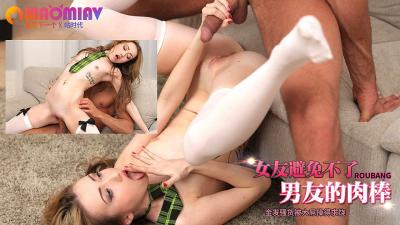
女友避免不了男友的肉棒

性感的闺蜜来我家性交 ‘家庭幻想系列’ S13:E7

在涂指甲油时男友来后入 S1:E4

跟超美巨乳妹子在沙发上做爱

欧美夫妇在家玩sm

在热水浴缸中被巨大的董杀死

#FUCKYOURPERIOD Pretty GF needs to Fuck on her Period - Amateur Leolulu

学生在厕所射的老师满身是 “老师教导系列” S3:E7

疯狂的酒吧钢管舞系列女郎
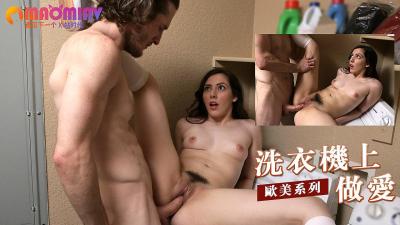
洗衣机上做爱
制服丝袜
羞恥! 新任女教師が学習教材にされる男子校の性教育 生徒の目の前で無遠慮な指が膣に挿入される。
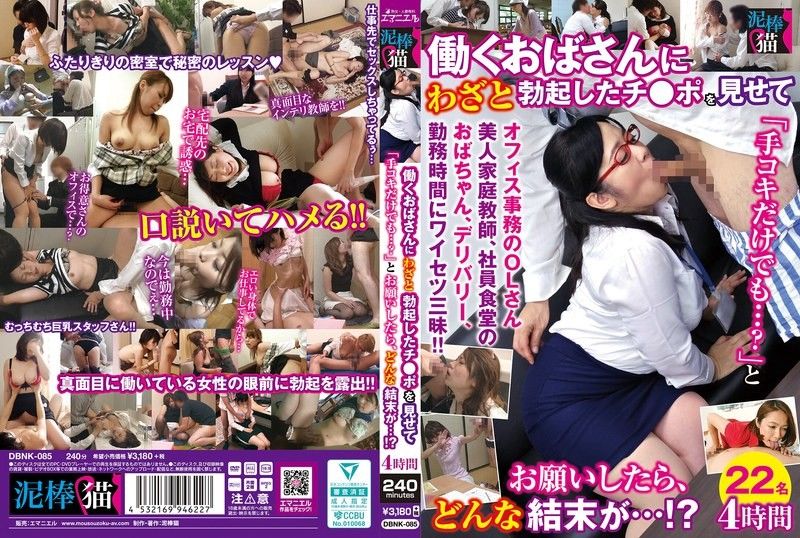
我故意向一位职业妇女展示我勃起的阴茎,并问她是否愿意帮我自慰…结果会怎样呢…? ! 4小时 未知演员 DBNK-085

NTO-004 ななこ
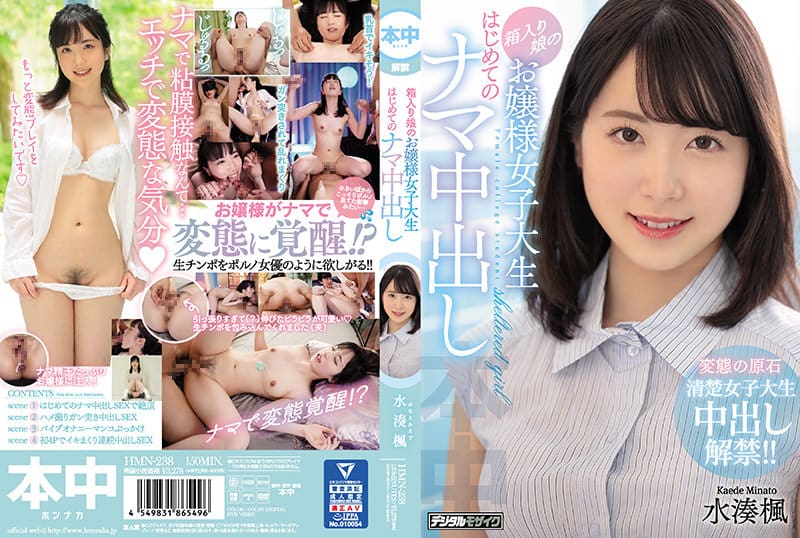
箱入り娘のお嬢様女子大生 はじめてのナマ中出し
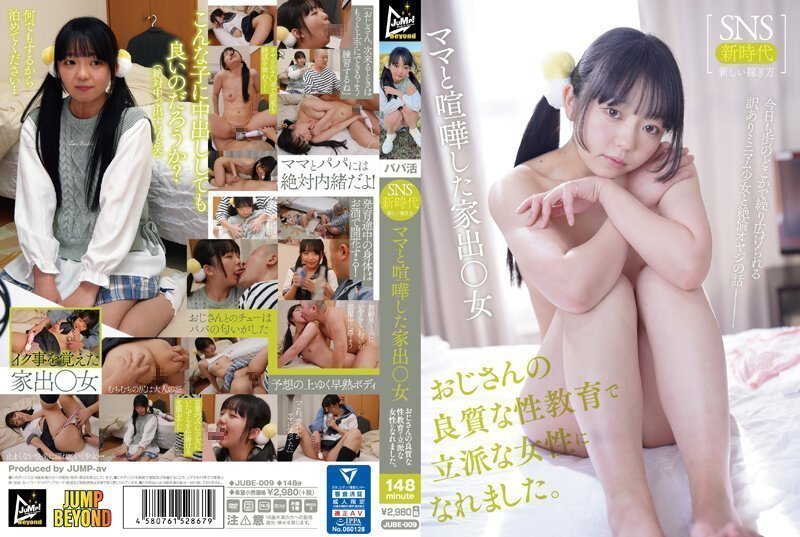
ママと喧嘩した家出○女 おじさんの良質な性教育で立派な女性になれました。的的!
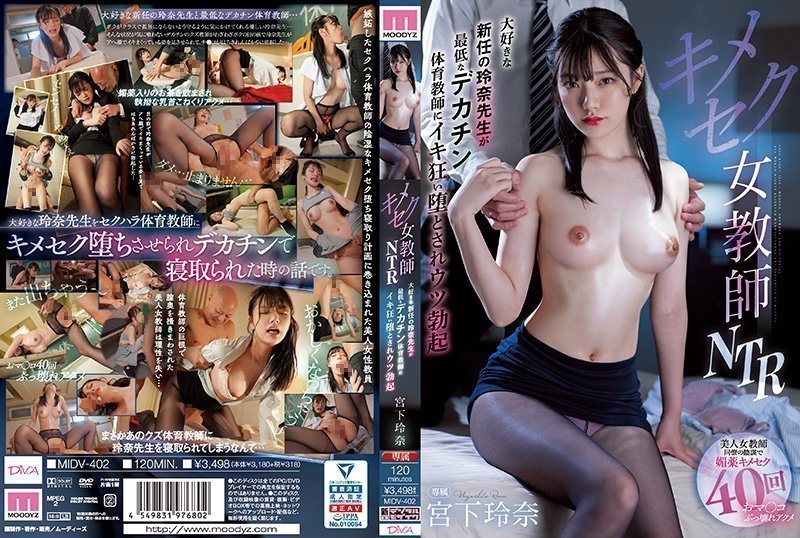
キメセク女教師NTR 大好きな新任の玲奈先生が最低なデカチン体育教師にイキ狂い堕とされウツ勃起的!

CJOD-214 こっそりノーパンノーブラお姉ちゃん達に一斉攻撃で誘惑されちゃったボク。 晶エリー 波多野結衣
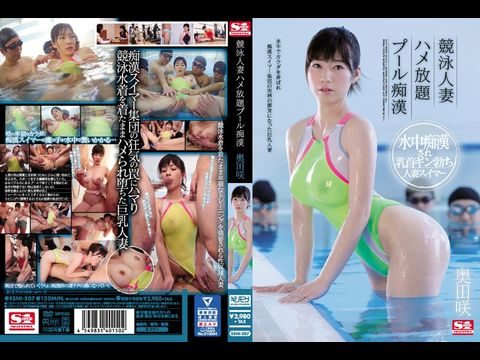
SSNI-507 競泳人妻ハメ放題プール痴漢 奥田咲
MOND-249 憧れの女上司と
JJCC-024 人妻溢出的蜜液 篠田優
近所のドスケベ奥さん洗ってないイカ臭いチ○ポをじゅぽじゅぽムリヤリフェラ10人240分 2。。
素人阴部扩张观察 11 - 湘南比基尼美女版 - 4K 摄影机超近距离拍摄,可以看到 未知演员 SABA-951
风情旗袍
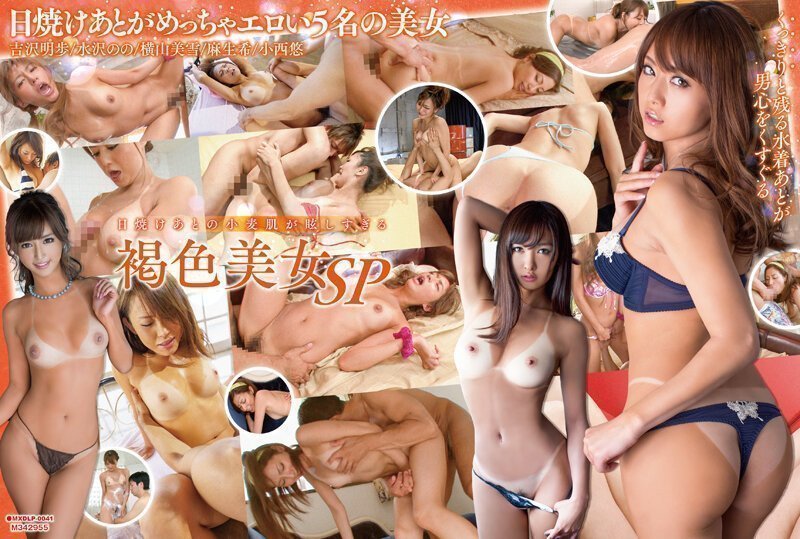
1 日焼けあとの小麦肌が眩しすぎる褐色美女SP的

KSBJ365息子が愛おしくて我慢できない!

極み接写!変態アングル!おっぱい愛で狂ったオヤジたちの爆モミ倶楽部

我的小梅子 小梅惠奈 SS-132

RBK-057 自己犠牲の女 岡田雛乃
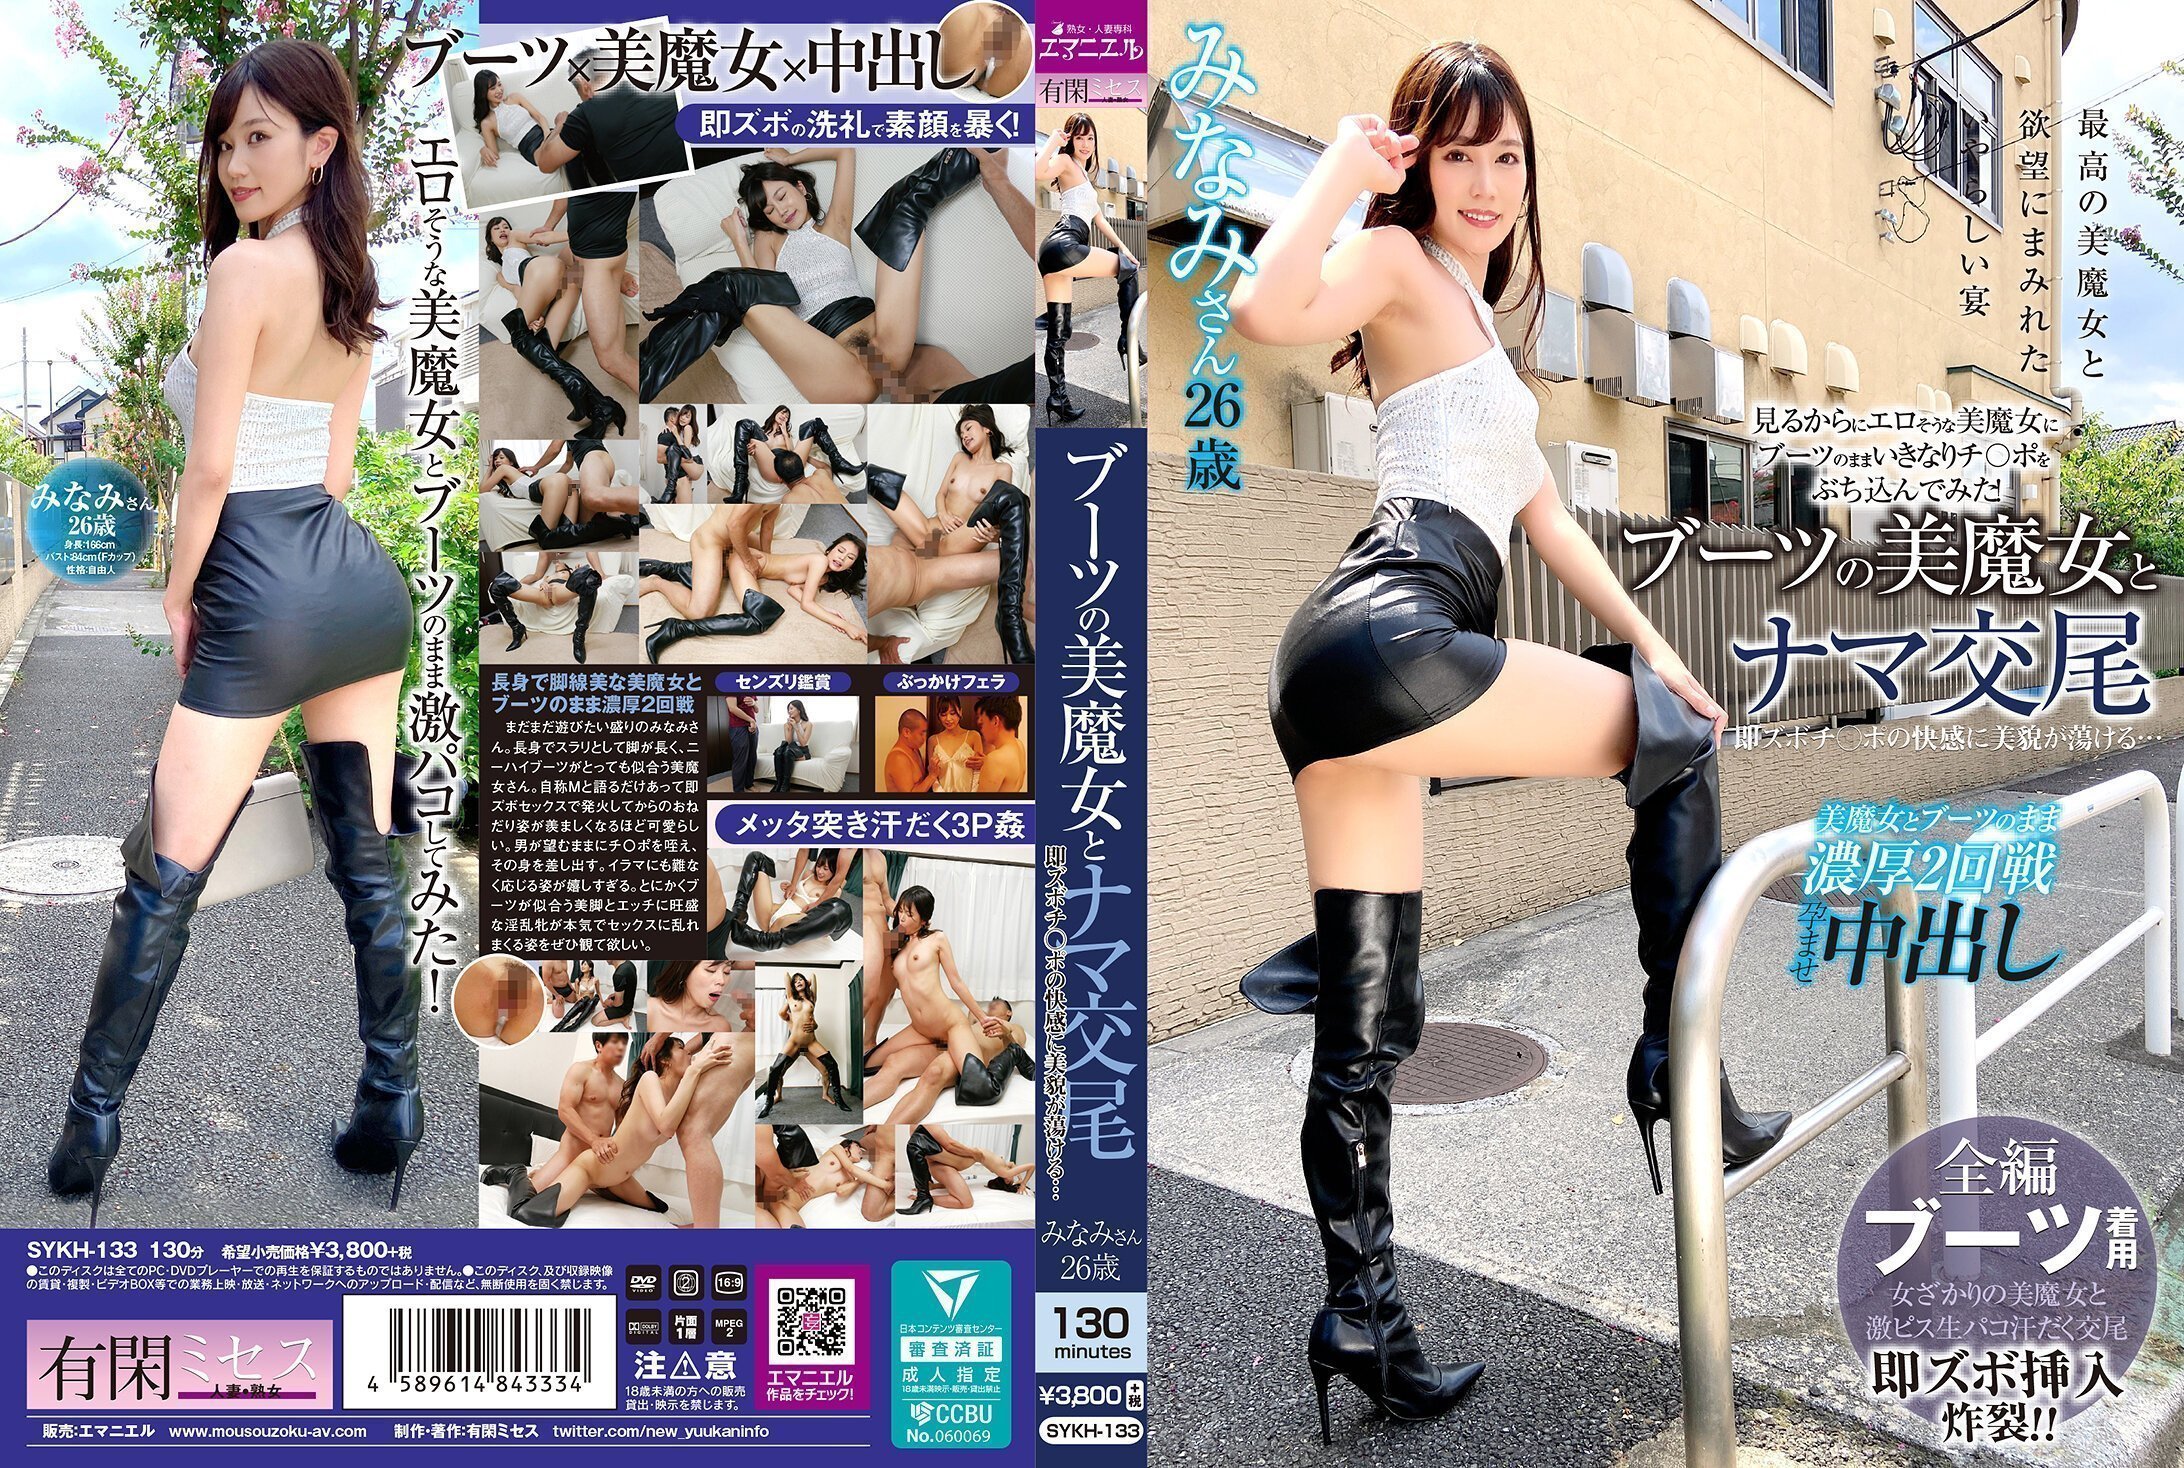
SYKH133ブーツの美魔女とナマ交尾即ズボチ〇ポの快感に美貌が蕩ける…みなみさん26歳
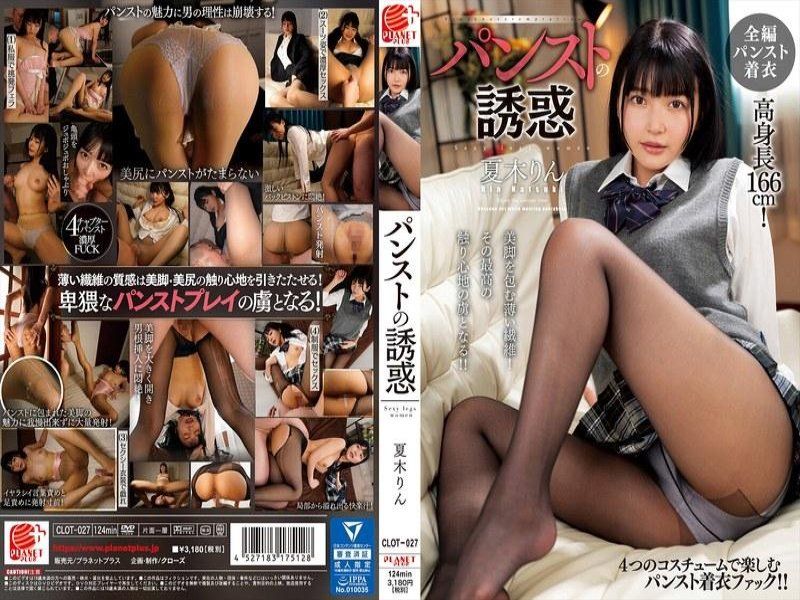
裤袜的诱惑 夏木凛 夏木铃 CLOT_027
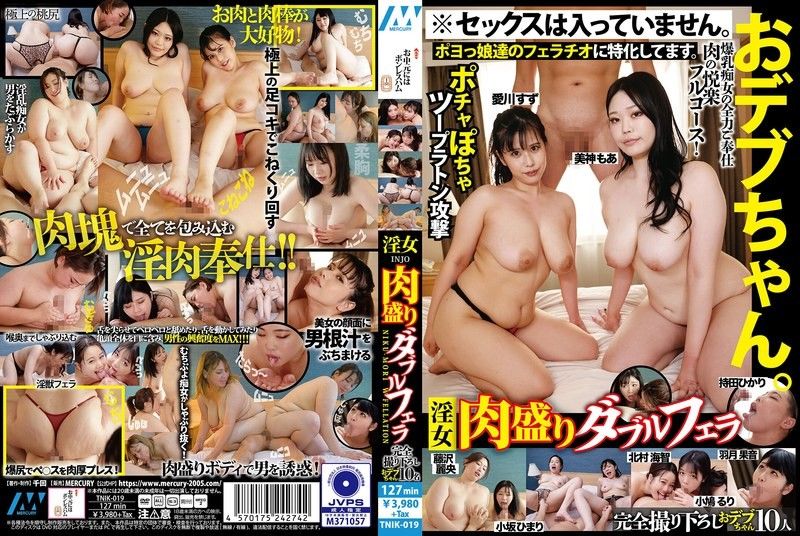
淫荡肉感双重口交 未知演员 TNIK-019
SYKH134ブーツの美魔女とナマ交尾即ズボチ〇ポの快感に美貌が蕩ける…みうさん41歳
被叔父侵犯后初次尝到绝顶自慰的媳妇 一乃あおい JUQ-096-C.

出轨的已婚女人-橘日向 SOAV-129
「等等!一定要做愛嗎?」貼身跟拍驗證紀錄 驗證架乃由羅是不是只要有拍攝就不管什麼時候在哪裡都會接受SEX 架乃由羅
萝莉少女
NUBI-057 実録ドキュメントパパ活 SNSで出会ったパパ活女子たちのハメ撮り裏動画
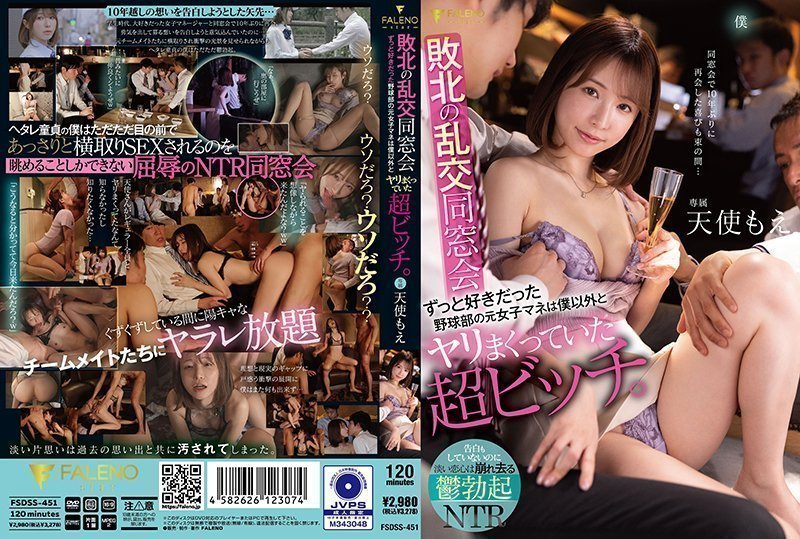
SDSS451亂交同學會以前很喜歡的棒球部女經理人其實是淫亂bitch天使萌。。
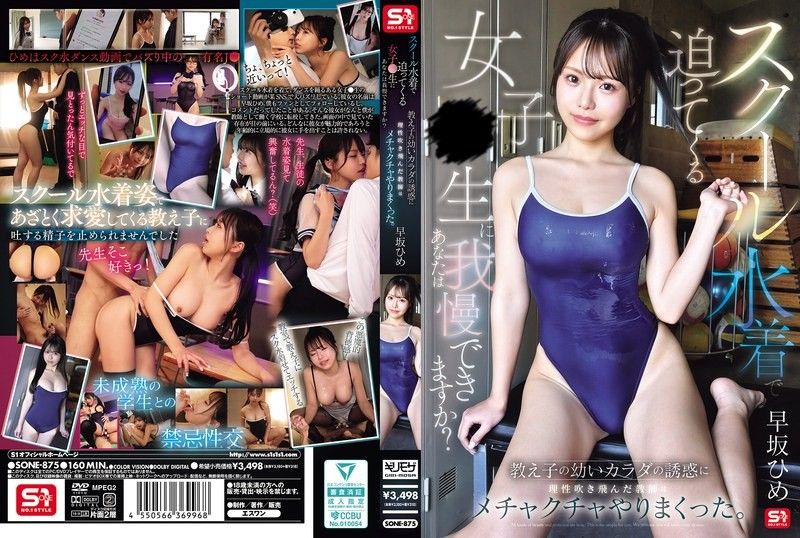
你能抵挡住身穿制服的女学生吗?老师被学生的青春肉体诱惑得神魂颠倒,变得狂野起来。早坂姬 早坂ひめ SONE-875

259LUXU- 1130 ラグジュTV 1113 若き才能を発揮する美人音楽プロデューサー。脱がせてみれば一際目を惹くGカップの巨乳にオイルを塗りたくり、激しさとネットリしたセックスに何度もイキ乱れる!
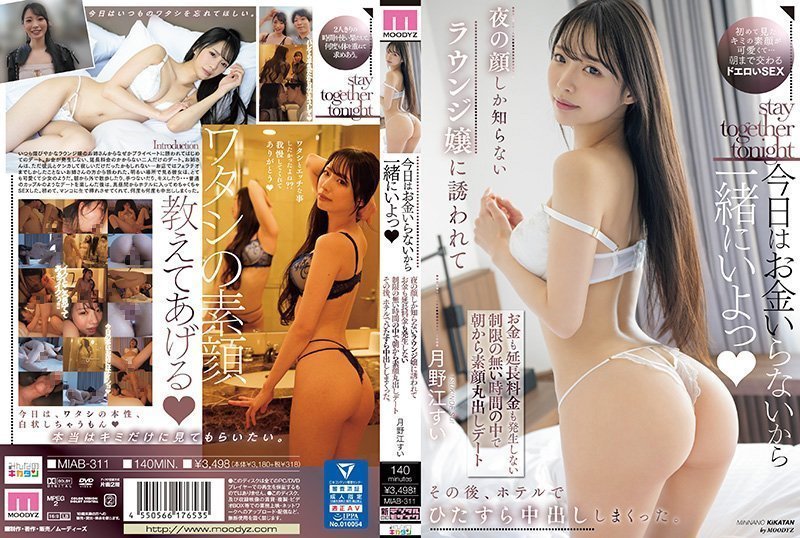
我今天不需要钱,所以我们一起吧。我晚上被一个只认识我脸的休息室女孩邀请,我们早上就 月野江すい MIAB_311
MMB-224メッチャ押しに弱い都合の良い女たちチ○ポ入れた途端に大喜び10人
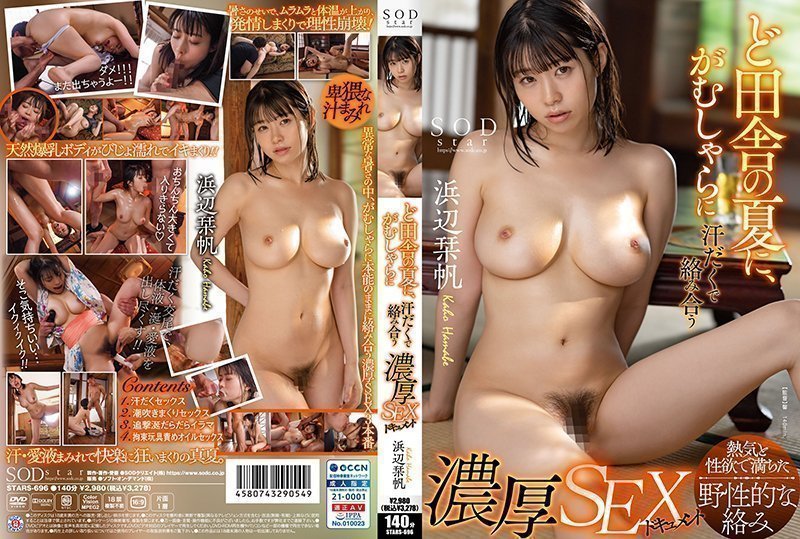
STARS-696 鄉下的夏天 滿身是汗的交融濃厚SEX實錄 濱邊栞帆
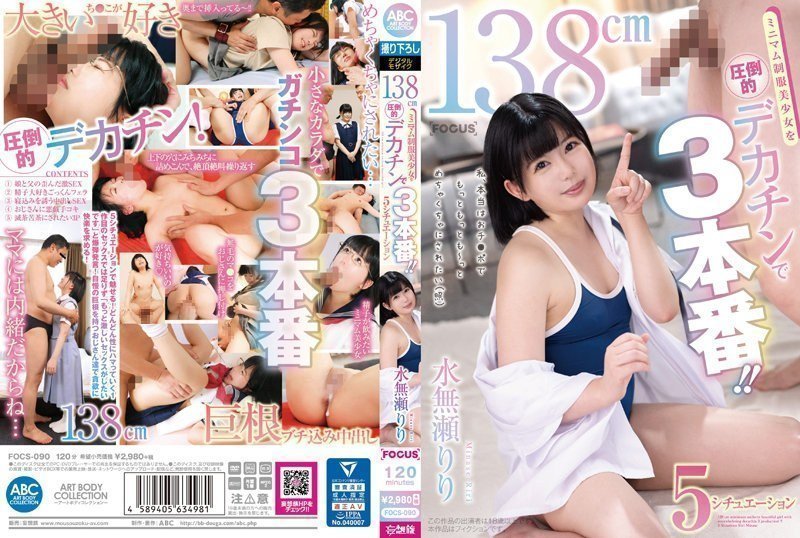
138cm迷你制服美少女压倒的巨根三本番水无濑莉莉水无瀬りり。
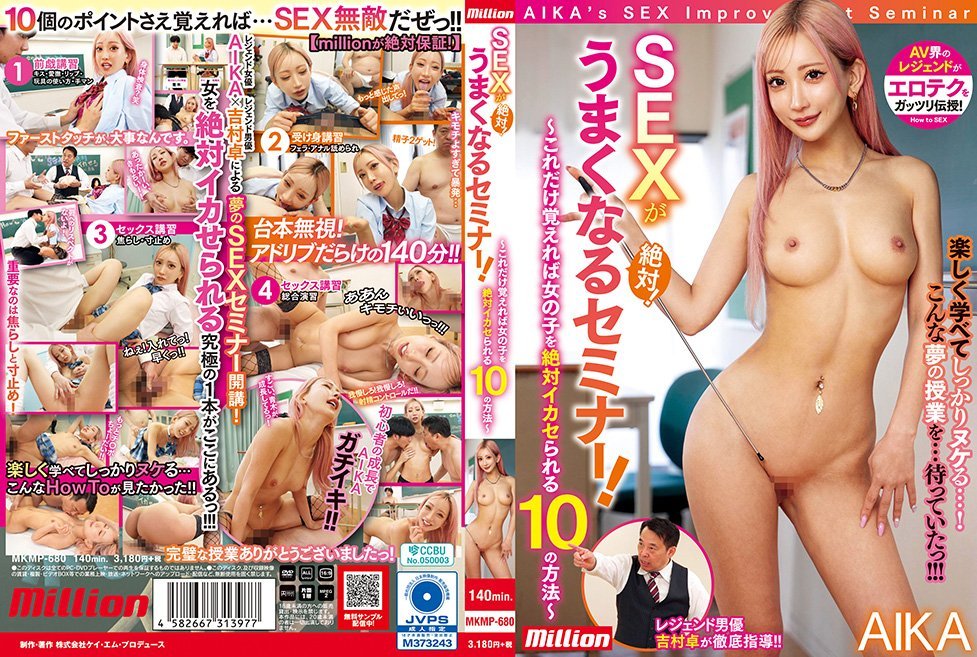
性爱保证!提升技巧的研讨会! ~记住这10个方法,就能让女生高潮~ MKMP-680
300NTK340超絶美女!!いきなりSEX!!怒涛の鬼ピストンで即連続昇天!!騎乗位で攻めに転じるも…即マッスル男優のパワー全開バック駅弁で文字通り昇天の大量中出し!!..
NHDTB927成績が下がった罰としてアナル好き塾講師に野外浣腸授業へ連れ出された気弱女子校生2
正统派体当たり美少女仓木しおりBest 290min.OVER SPECIAL
国产丝袜

抖音小博主袁帅裸聊视频曝光精神小妹喜欢在网上分享一些微擦边视频穿上过膝小黑丝的样子看起来很欲大神也只是随口试探了两句而已没想到小骚货竟然爽快的答应了裸聊

白衣花裙妹子,镜头前掰穴非常粉嫩站立抽插.
调教纯欲白丝JK乖巧萝莉妹子极品小丰臀主动骑乘

性爱泄密和两.老铁分.享4P.包养的长.腿黑丝淫.荡小.母狗_有妞一.起操_众屌.挨个.裹一起操_完美.露脸

反差人妻-丝袜高跟极品人妻道具抽插激情自慰

激情性爱-肥逼技师丝袜制服抽插疯狂性爱-
小美女长腿黑丝.
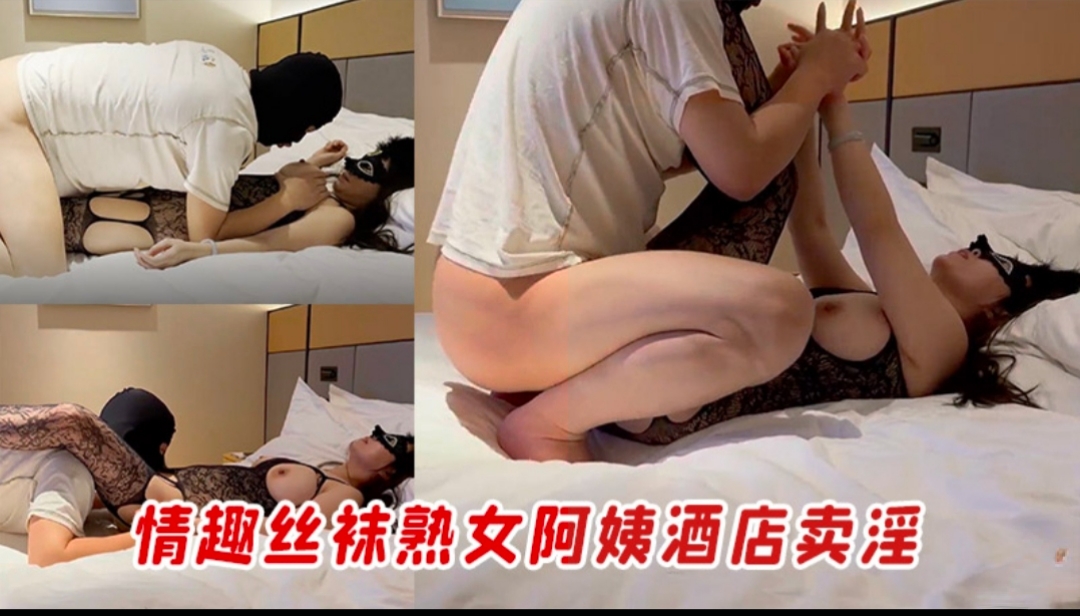
情趣丝袜熟女阿姨酒店卖淫

钢琴舞蹈老师Satie极品反差 超级色超级诱人.
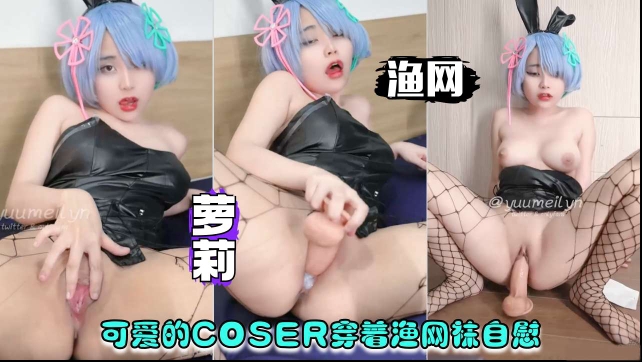
可爱的COSER萝莉穿着渔网丝袜性感自慰

丝袜夫妻大秀花样多丝袜足交深喉做爱

内射中出吊带红丝巨乳女神
韩国直播

KBJ-25010870 kbj25010870_yami1009_20241118 - Yami1009
KBJ-24012201 kbj24012201_ueue1004_20230911 - Ueue1004

KBJ-23070643 kbj23070643_yena1002_20230325 - Yena1002
KBJ-23120215 kbj23120215_rlaakfl123_20230718 - Rlaakfl123

KBJ-24041636 kbj24041636_imissy0u_20231212 - Imissy0u
KBJ-23101046 kbj23101046_ayoona_20230602 - Ayoona

KBJ-24030643 kbj24030643_tess00_20231030_VIP - Tess00

KBJ-23071542 kbj23071542_soyether_20230331 - Soyether

KBJ-24093043 kbj24093043_mina8017_20240630 - Mina8017
KBJ-25020552 kbj25020552_zzudyy_20241212 - Zzudyy

KBJ-24020551 kbj24020551_hanny27_20230926 - Hanny27

KBJ-24091271 kbj24091271_qkrgkdms01_20240606 - Qkrgkdms01
成人动漫

#1初恋。
[milky] 牝教師~淫辱の教室~ #1 私、汚されてしまいました…
Acha当我进入公共场所时一个神秘的淫荡母狗正等着铲除所有司机并猥亵他们

akira_Brave777SP一月风真伊吕波01翻译
Loveme枫与铃1

新 最終痴漢電車 Rail-3

3D守望先锋
[メリージェーン]オトメドリ 上巻 纯洁の轮舞曲
女教師 一時限目 社会科「泣かぬなら犯してしまえホトトギス」
巨乳肮脏的小学校

[3D][無字]落淫の花嫁

姐嫁四重奏 2
中字有码
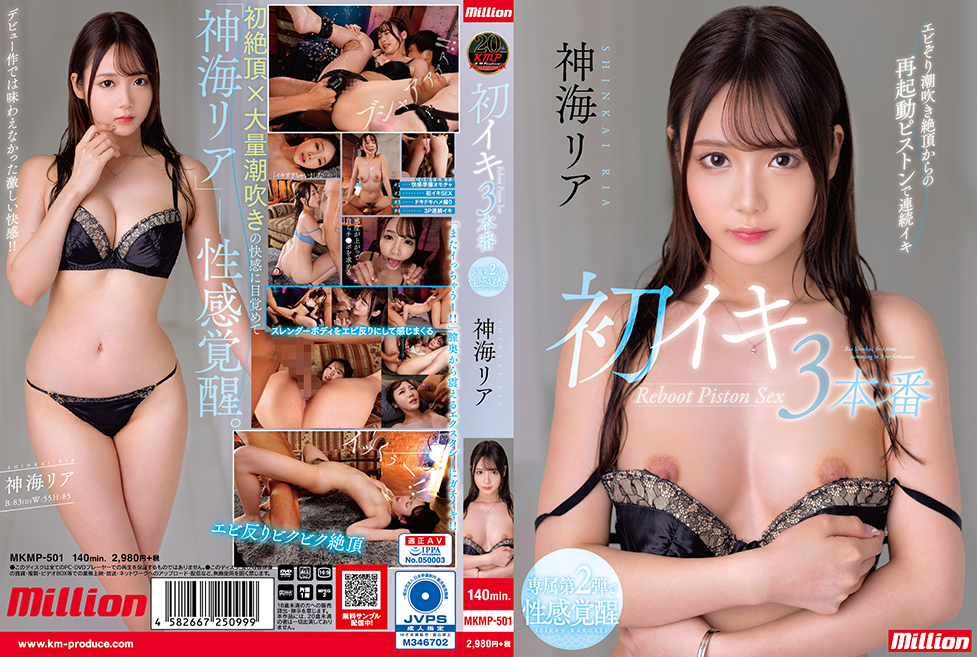
MKMP-501-C 神海リア 初イキ3本番

KMHRS-032C 在T●kTok很快就10萬人追隨!淫蕩可愛的話題性辣妹 夢想中的AV debut 叶夢空
MXSPS601吉泽明步编年史Vol.1
JUL-099 女婿的大肉棒被飢渴難耐的岳母霸佔讓女兒獨自享用太可惜了 瞳亮

SSNI-904C 和有著最贊比例的獨一無二愛人外遇性交直到末班車為止的兩小時 奧田咲
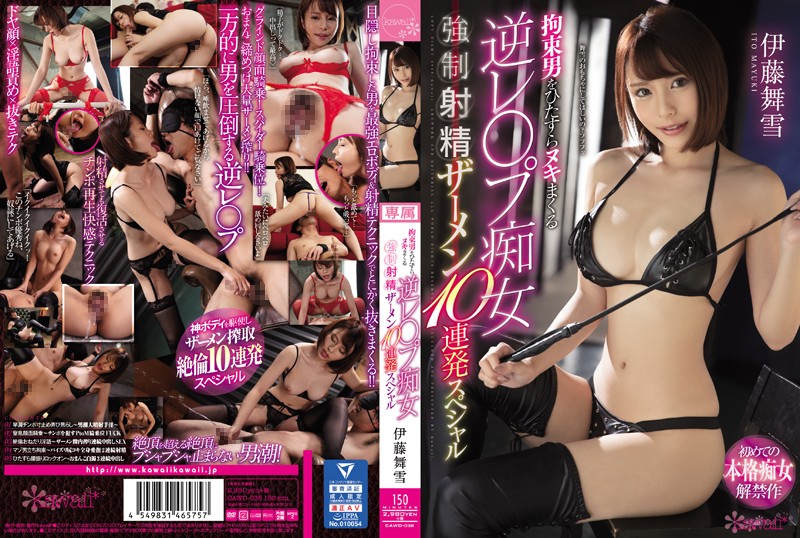
SSNI-666 在戀人面前被學生輪●的新人黑絲女教師 櫻羽和佳
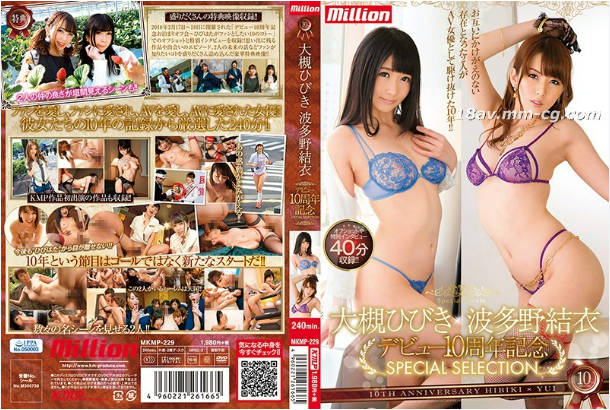
MKMP229大槻响波多野结衣出道10週年纪念SPECIALSELECTION
MEYD-898-C 時給アップを条件に店長からの乳首責めハラスメントを受け入れた巨乳パート妻NTR
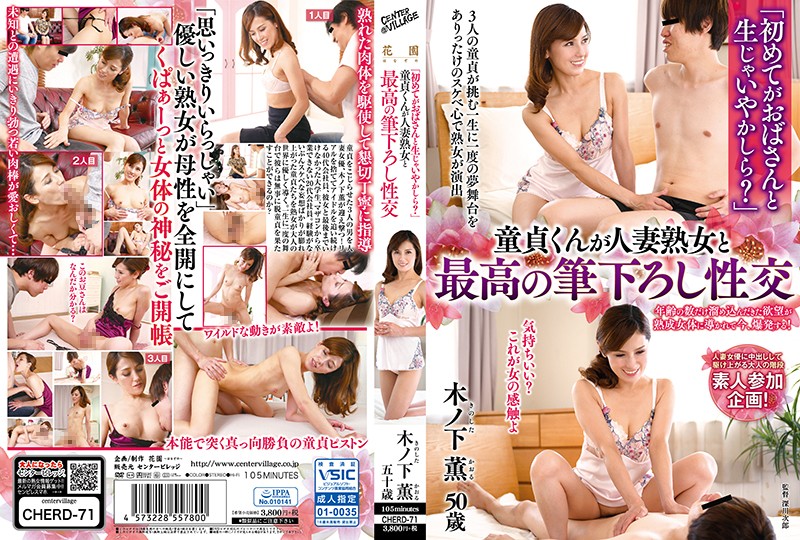
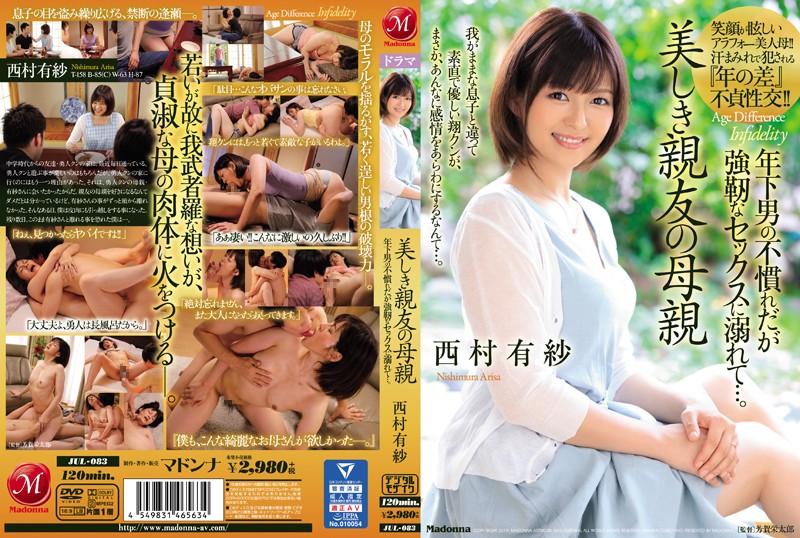
「初めてがおばさんと生じゃいやかしら?」童貞くんが人妻熟女と最高の筆下ろし性交 木ノ下薫
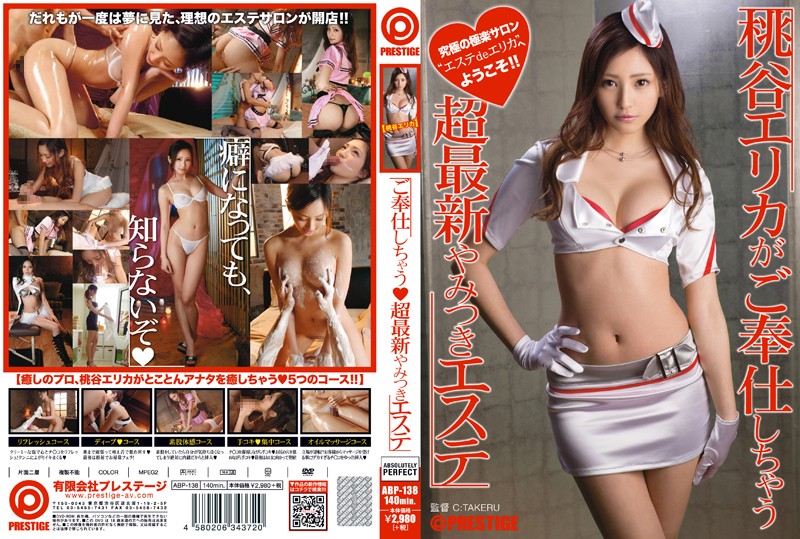
ABP-138 桃谷繪里香超高級風俗服務侍奉你爽快射精

ATID-390 花は毒蟲に挿れられ蜜を吸われた 知花凛
MIRD180私立深喉大学医院精液採取科
女优系列
マッチングアプリで知り合ったカワイイ女の子を連れ込んで俺好みの専用ご奉仕メイドに調教しようと思
離婚して地元に出戻った幼馴染と再会 ずっと片思いしてたと告白すると…。
SUPER FISHEYE FETISHISM震撼力兴奋蜜写docbe OL肉感BODY藤子未央。
朝ゴミ出しする近所の游び好きノーブラ奥さん村上佳フ苗.
「○○君,看。这是老师的胸部喔?」 2周实习来的朴素教育实习生,和学生两人独处时不知为何会露出 CAWD-926
在搬回老家前和都市男在没有人的房间里数次中出-美谷朱里

昔みたいにアナルを调教してくだうさい.
REXD-475 えっ…嘘でしょ… 心霊スタジオ検証中 なんか…クリがジンジンする…
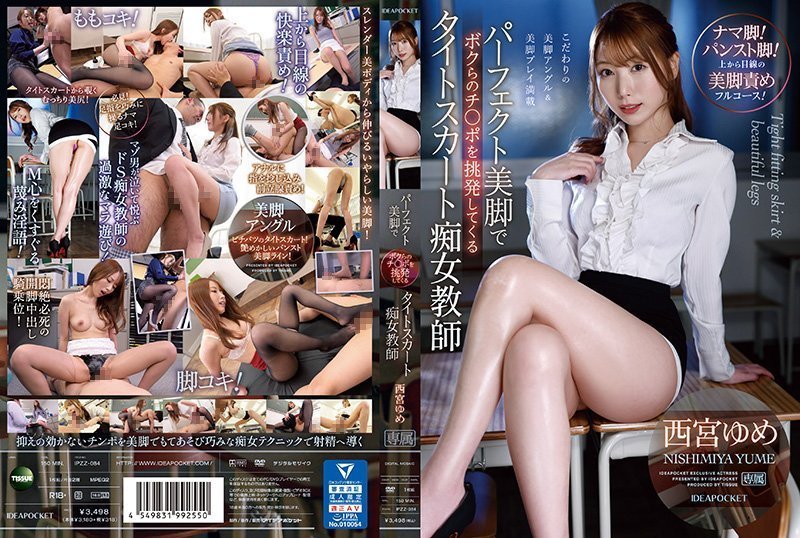
パーフェクト美脚でボクらのチ〇ポを挑発してくるタイトスカート痴女教師 ナマ脚!パンスト脚! 上的的!
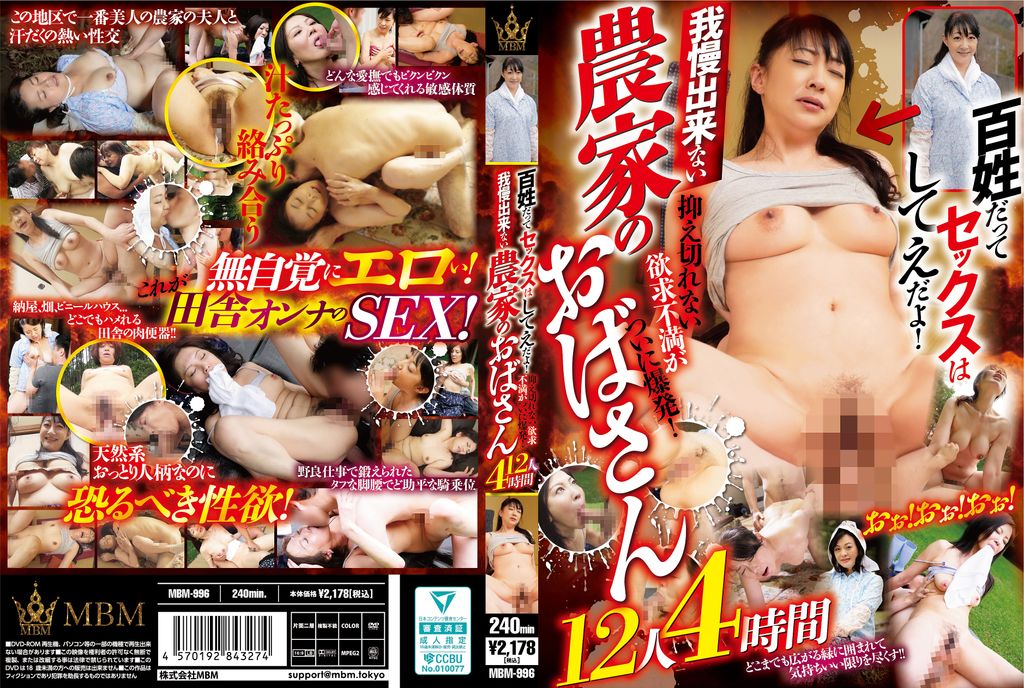
MBM996百姓だってセックスはしてえだよ!抑え切れない欲求不満がついに爆発!我慢出来ない農家のおばさん1
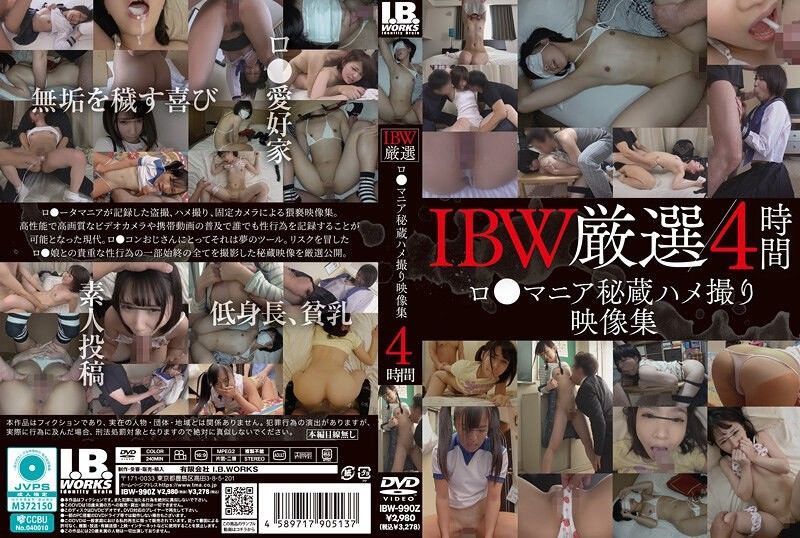
IBW严选 罗莉爱好者珍藏自拍性爱映像集4小时 未知演员 IBW-990z
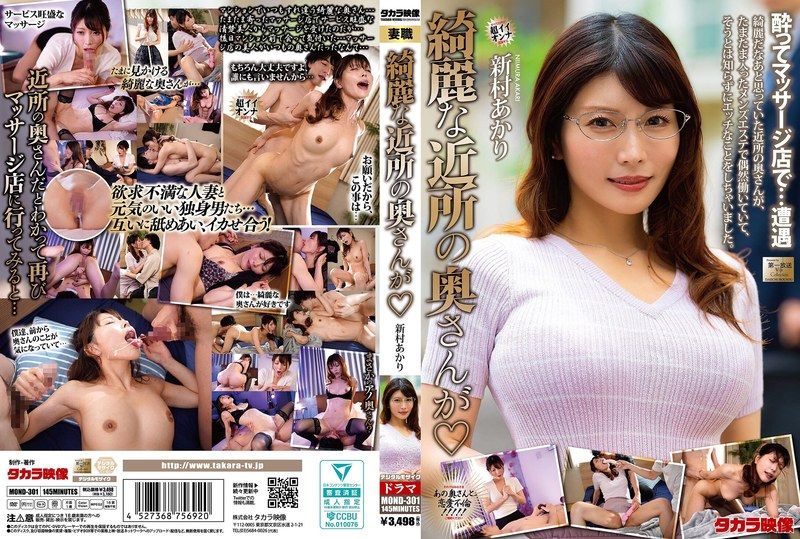
漂亮的邻居太太 MOND-301
欺辱凌辱
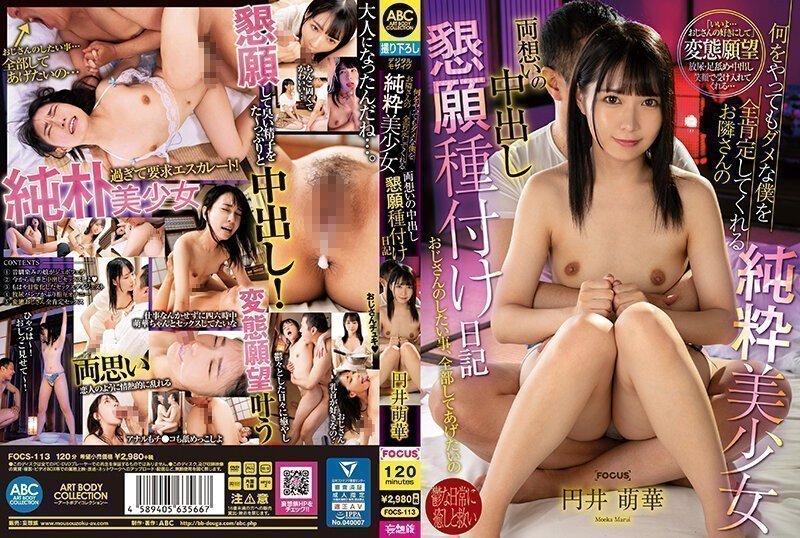
什么都没做成的我和对我全盘肯定的美少女邻居圆井萌华円井萌华。
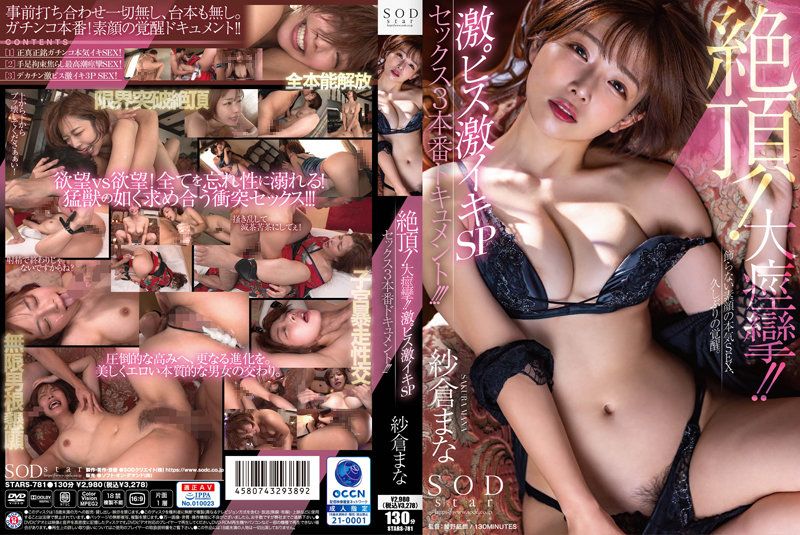
绝顶!大痉挛!超激活塞SP SEX三本番document

完全私密影片:E罩杯高挑美女全裸露。广濑鸣美的第一次独自过夜 PKPL-058

带有未公开片段的高级版!-枫可怜,初川南,坂道美琉。
两个痴女的面部调教的!
一位高级教练那里得到解禁

dldss151 お嬢様大学に通っているのに内绪で福原の最高级Debut 花宫えま.
HOMA131青森から上京してきたばかりのバイト先の女子大生と密室で何度も何度もずっと粘着SEXして過ごした日々
DN383被女兒男友抱緊的我篠田優。。
STIGE PREMIUM 22.。
工作的超M女子精选 20
【有码高清】cjod-368 朝がくるまで射精させる种榨りプレス 乙アリス
男同性恋

教粉红系男孩。

秘密性行为.

一进屋就运动.

充实的性生活.

三性引诱和乱搞肌肉男。

一个洞两个屌.

阳台上高潮与随想.

妇玛丽男奴隶。

唅不腻的肉棒.

又一次把我猛揍了一顿.

丛林性爱.
拥有巨乳熟女的身体.
国产人妻
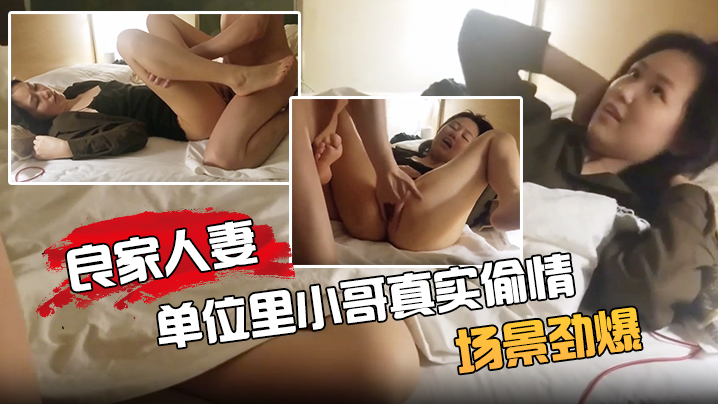
泄密流出良家人妻与单位里小哥真实偷情露脸私拍_场景劲爆

与闺蜜双女共调 成为主人木偶型.

偷情泄密内射.内射.内射.极品朋.友妻女朋友.刚哄睡着就.去操

TZ柔弱美女租客为了房租不惜出卖身体

眼镜人妻淫荡骚货棋逢对手遇上猛男各种抽插白臀细节

小熊淫荡的反差人妻骚少妇小熊帮仔仔开生日淫啪_3猛男激情无套抽插激情口爆内射中出

吊王大哥啊婴儿肥超嫩肉感身材操很舒服

扛着苗条腿 疯狂输出.

淫骚人妻街头搭讪.

绿帽奴曝光花钱给自己带绿帽_攒钱给女朋友请健身教练_结果把自己捐进去了

真实夫妻自拍素人夫妻家中性爱自拍女上位

和闺蜜KTV找两个大叔玩群P.
东南亚AV

しプラベえイっち.

SEVEN002夏の日のアリス。俺の初恋がエモくてエロい物語···

AVOP-125 SSS-BODY 解禁 真正中出し 美竹すず
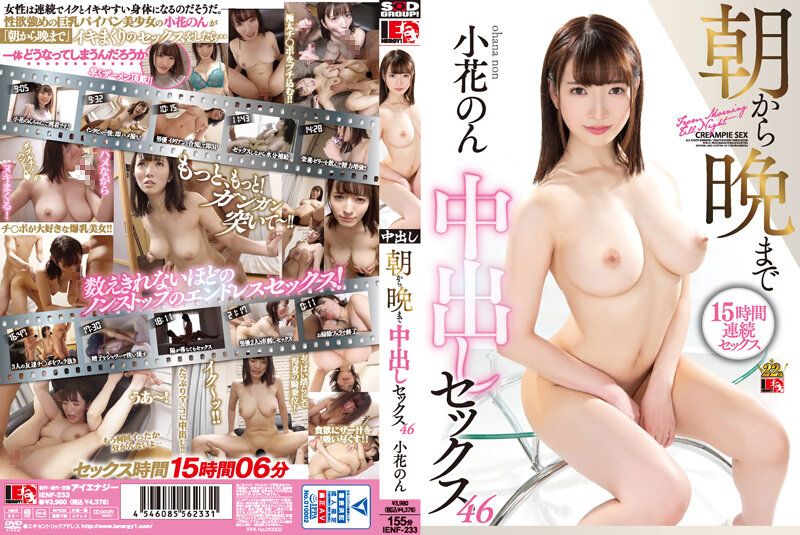
小花暖 从早到晚的中出SEX 小花暖 IENF-233-C.

卑鄙猥瑣的人口調查員要少女按摩蛋蛋
擅长撒娇的诱惑妹妹2!

HND-666 发出声音就中出!猛追制服正妹硬干到生 有村希
[游泳JD x 3连射中出] 小心处理高潮高潮!圆满旅程!潮吹和抽搐性爱!这不再是…完全合法的性行为!不看风!

032720-001-CARIB カリビアンコム 032720-001 私のセックスを見てください!い~っぱい顔面射精してください!3 日高千晶
ND646在校園活動室被迫做風俗服務的校花有坂深雪。。

家庭教师射精管理小课堂的!
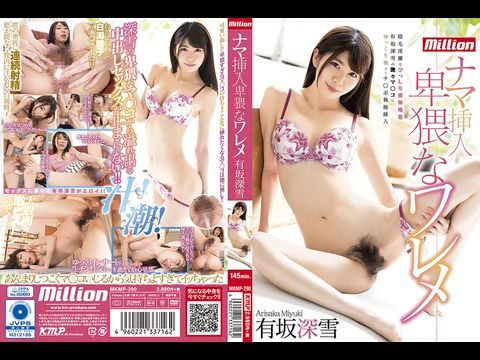
MKMP290 有坂深雪 ナマ挿入 卑猥なワレメ.
麻豆传媒

PH077到素人家的拜访SEX的!

【葫芦影业】 HUL-015 古装剧情 荒郊野岭之 千年妖狐的成仙之道
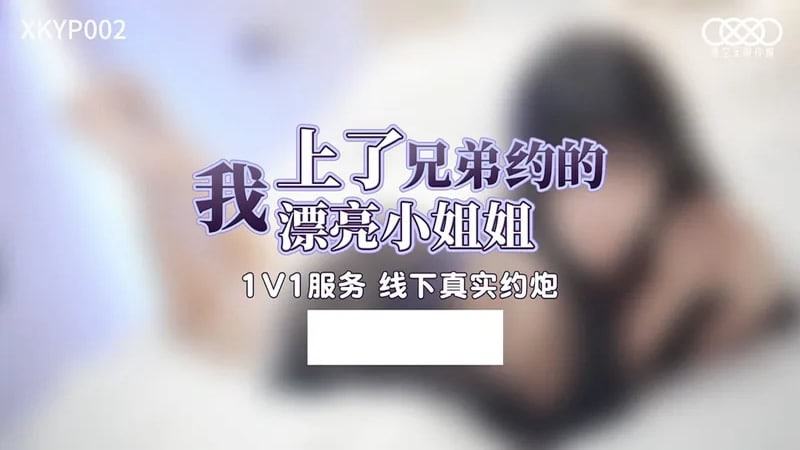
XKYP002 我上了兄弟約的漂亮小姐姐1

麻豆传媒映画最新出品MD-0060『第二届实习男优计划』女教师的诱惑-素人男优征选拍摄AV-千鹤

TM004釋放淫欲的神女的!

電車搭訕女神護士_得不到妳我就要操死妳!_尾隨突襲侵入性愈強迫輸出麻豆-花语柔
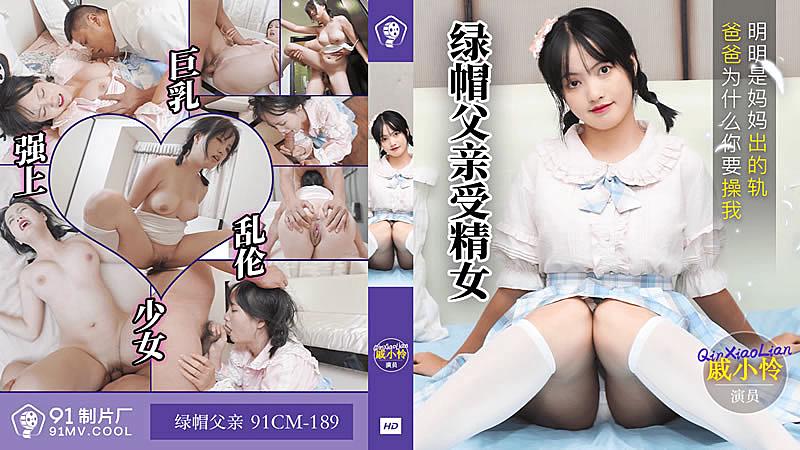
91CM-189 绿帽父亲受精女-妈妈出轨为什么你要操我?

国产麻豆AV MCY MCY0017 高中弟弟约炮约到表姐 艾秋!

国产麻豆AV 皇家华人 起丘比特之富家千金调教的!
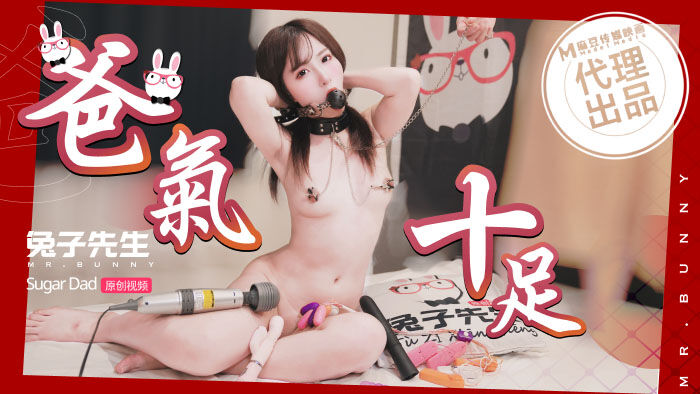
麻豆傳媒 兔子先生監制 DAD001 爸氣十足 EP17

网红妮可想怀孕重金求子.无套采精强求内射小逼

TM00134 英雄联盟之盖伦兄弟乱伦,妹妹淫穴为哥哥解毒1
pacopacomama

032725_100 不法之徒别再捅好妻子了
121421-571 一个只会找借口的成熟女人,敏感度出众!
041619-070 一个不是美女却想长矛的成熟女人
060317-098 以在妻子的胸部射精的桂清美为例
PACOPACOMAMA-100925_100 美丽的成熟女性寻求怀孕 - 笠原あおい

071120-328 Belochu荡妇的愚蠢
120122_748 彻底操性欲旺盛的美艳熟女
110923_936 成熟的美容院有背选!
070712-685 通过带来一把淫荡的椅子来体验 Deriheru
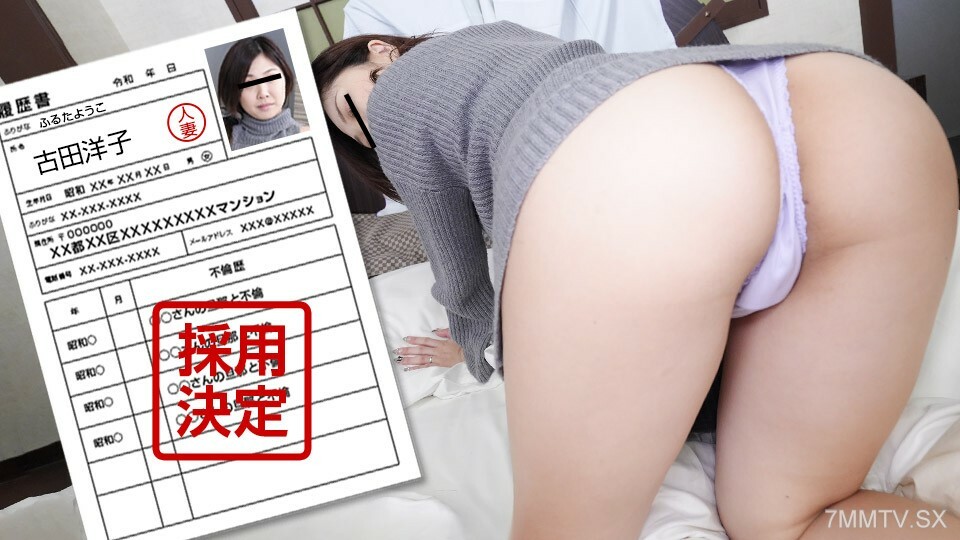
080923_891 素人人妻第一纪事片段123 古田洋子

071522_674 成熟的 Chinguri 返回肛门舔 Yui Shinshiro

PACOPACOMAMA-072324_100 淫荡的舌头彻底乱搞一个非常色情的成熟女人
顽皮
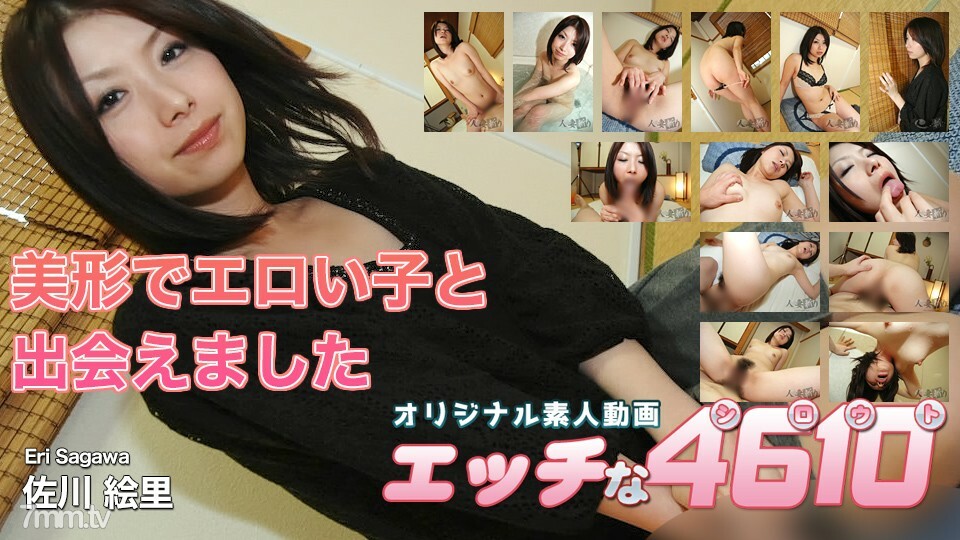
H4610-KI211031 佐川绘里 30 岁
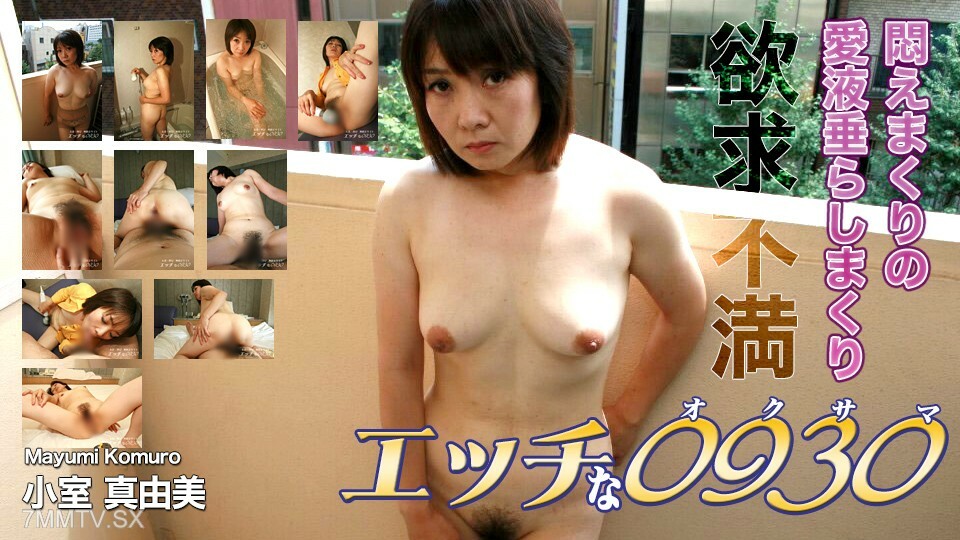
H0930-KI240924 小室真由美 44 岁
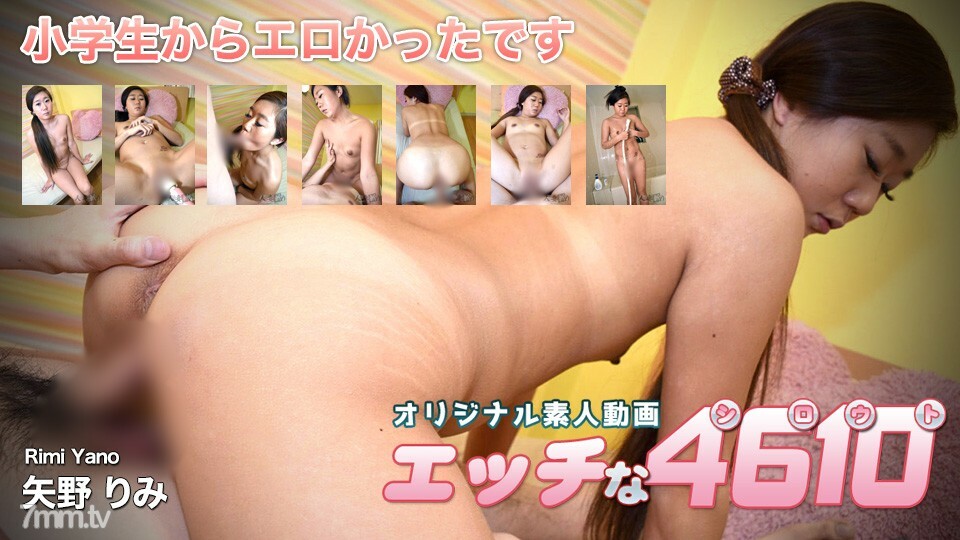
H4610-KI200116 Rimi Yano 24 岁

H-1625 菊田琉璃 36岁
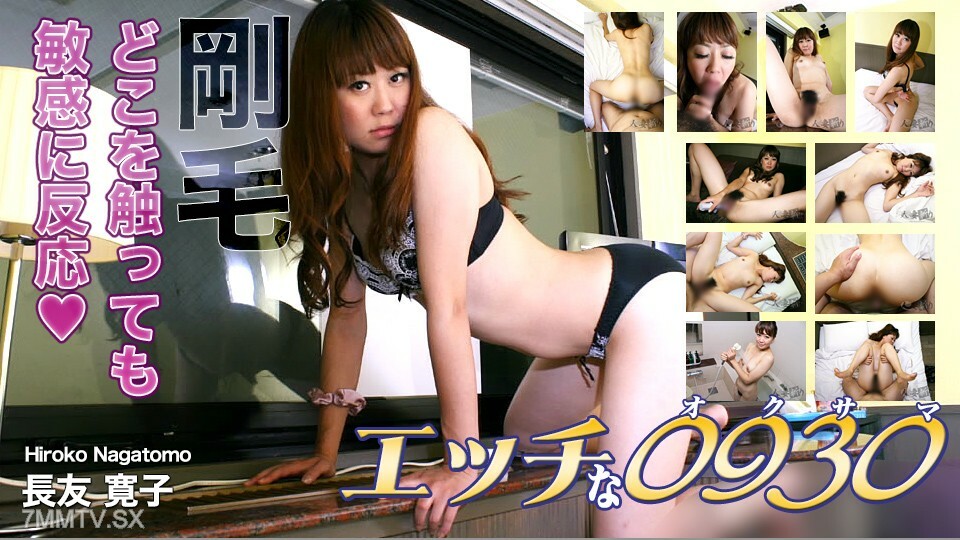
H0930-KI231112 长友博子 27 岁

H4610-KI170212 芹泽萌
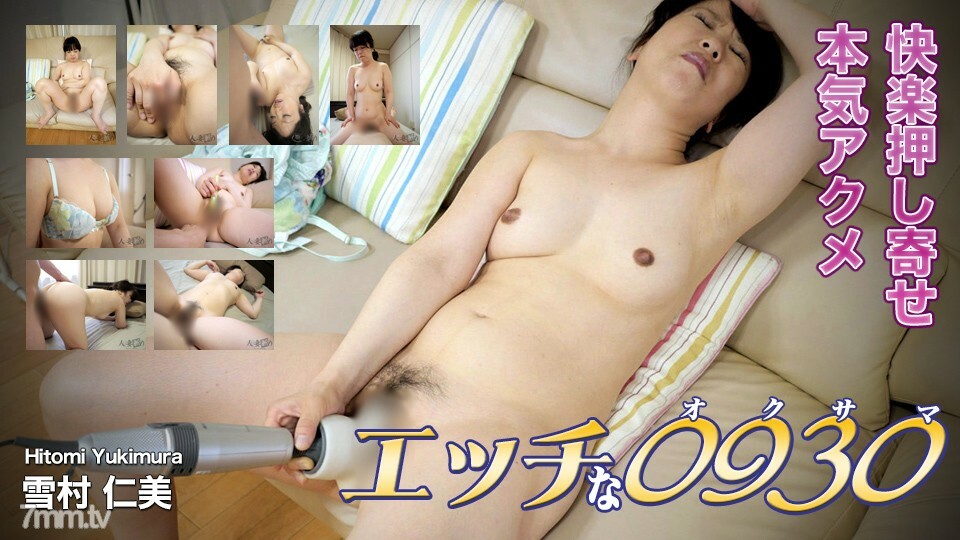
H0930-KI190613 幸村瞳 42 岁
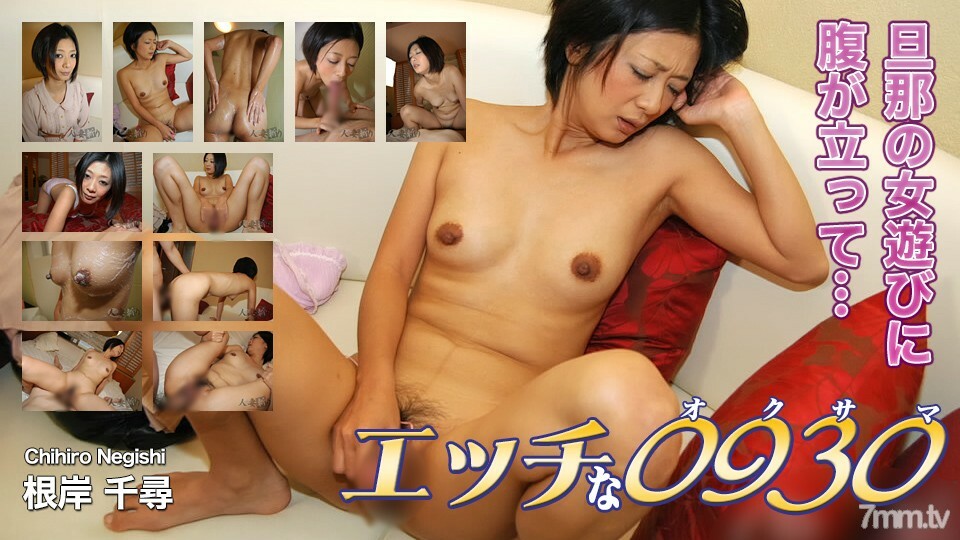
H0930-KI201004 根岸千寻 35 岁
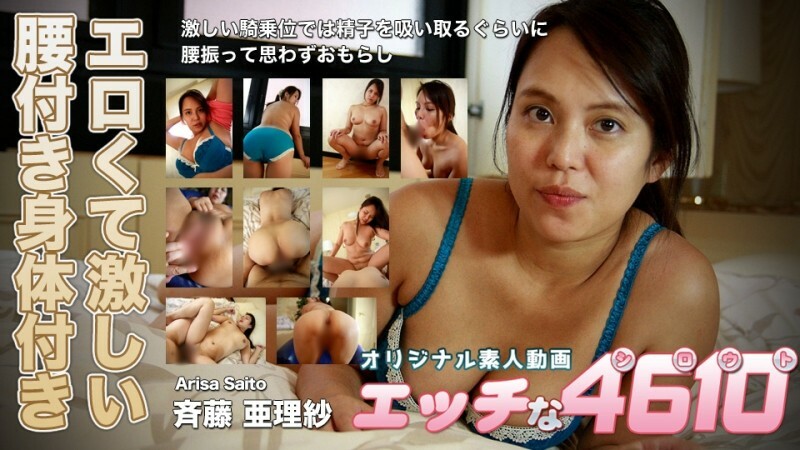
H-220922 斋藤亚里沙
H0930-KI230722 20岁小便功能
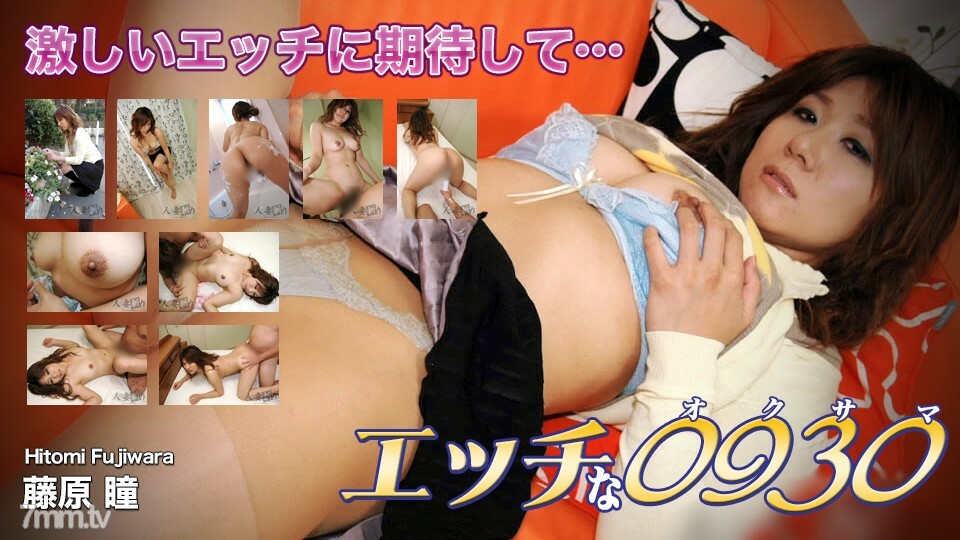
H0930-KI190224 藤原瞳 29 岁
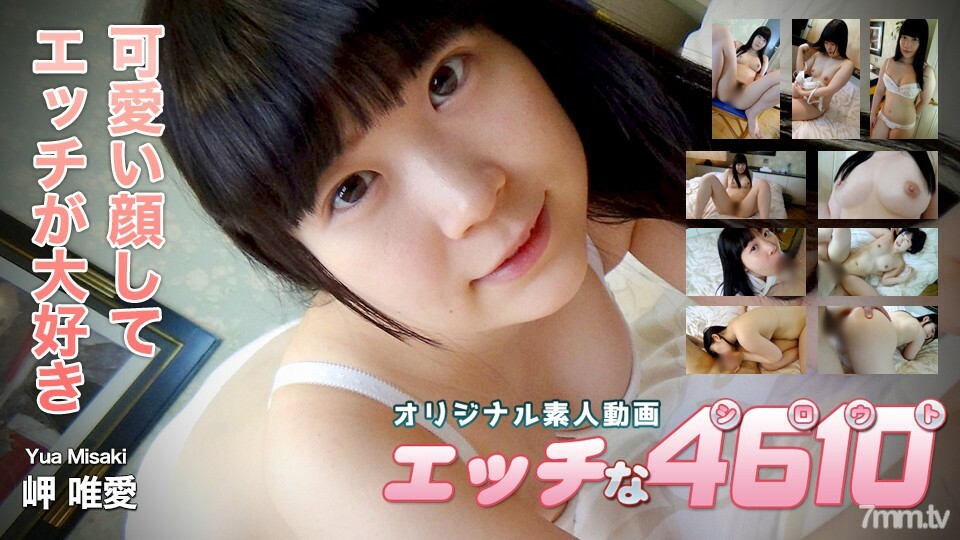
H4610-GOL196 21岁的美咲衣
口交颜射
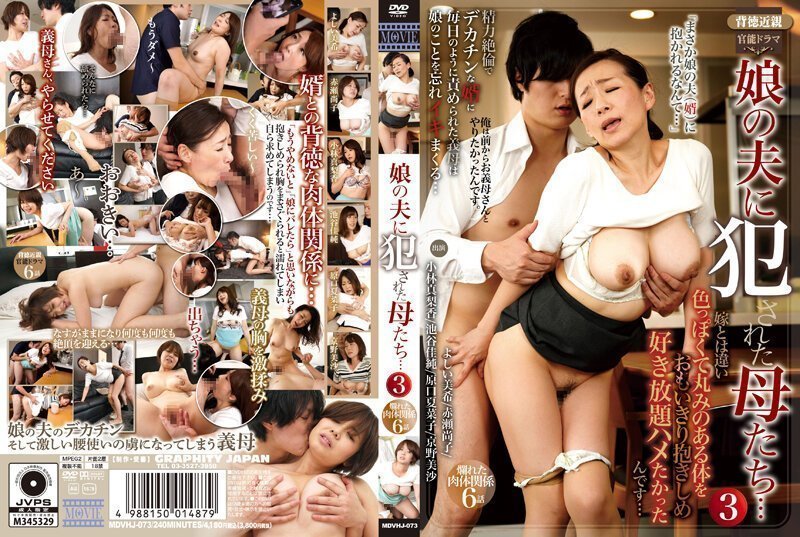
被女婿侵犯的岳母们…(3)!
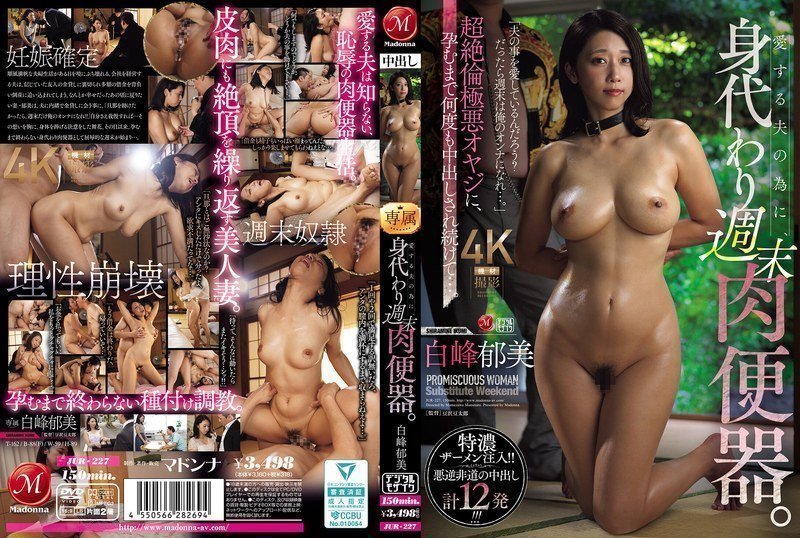
JUR227愛する夫の為に、身代わり週末肉便器。超絶倫極悪オヤジに、孕むまで何度も中出しされ続けて…。
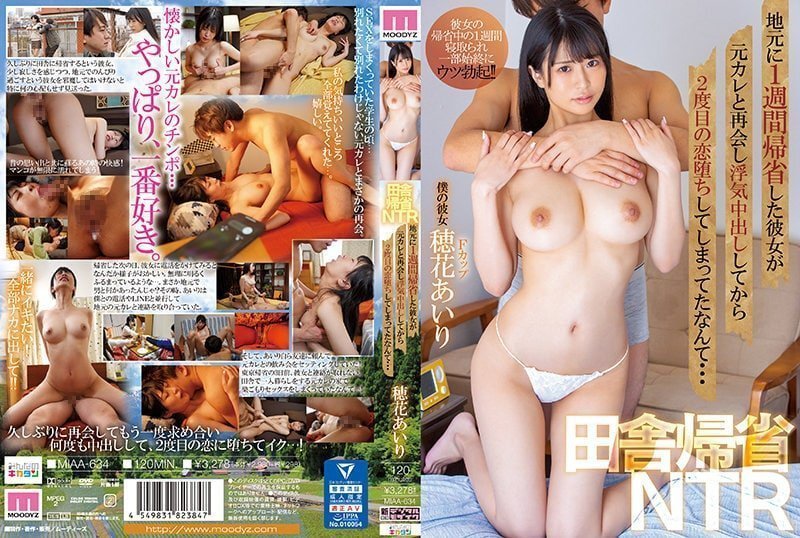
婚后回乡与前男友有染的!
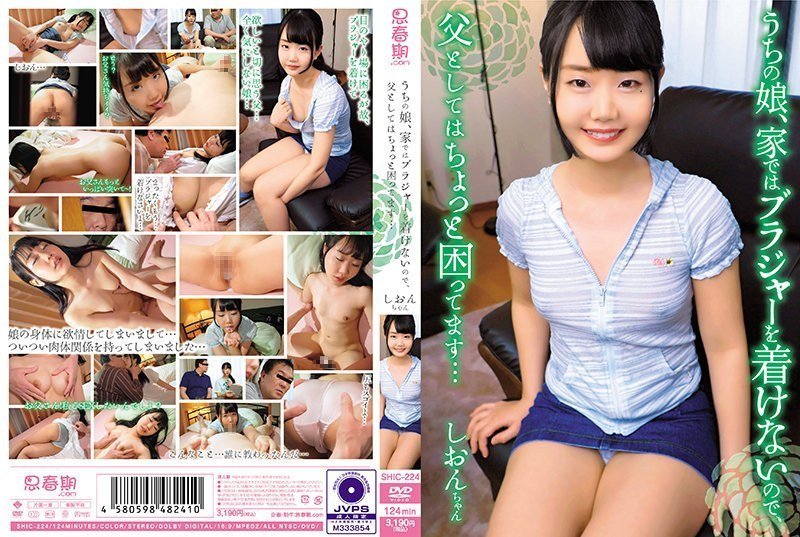
ちの娘、家ではブラジャーを着けないので、父としてはちょっと困ってます… (SHIC-224)-夏目しおん。
TOKYO-HOT-COTERIEAV0052 東京熱 【個人撮影】経験数少なめ従順女子なつちゃん-フェラ撮影後のお風呂編(モザイク有り)
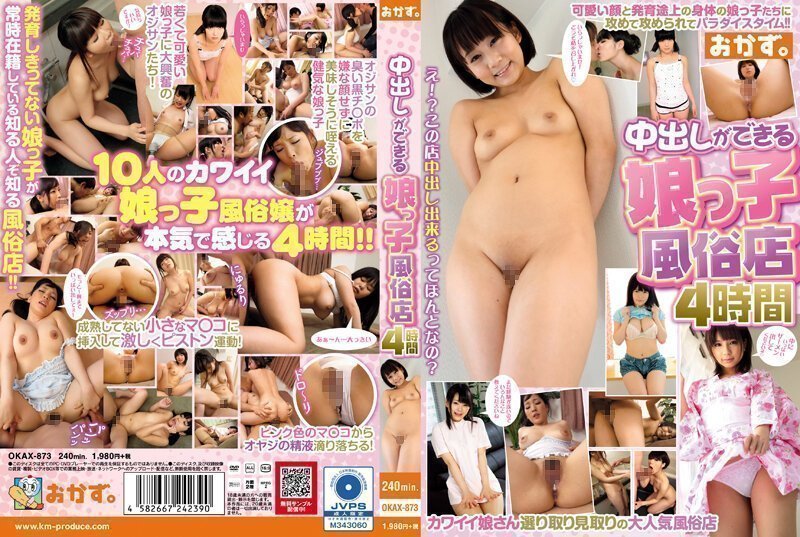
中出しができる娘っ子風俗店4時間
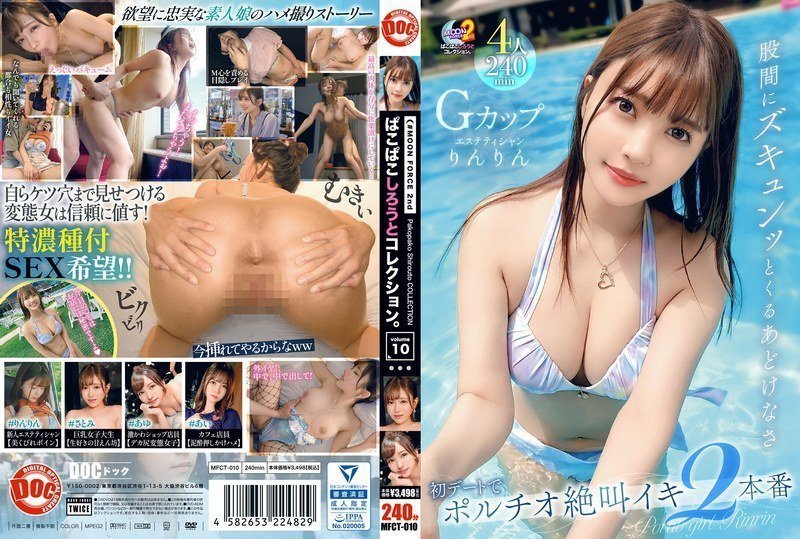
MOON FORCE 第二版 Pakopakoshiro 并木あいな,夏木铃,亜弓れおん等演员 MFCT_010
成瀬葵-登录到 老司机论坛 论坛1
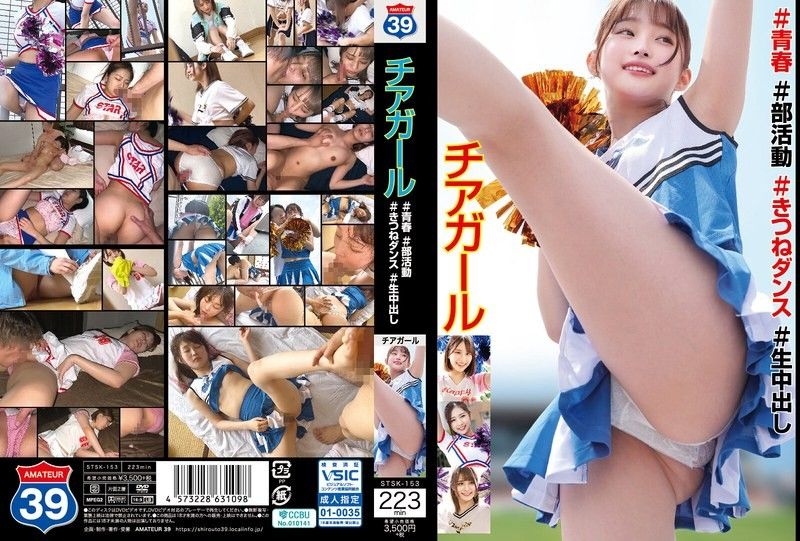
啦啦队长#Youth #俱乐部活动#Fox dance #Creampie 未知演员 STSK153
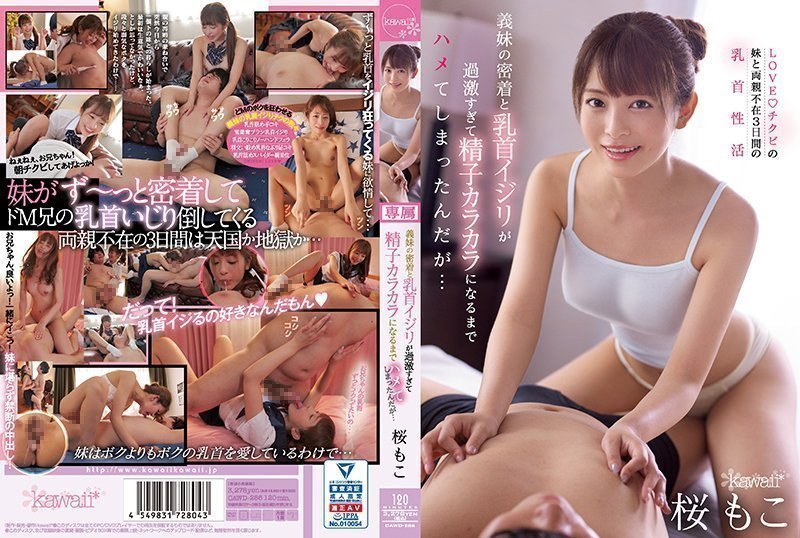
CAWD-286 嫂子親密接觸乳頭松鼠太激進被幹到精液空空... Sakura Moko
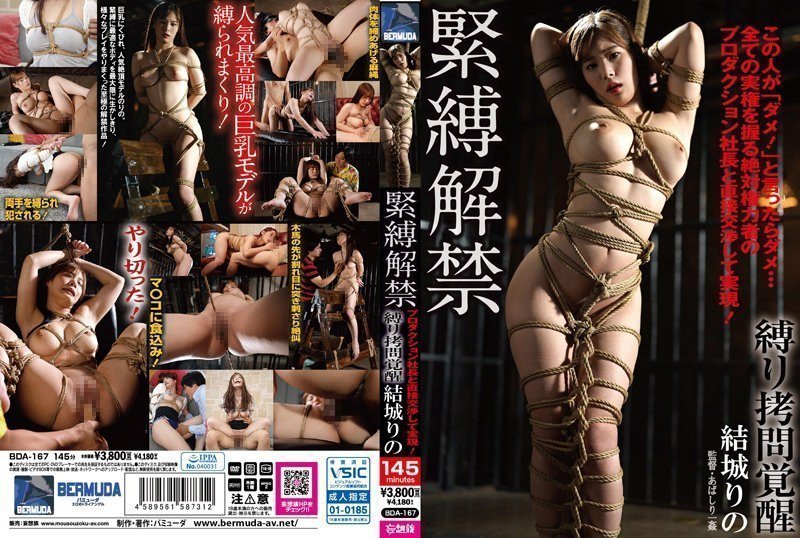
紧缚解禁 缚り拷问覚醒结城莉乃。
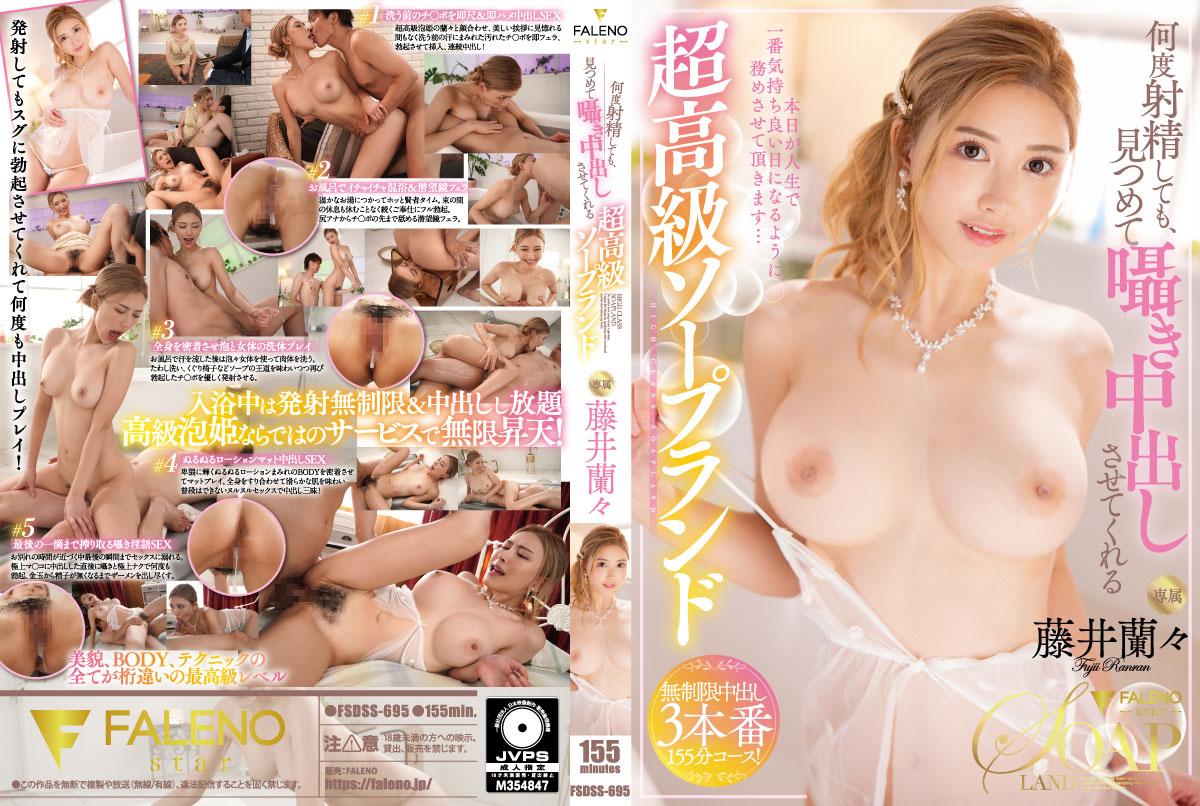
5 何度射精しても見つめて囁き中出しさせてくれる超高級ソープランド的!
91制片厂

最新果冻传媒国产AV巨献-真人版《夜勤凌辱》偷袭照顾受伤男友的女大学生 连操两炮内射
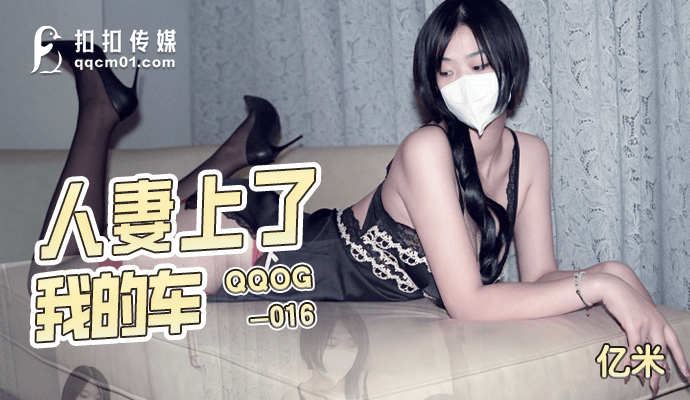
QQOG016 人妻上了我的车 亿米 长腿黑丝爆乳强上尤物 波涛胸涌软糯蜜壶 狂射浓滑精浆

果冻传媒 弟妹跟我吧 姐姐念亲情当伏弟魔 姐夫酒醉怒睡弟媳-杨柳

91CM-103 何雨.善良的小姨子.淫荡妻子设计.妹妹被老公玩弄

果冻传媒新出品国产AV剧情《借种》丈夫不育找大哥做爱传宗接代

91CM-110 杨柳.女教师.因房租而欠债下海.却遇到同居室友

果冻传媒 GDCM-059 空姐豪华鸡上服务

果冻传媒 GDCM-057 双胞胎姐妹的心有灵犀

果冻传媒联合出品国产AV佳作之 消失的妻子 聂小倩主演

黑丝巨乳淫肉Body 夕海 白虎蜜鲍超能榨汁 软糯冲击尽享湿滑中出尤物

果冻传媒 91KCM131 兄妹乱伦禁忌的性爱游戏 啤儿

果凍傳媒 91BCM033 趁閨蜜不注意誘惑她老公 莉娜
古装扮演

【奈汐酱Nice】五月最新私拍《禁忌医生》开档牛仔裤

我的兼职瑜伽教练室友

侵犯顺从的她.

三八法袍成熟有气质

小夫妻性欲强烈不顾自己小孩.

【国产剧情乱仑】网红美女演绎母子乱伦对白精彩

打扮成熟很有女人味的大阴蒂美乳风骚御姐喜欢年轻小弟啪啪啪的!

超性感国风旗袍

网红小姐姐激情秀,跳蛋震穴,口活不错,69姿势舔逼后入。...
古装扮演 XK8070 淫蛇

你心中的卡哇伊女友日本美美自慰诱惑~

古装扮演 MAD030 亂世佳人[第五章] 淫亂大帥的酒肉池林4P大戰
中国直播
CN-24080312 CN24080312
CN-25012505 CN25012505

CN-23061903 CN23061903

CN-23112107 CN23112107_20230824

CN-24051417 CN24051417

CN-24051413 CN24051413
CN-23062914 CN23062914
CN-24010203 CN24010203_20230704
CN-24071313 CN24071313

CN-25020309 CN25020309
CN-23060711 CN23060711
CN-23121311 CN23121311_20230928